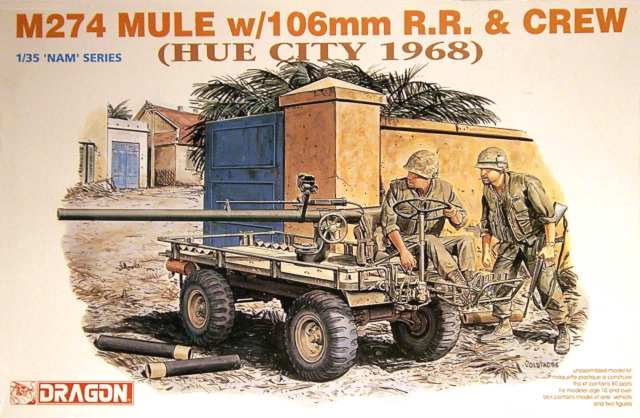
 This is as always another impulse buy from the internet. While browsing e-bay I came across the advert for this model; a Dragon M274 Mule with 106mm Recoilless Rifle. The box art caught my attention as did the reasonable price for an out of production kit. The only down side was that it was half way across the world so it would be a bit of a wait for it to turn up. After a few weeks wait, it arrived in the post all the way from Hong Kong. It has survived the trip in one piece and I eagerly opened the box to view the contents. The kit itself is well moulded and from what I can see its quite an accurate representation of the Mule. In all honesty though there is not much of the vehicle to start with, so inaccuracies from a company like Dragon on this vehicle would have surprised me.
 I was pretty much left to two choices for building this vehicle into a diorama. Make the vehicle and figures as per the box art and make up a small vignette to represent everything that you see on the lid, or try and think of something else that would capture a moment in time from the Vietnam war. After a few days thinking of scenarios that would capture interest when considers that this is not a really interesting vehicle at all, I have decided to employ the the trick that I used for my Follow me diorama and make the figures the subject of the diorama and not the vehicle which would compliment the figures. I have decided to base this diorama on two photographs that I found on the web. (shown above and below). The first image shows some GI's taking a well earned rest in the cover of a building and a mule. I soon realised that the images are screen shots of one of my all time favourite films of the Vietnam war; Full Metal Jacket.This then gave me an excuse to watch the film a few more times (not that I needed much of an excuse). The scene shows the characters taking cover while a tank fires off rounds into the distance. While this is happening, a camera-man and sound-man tentatively film the soldiers taking cover.
Happy with the concept I began planning out the dio. First port of call the stash of figures that I have in storage. I was fortunate to have an academy figure kit depicting a US Tank crew in Vietnam, where two of the figures would slot into the diorama with very little work needed to them at all. The two figures that were provided with the Mule will also be used, however their poses will have to be modified. For the camera crew I ran into difficulties though. I don't have any kind of kit like this in the "stash" and a quick internet search revealed only one figure that represented a US combat cameraman from this era and he would have cost more than the Mule and other figure kit combined! I am therefore opting to make the camera and sound-men myself from existing figures that I have.
The Mule
The mule itself builds up really easily. The only problems that I had were the steering wheel and engine framework had snapped in transit and had to be repaired. The drive-shaft was a little too short and had to be replaced with stretched sprue. The cage that housed the pedals also had sections that needed to be lengthened with sprue as well. The only other addition to the kit that I made was to add a back to the seat as this is not included in the kit and would have looked a little out of place once the vehicle was finished.


One gripe that I do have about this kit is that Dragon in their wisdom only included one round for the recoilless rifle! Even worse even though I was loath to buy some, I could not find a single after market manufacturer who made this specific round that I could buy. Time for some more scratch building!! I opted to make a few fired casings rather than the complete rounds themselves. To do this I found some spare sprue lengths, cut them to size, removed the flash marks and drilled the centres to represent the expended shell casings. These were then painted in gun metal and polished once dried. the completed shell casings will be visible in completed shots at the bottom of this page. I have included two photos below, one of the real thing and another showing the lengths of sprue that the casing will be made from and the single round supplied by dragon.


The figures
The figures themselves will represent a bit of a challenge as I will have to "adjust" some of the poses and in at least one case make an entirely new figure. The seated driver from the Mule kit has had his legs re-positioned to reflect that he is now sitting on the ground rather than the vehicle. I will also be repositioning his arms to allow him to hold a weapon rather than the steering wheel. The camera man is going to be the other figure from the Mule kit as he is already standing in a bent forward position and will only need his arms moved to enable him to hold the camera. The biggest pain by far is the sound man as I don't have another Vietnam figure that would be suitable for the pose. I am going to use an old Tamiya German infantryman from the spares box to make him. The Tamiya figure is not a very good one in my opinion and that's the reason why he ended up in the spares box. The trousers are badly sculpted and the boots look like large soled slippers. The face is also not very well detailed either. The plan is to strip as much detail from the figure as possible, file away a large amount of the boots, replace the head with a spare head that came with the Academy tank crew kit and re-detail using milliput, squadron putty and sculpey firm. I would point out that before you decide to use sculpey on a plastic figure, to cut a piece of the sprue that the figures come from and bake it in the oven at the correct temperature for sculpey and for the same amount of time. Some plastics behave very well and others melt quite happily! The following photos show the progress of the various figures during the build.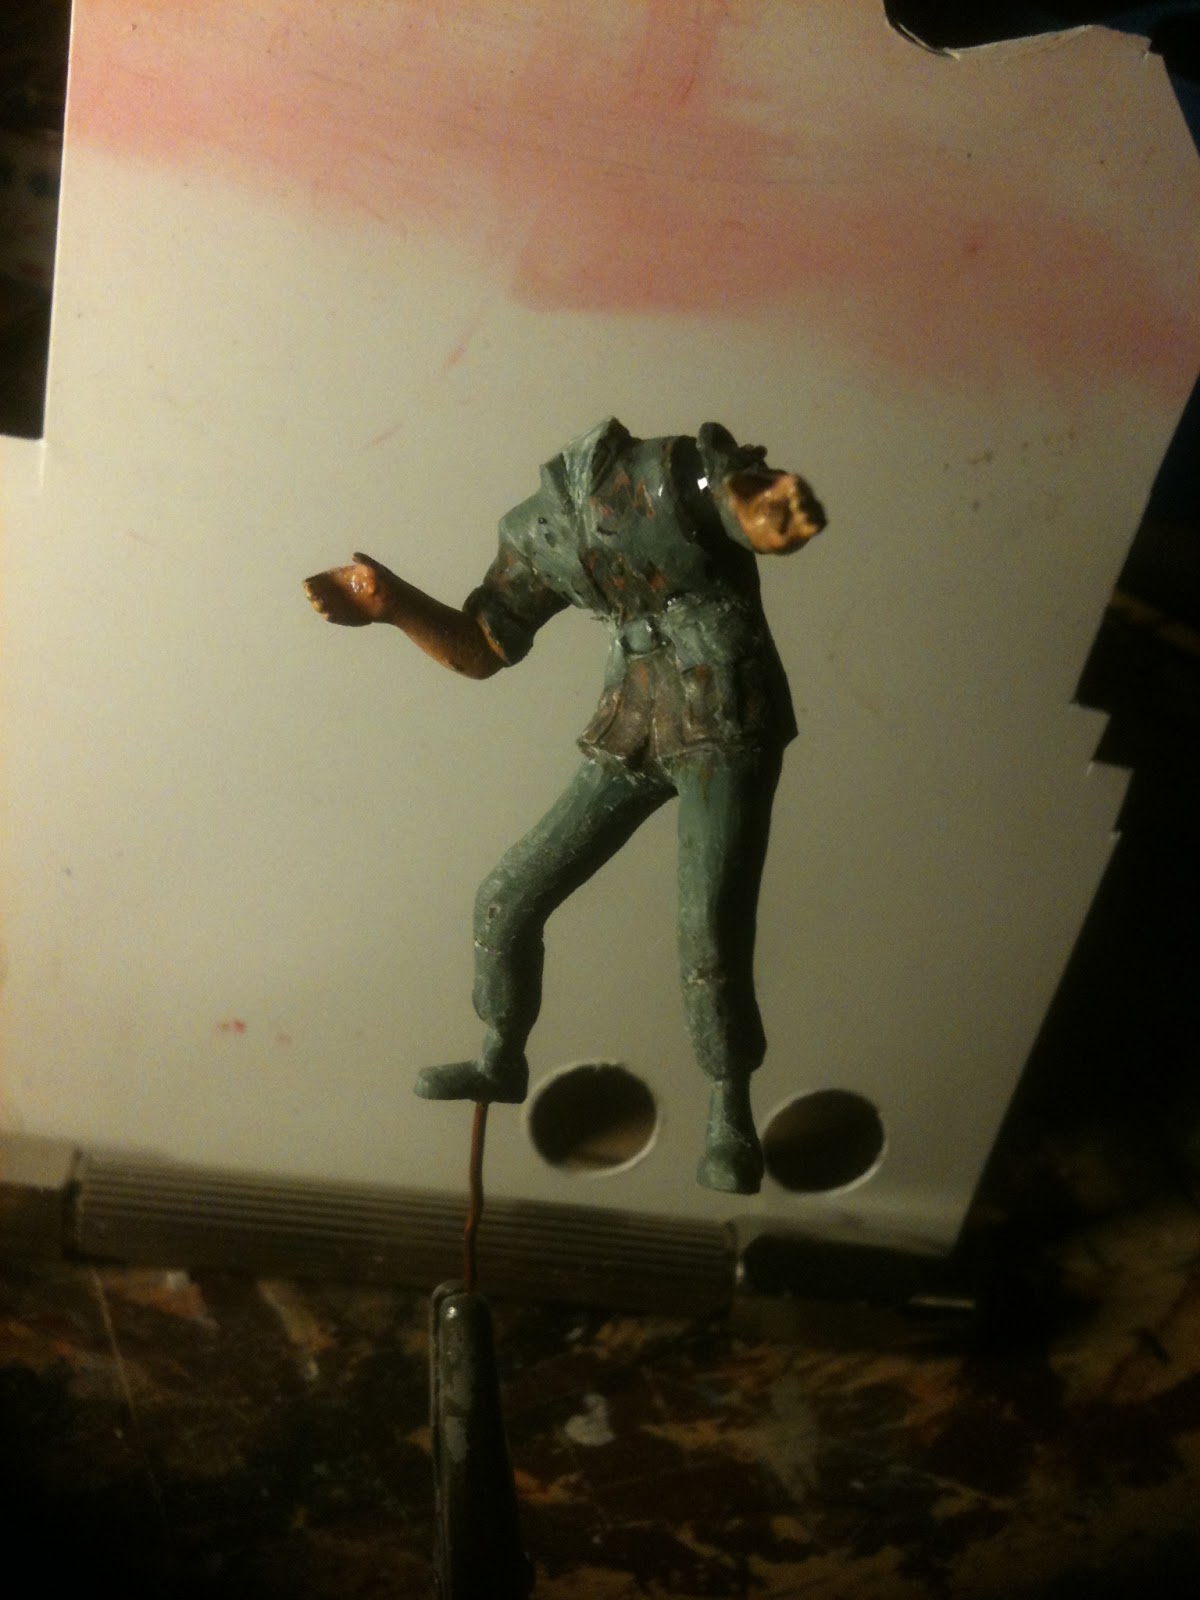


All of the figures have now been assembled save for one which will be completed shortly. I am happy with the adjusted poses and think that they should all quite happily fit in and around the base and model once painted. The following pictures show the various figures after they have received a coat of primer and prior to base colours being applied.


As I've previously stated, most of the figures have had some of scratch building or adjustments made to them to suit this little vignette. One of the more challenging items that I had to make for the figures was the camera. It has been made from stock plastic card and stretched sprue and I am really happy with the resemblance that it has to the real thing. I have also scratch built the separate battery pack for the camera as well out of the same materials. the following images show the actual camera and the one that I scratch built


The Base
The base is going to be a simplistic ruined building setting. I will be using the image of the GI's hiding behind the mule as a rough guide and reference for the dio. The first order of business was to make some concrete wall sections that can be cut and shaped once the base board has been cut. To make these I have used the dry florists foam that has been cut into thin pieces. I then put standard poly filler or white plaster that has been dyed with black acrylic paint. Initially I paint a think coat onto the foam and I then force the filler into the may holes of the foam with an old credit card. Once one side of the foam is dry, I repeat the process on the other side.


The base board is going to be a piece of MDF that has been cut into an irregular shape. I have already placed the figures onto the board in the rough positions that they will eventually be set in. You will also notice in one of the shots that the wall sections appear to be too big for the diorama. I intend to cut these walls down significantly and use the cut sections as a basis for rubble on the base.


The walls themselves will be attached to the base with a combination of wires drilled and glued to the base and poly filler which in this case acts as an adhesive and a filler. Before the walls are fixed into place I did a little extra work on then which included an ornamental viewing hole, an architectural design that can be seen on many buildings across Vietnam. the walls themselves were trimmed in height as well as sections of them being removed to simulate war damage. I have also dug into sections of the walls to represent damage from gunfire, shrapnel, etc. You will notice in the following pictures that I have also decided to add a stone pillar in the corner of the walls to add a little more interest as well as a capstone made from sculpey. I have also began to sculpt a stone Buddha which will hopefully become part of a stone shrine which I will place against one of the walls. Once I am happy with the assembly of the buildings and other structures, I will coat it all in spray primer before the painting and ageing of the structure is started.


The next stages for the groundwork is to weather the walls and floor of the shrines considerably. This may also include some bullet holes? the earth itself is going to need a lot more work in the form of mud, water and variation in colours and some rubble will also be added. If you would like to see how I made the rubble piles click on this Link


I'm really happy with the way that the base now looks. The only addition that I am planning on making is an additional muddy pool that the camera and sound man will be walking through, however this will be added once the figures have been completed and added to the base.
Everything is now complete. I am really happy with the piece and how it has turned out. This is to date the most amount of scratch building that I have done for one scene including figures, groundwork, statue and buildings. I think that it is a good "take" on the film and I hope that you think the same.


No comments:
Post a Comment