Showing posts with label Gulf war. Show all posts

Wednesday, 26 October 2022

British ATMP Supacat

 Introduction

This is a model that I just had to have when I saw it built in Airfix magazine (Jan 22 issue). Its a Gecko models 1/35 scale kit and although I have not previously built something from this manufacturer, the write up speaks of the high quality of the kit and ease of building it. There are several variations of this model available and I was originally considering the airborne forces version because it looks better with its additional framework and armaments however; after looking around the internet at photos of this in use and considering that many model makers will have the same initial thought as me (the fighting version) I settled on one particular photo that shows British soldiers in the Gulf using the Supacat as transport in and around the war zone and it was the "basic" version, not the "fighting" version. Decided on what version of the kit I wanted; I placed an order with my daughter for the model as a Christmas present and on the 25.12 I was greeted with the kit under some wrapping paper (Thanks Lauren). 

The model 

As I said in the introduction; I'm going to use the basic version of the Supacat to portray a simplistic scene from a photograph found online. Here's the kit box and the image I am basing my little diorama on:


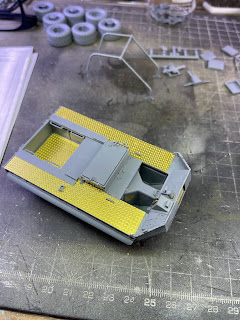
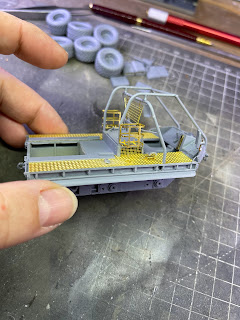
The kit itself is amazing quality and the instructions are the coloured "cad" type. I still haven't formed a complete opinion on these instructions. This the second model that I have built that uses this style of instruction over the "traditional" style of instructions that you normally get with a scale model. On one hand the instructions are very clear however they are produced by a technical drawing programme and while I am comfortable using this style of image because of my job (I'm an engineer by trade), I do find the traditional style of instruction a little easier to use because of their pictographic qualities. This may be because I've spent over 20 years using them or it may just be that the traditional instructions are better? Anyway; back to the model: The kit is superbly made and the details Gecko has managed to reproduce in plastic are really impressive. The plastic is quite soft so it has to be handled with great care. There is a lot of photo etch to contend with for this kit and while it provides some amazing detail like the tread-plate, if you don't have a photo etch bending tool you may struggle with some of the brass parts. 


Building the kit unsurprisingly did not take long because of its diminutive size, however don't let the size fool you in terms of the price asked for this. At between £20 - £30 pounds for this kit it does seem a little on the expensive kind but when you take into account the quality on the kit parts plus an entire etch brass fret as well I would consider this as a kit that's good value for money. Be warned though; the parts are small, easily snapped if your not gentle and soft, so careful with that glue as well! 

Painting 

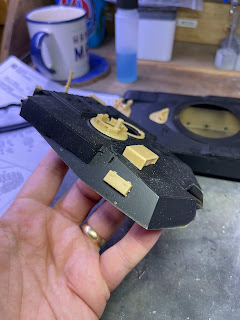
Painting the model began with using Vallejo light grey primer on the vehicle and Vallejo black primer on the wheels/tyres. I also used the black primer to pre-shade areas of the main vehicle as well. Once sprayed I allowed the primer 24 hours to completely cure as I have found that this produces the best results for a durable finish with Vallejo's primers. 


For the main colour I have chosen to use Vallejo's UK light stone and progressively add some signal white to the upper layers of the vehicle (misted on with the airbrush). What I also like is the fact that in the image that I am modelling the scene from; the tyres have some significant over-spray from a rush job to change the colour from green to sand? Whatever the reason it made my life a lot easier without worrying to mask the wheels from the tyres to spray them! Once dry, the whole model was coated with Vallejo matt varnish and then the areas that required decals were given a quick coat of gloss.  


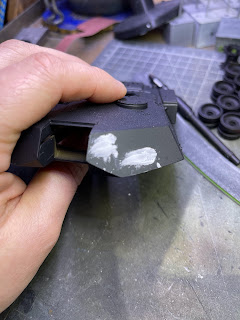
To get a good mount to spray the model I drilled underneath the main body of the vehicle. I had intended on simply leaving the hole but I noticed that on the photo etch plate provided with the kit; the company logo was included. Rather than simply throwing it a way I used the opportunity to seal the hole and preserved the beautifully rendered company logo:


The figures

I bought a Masterbox kit of British soldiers that a close enough to the time period to pass muster. I will be honest here and say that the choice of British soldiers from modern era settings are extremely limited in comparison to other nations. I have also elected to use the driver figure supplied with the kit as this seems to be a really good quality figure in terms of detail. The Airfix magazine article mentions fit issues with this figure however this doesn't appear to be the case with the kit that I have. I can only assume that the author of the article was supplied with a pre-production kit and this issue was resolved before they went on general sale? In any case, I selected two figures from the Masterbox kit to represent the two squaddies on the back of the Supacat. These figures will require some extensive re-modelling to get them in a similar pose to the ones in the picture. I decided to cut the limbs at the joints and then strengthen with some copper wire before filling with some perfect plastic putty and then sanding back with my mini grinder and a small bit. I also took the opportunity to trial fit some packs and bags from the spares box that resemble the ones that are loaded onto the vehicle in the picture that I have: 


Once I think I have achieved what resembled some natural poses I then primed all three figures and mounted them to my temporary bases for colour and weathering. I also started to build the storage onto the Supacat into positions that closely resembled the image and looked OK from all angles: 


The Base

For the base I decided on using one of my Ikea bargain £1 frames. They are really small and compact and I originally bought them for the various 120mm figures in the "stash". This vehicle is small enough to comfortably fit on the frame and being as the image shows the Supacat in a desert setting, the base will be a simplistic sand finish. To prepare the frame I simply take out the card and plastic and glue the backing in place permanently and then cut the card and clear plastic to fit the hole and glue that into place as well. This raises the picture area up in the frame and with a little balsa sheet glued on top of everything It provides a great substrate for the application of a generous layer of mod-podge and kiln dried and ground light earth that makes a great sand finish. This is allowed to dry overnight and the base is effectively ready for the Supacat. The whole base was then covered with a very generous amount of dried light earth and mod-podge and while still wet; some cling film was laid over it and the Supacat wheels pressed in to make some indentations. 


After the base had set I then applied a further watered down layer of mod-podge and sprinkled on some more "sand" to provide an even coverage and noticed that where some of the earth spilled on the edges of the base it gave a pleasing affect to it; as if the Supacat had sprayed it on there as it was moving. It gave it an additional dimension that I had not considered or; as Bob Ross would say "a happy accident". 

Final Assembly 

To finish this little model I did a quick search online for the origins of the image that I chose to replicate and found that it was taken just outside Basra, Iraq in March of 2003 and the soldiers were members of 3 Parachute regiment. A short trip to E-bay delivered a miniature cap badge to compliment the information plate on the front of the base and I am very happy with how it looks. The mounted figures do help to sell this little diorama and its definitely something different to what I have seen so far with this particular figure kit. Here's the final photo's and as always I'd love to hear what you think in the comments below:


I have actually lost the final photos for this model; so will have to take some more very soon. Apologies for not publishing the shots at the time pf publication. They will be here very soon


Saturday, 5 February 2022

M1 Abrams Tank

Introduction.

This I will be honest was a bit of a "risky buy" for me. I have recently started buying model making tools/equipment from Ali Express and have so far been really impressed with the price and quality of the things that I have bought. One evening whilst browsing the app I noticed a 1/35 scale Abrams for less than £20 delivered to UK. I am normally an advocate for "if it seems too good to be true, then it probably is"; but based on my experiences so far I thought why not give it a go? Around 3 weeks later the parcel turned up on my door and although the box stated the model was made by a company called WSN; I was surprised to see that the tank mould was stamped with Trumpeter as the manufacturer. I also have a large collection of resin stowage for this tank in my stash (an E-bay purchase) so the plan is to build this tank almost directly out of the box and add the stowage with lots of weathering to complete the model. I am also toying with the idea of displaying the mine rollers that come with the tank as being destroyed by an IED; saving the tank from destruction; but we will see as this already seems like a monster of kit compared to what I usually build. 


The Kit 

The kit is actually a lot more detailed than I first thought. There are as with almost every kit some inaccuracies however after reading a great many reviews and comparisons online I have decided to go ahead with an out of the box build with as little modifications as possible. I have made this choice because the differences that I have found are in my opinion negligible and also because I am adding such a large amount of stowage; it will cover a great many of the inaccuracies once completed.  The main body of the tank was relatively simplistic and had a very good fit. I was also really impressed with the way in which the anti-slip paint has been re-produced in the mould. Once the basic shell of the tank was completed I decided to spray the main parts in Vallejo black primer and while that cured; I worked on the smaller sub assemblies of the tank. There were a couple of sink holes in the main turret however; thankfully they were in a non anti-slip coated area and along with the main gun seam, were easily filled with some Perfect plastic putty. 


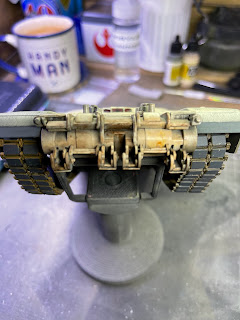
The mine roller assembly is a really involved kit in its own right. When compared to reference images its also a really accurate representation of the real thing. The only downfall is the injection marks which are on almost every piece. While this isn't a major issue to resolve; after filling around the 20th hole, it does start to grind your gears a little! I also began to add the various additional sections required to the main tank body as well as the turret. 


The additional parts were then primed and while that hardened I began on the fitment and positioning of the track assemblies and preparing the multiple resin stowage items ready for their own coat of primer


Painting the tank

I chose a black Vallejo primer for this model as I am planning on a very heavily weathered finish and thought black would be an excellent start for shade and if I break through the paint layers as I am weathering then the black primer will hopefully add to the finished effect. A green that closely matched the American standard colour was chosen as the base paint ( the correct Vallejo colour was ordered but still hasn't arrived in the post). The main body of the tank, the turret and the road wheels were all sprayed in this as a solid colour and 24 hours was left to pass before any additional colours were used. 


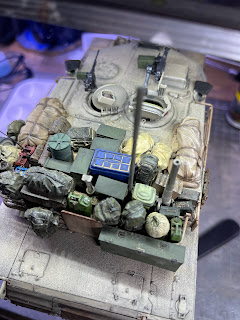
While the model hardened I then grabbed a large selection of colours from the inventory and started to paint the various stowage that I had and once dried assembled them on the turret in a rough order of where I'd like them on the finished model:


I like to do this at the earliest opportunity as I can adjust how I'd like each item placed and then alter/move them as I go along. Once I am happy with the placement I then take a few detailed shots (above) and when it comes time to place them and glue them down I have reference images that I can copy from. 

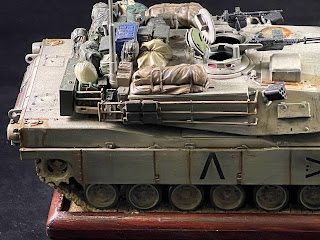
The next layer of paint was a Vallejo colour matched to the colours used in the Gulf campaigns. I wanted to portray this as being heavily weathered so I assumed that these paint finishes were quite rushed in the beginning and probably quite thin paint layers as well. I'm aiming for a tank that has seen one too many sand storms as well as a decent amount of use. I applied the paint in thin almost over-sprays in some areas and then a thicker, more solid finish in others. Once hardened (24 hrs) I then lightly sanded with a few different fine grades of sand paper to achieve a beaten and sand blasted look to the vehicle. The result of this can be seen below: 


The mine rollers were painted in a solid desert sand colour and did not receive an undercoat of green beforehand so that they appeared a little "newer" than the tank. Again this was chosen to provide more colour variation and interest to the finished model. Hopefully this will suggest to the observer that the rollers were fitted after the tank had been used a great deal in the desert environment. 


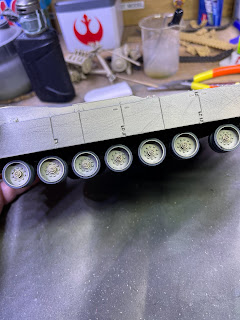
The next phase was a combination of painting the tracks in a dark brown, followed by a light coat of rust then grey/black for the pads and while that hardened I began to think about weathering the tank. For the tracks I had bought some Vallejo environmental colour washes and I used the rust wash in various layers/positions on tracks. Leaving that to dry I then used some spray masks from Alexan models to apply the fender markings used to identify allied forces vehicles in the Gulf along with unit markings. I also chose the name of the tank from a choice of a few provided on the mask sheet. 


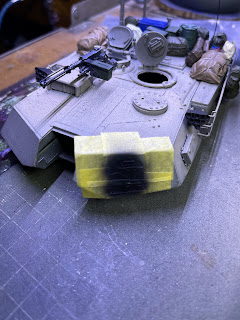
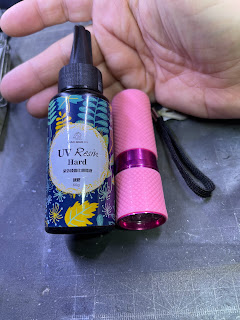
Once the paint was fully hardened (24 hrs) I then lightly sanded over it for it to match the rest of the wear and tear on the tank surface and then I added the stowage on the rear of the turret permanently. The finishing touches for the build were filling in the windows with some UV curing resin instead of the clear plastic insert sheets provided with the kit and then coating the entire model with some airbrushed matt varnish:


Yet another 24 hours later and the finishing can begin; For this I chose to use the fantastic Vallejo environment washes and the AK weathering pencils (review here). I also made the decision to leave off the mine rollers from the front of the tank. This is simply down to a logistics issue I have; no space and the length added is simply too much for my display shelves. I did however decide to keep the tank mounts on the front as this shows the additional functionality of that tank as well as adding some more interest to the finished model. I also added some "sand" to areas of the tank. This is some kiln dried and ground earth that I get from the university that I work in. Its used for research and when finished they dispose of it. Every so often I grab a pot or two before it goes in the skip. 


While the tank was allowed to dry for at least 24 hours I began on the base. Normally I use one of the many picture frames I buy from Ikea on clearance however I didn't have one that matched the footprint of the Abrams. I decided on a simplistic base for this model so opted for a piece of MDF cut to size with some wood trim glued around its edges. Once painted and gloss varnished I then liberally applied some Mod Podge to the base and to that I sprinkled liberally the same "sand" as I had used on the tank body. To fix the tank to the base I then drilled through the floor of the tank and the base where I then fitted an extra long M2 bolt. 


The figures

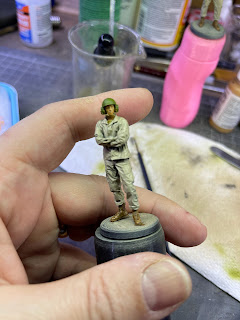
The figures where resin items bought at the same time as the tank on Ali-express and I must say the quality of them is excellent. They were primed in the same black primer as the tank and then a coat of light brown was airbrushed onto them for the uniform and a coat of green airbrushed for the helmets. The rest of the paintwork will be by hand but the airbrush gave a great brush mark free start for them:


The rest of the colours were added by hand but I will also point out that I used my mini grinder and a fine bit to carefully grind out the "glass" from the goggles so that I could paint the bottom of the holes I created in the same colour as the helmet and then fill the holes with some UV clear gel. This gives a great effect to the goggles that I haven't been able to replicate with any other method. 


Finishing the model and final thoughts. 


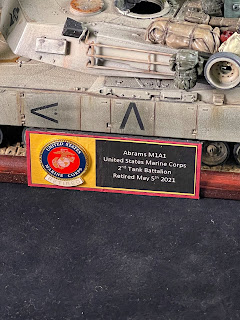
Normally for the display I add a descriptive plate for it and sometimes a cap badge if possible. I had planned on doing something like this for the Abrams as in my opinion the Challenger display with cap badge looked really good. Here's the link if you haven't read that article. Just scroll straight to the bottom for the finished shots. While digging around the internet to look for what would be the most suitable cap badge I discovered an article that discussed that the US marines are disbanding their entire tank capabilities. The Abrams that I have made looks identical to the Marines deployed tanks in the Gulf war and after a quick search on E-bay I was able to find a US Marines Retired pin badge that I think will provide a fitting context to what will become a commemorative tank model for the now retired Marine Corps tank battalions. 

 This pin badge was mounted to the descriptive plate and then that in turn mounted onto the front of the display base. The completed figures were also added to the tank; staring off into the distance and that's another completed model! I have to be honest here and say that when I initially ordered this model I had expected the same troubles that I experienced with the Airfix Challenger (link here in case you didn't click on the link above above). In reality I didn't face any issues at all. This was a superb kit and one that I thoroughly enjoyed making. I have a Trumpeter AS90 1/35 kit in the stash that I have been putting off building for almost 8 years. Its a thumping huge model but if the quality of that is the same as this Abrams I might dig it out in the very near future! The name plate is a simplistic printed design that's glued onto some black painted balsa sheet. To this I added the pin badge:


This was the last piece of work left on the to do list for me aside from the finished photos in my portable photo studio. Finished shots are below and as always I'd love to hear your comments below and follow my web-site for more scale model builds from the bench!