Showing posts with label 1/8 figure. Show all posts

Friday, 21 January 2022

AK Interactive Weathering Pencils for Modelling

 Introduction

Weathering a model for me is where in my opinion a kit turns from a commercial kit that can be made by anyone into a very personal interpretive piece of art. Yes I am sure that some of you may think that this statement is a little "too much" or even grandiose. When you consider the time spent, the materials chosen, the exact distribution of weathering materials and choices of whether its weathered for an arctic or desert environment; how can you not describe it as a piece of art? Anyway; I'm getting away from the subject of this review. I had seen a couple of advertisements for these pencils online, in magazines and on social media but I had not really thought about buying them as I was quite happy with my current methods of weathering and if I'm honest a little "advert blind" being as we are constantly bombarded with adverts every day. This changed after seeing a series of photographs of beautifully weathered models. The detail and accuracy of the weathering was stunning and after reading the blurb underneath the model I was confronted with "finished with AK pencils". A quick search on Amazon and after 5 minutes I had ordered:

Dirt & Marks set AK10044


Chipping & Ageing Set AK10042

Rust & Streaking set AK10041


After waiting 2 days, they arrived at my door and I was immediately struck by the quality of the product. The wood is excellent. The paint coating on the wood is fantastic and the "lead" is nice and thick which allows shaping into a fine point or wedge with a sharp blade or will "melt" and spread around a wet surface quite easily. I have tried these pencils in a number of ways

Direct to the model where I used the gunmetal pencil directly on the edges of sheet metal panels on a model. Run the rust colours around bolt heads, panels and panel edges and as a general weathering coat by wetting the model surface and "melting" the pencil into the water and spreading around with a brush. Each one of these methods proved to be easy to control, remove and blend (using a damp brush tip and light strokes). 

Each of the above packs cost me £5.25 on amazon (at the date of publishing this review) and they are more than worth the money. They will (based on my current usage) last me a good number of years of model making. I have already bought another set in the range and am eagerly waiting for it to turn up! The only real regret that I have is that in my haste I bought three packs of these pencils. In hindsight I would have probably bought only one of these sets to try at first as AK also sells the complete range of pencils in one set for approximately £40 (at the date of publishing this review). This set as well as including all of their pencils also comes with an AK pencil roll up for storage instead of the individual boxes that I am now resigned to collecting. If anyone finds a link where you are able to just buy AK's pencil roll bag please let me know in the comments as I would love to buy this and use as I collect each of their pencil packs over the year. 


Make your own Acrylic thinner and cleaner

 Introduction

I will start this review by stating quite clearly that the recipe's I will list below are NOT mine. They are a revision or tweak of several recipe's that are freely available on the internet as articles (like this one) and YouTube tutorial videos. I can't credit an individual for the original recipe as this is essentially my own variation that I have created that best suits the paint that I use and the results that it produces for me. 

Why? 

This is something that I have not seen covered in many articles. The main reason I suppose is cost. For the equivalent amount of thinner or cleaner purchased from an acrylic paint manufacturer (amazon used as a price comparison) I would run a bill of easily three figures as opposed to the original £50 investment (approximately) that I made to start making my own. The other bonus is that you are able to tweak the recipe with each new batch to cater to your own individual needs/preferences/paint used. 

What you will need

The acrylic paint that I use almost exclusively is from the Vallejo range so this exact recipe has been catered for this specific paint range. I will point out however that all of the other recipe lists contain the same ingredients in varying amounts. 

Thinner per litre

590ml of Distilled water

300ml of IPA 99%

55ml of acrylic flow improver (I use Vallejo but any acrylic flow improver will work)

55ml of acrylic retarder (I use galleria but any acrylic retarder will work)

I will point out that the cost of flow improver and retarder is relatively high (compared to the other ingredients) but I also use these products in their own right as part of my model painting anyway. 


Cleaner per litre

360ml of distilled water

360ml of ammonia free window cleaner

240ml of IPA 99%

20 drops of pure glycerine  


You may be wondering why glycerine is an ingredient for the cleaner. Essentially when this is run through an airbrush it will leave a very thin coat inside it. This is a natural lubricant and won't affect the acrylic paint that follows it. Its also really good to use when you break your airbrush down for a major clean. I lightly coat all of the moving parts of the brush with the glycerine (and then wipe off) before I re-assemble it. Again this leaves a really lightweight lubricating layer on all of the components that leaves no adverse affect on the brush. 


Final thoughts 

I have worked out very roughly I might add that I can make approximately six and a half litres of thinner and cleaner (or 3.25 litres of each) after purchasing 5 litres of distilled water and 1 litre of IPA. The window cleaner cost me £2, distilled water £6 and IPA £7. While everything else has higher costs they will last a lot longer than the original 6.5 litre batch of cleaner/thinner that you make. As an example the bottle of pure glycerine I bought cost me £5 but I estimate I will need to replace this at my current usage in around 3 - 4 years time! I have used both of these recipes for around 8 months now and they are both fantastic and have not produced any adverse results at any point. The cost savings are significant and the only downside that I have experienced is finding somewhere to store the additional bottles of the ingredients and the high volumes of cleaner and thinner that I make (by storing I actually mean hiding them from my wife!) 

Until next time happy model making! 

Monday, 30 August 2021

Politics and everything else in life in model making communities

Introduction 

This is something that has been on my mind for quite a while. How politics and current affairs/opinions can creep into our hobby. Recently I read about an online American mums sewing club has become so embroiled in current affairs that many members have left due to the toxic environment that it has created. So when does a hobby become political?


What is a hobby? 

I suppose that I should start with answering this simple question; a hobby is something that one undertakes as a form of escapism from daily life; a happy pursuit that allows us to express a creative part of ourselves and sometimes share this creativity with other like minded people. The expansion of social media over the years has increased numbers in hobby communities and allowed us to share our passions with people from

all over the world in all walks of life. It helps us share hints and tips; share resources and materials and opens our minds to new ideas in the expansion of an ever increasing yearning to seek perfection (although we will never get there) in whatever our chosen hobby is. For me; my hobby is everything to me. It defines me as a creative person. It reminds me every day that I am not just my career. It shows me that I can take something that only exists in mind and make it appear in front of my eyes. A hobby is an expression of individual art. It doesn't matter if that means the production of a wool scarf, a wooden chair or a scale model. Each hobby is as individual to the person as there are people. I am a member of a very loosely based community of model makers (the sprue cutters union). We mainly talk through twitter and read each others blog posts but I know very little of their personal lives/careers/location/political preferences etc. and that is a good thing. We spend so much of our lives sharing personal thoughts and opinions on everything from politics to celebrity and more. Its nice to just talk about one particular subject (model making) and not worry about anything else. 


I don't agree with your opinion on ........ therefore I want you out of the community

How many times in one week do you hear about "cancel culture"? It seems like its never ending. This can happen from expressing a political opinion to voicing your thoughts on the biology of a woman or if a book is suitable to remain in a public library. These arguments can invoke extreme views on both sides resulting in ill feeling, doxing and in some severe cases; the suicide of individuals. As I have previously stated, a hobby is a form of escapism. somewhere to forget your daily struggles but if your daily struggles invade your

hobby space, what do you have left?? I use twitter mainly for keeping in touch with other model makers, sci-fi fanatics and to keep informed from manufacturers on their latest releases. I also use twitter to keep informed about current events around the world. I very rarely comment on current events as I personally don't think I know enough about certain subjects to form an accurate unbiased opinion in such a short time or based off the very limited information contained in a tweet. This however does not stop many of the users on the platform. ( it may seem like I am picking on twitter but I very rarely use other social media platforms. Its just as bad on them as well so I have heard). So how does this affect hobby discussions? Its simple really and happens in 5 steps. A member feeling the need to express their view in that space on an issue that's not related to the hobby is the first step. Step 2 is another member getting extremely upset about this as they have an opposing view; leading to step 3, other members speak up in support of the original post/member. Step 4; yet more members rallying around the offended member and posting their disgust which leads into step 5. The moderators of that group feeling they have no other recourse than cancelling or banning someone. Even if this doesn't happen. Once that argument has taken place it can irreparably damage communication in that group. People will feel that they have an axe to grind so every time a group member (now perceived as the enemy) posts something, members of the opposing faction will snipe, make negative comments or deliberately disagree just to prove a point (even when there isn't one).  The ultimate loss is for everyone. Members directly involved see happiness replaced with anger. Members who did not get involved experience sadness where there was once happiness as they are afraid to speak to anyone in case they are viewed as "the enemy" from the opposing group in the community. The end result is always the same; people leave for other communities online or even leave completely.  It sometimes doesn't even end there. I have seen community members actively hunting online for the ex-members and when they find them in another community, they "out" them to the new community members. This act of revenge (I have seen them justify their actions in several ways but its in essence revenge) has now spread the poison that infected one community into another and the cycle repeats over and over. Now here is the next question: 


What does this achieve? 

NOTHING, yes that's right; nothing! The person who believes that the moral authority is on their side and they are the "champion" of that particular cause may feel a fleeting moment of victory or vindication but it is always short lived and they quickly search for more "offenders" to pursue and punish. When they don't find someone as easily as before then to get that feeling back once again they adjust their morale authority to even stricter ideals until someone breaks these imaginary "rules". For those on the receiving end of this morale authority that has punished or banished them from their community, they have now been pushed further away from their original view point into a more extreme version of it. In most cases they harbour a very angry point of view and will often start attacking others with the viewpoint that punished them to begin with. with each cycle, these viewpoints become ever more extreme and people withdraw into "echo chamber" communities that spout bile and hatred over anything else. Their original hobby becomes a twisted, bastardised version of what it once was. No longer an escapism from daily life it now becomes something that spills over into daily life. This extreme opinionated hatred now seems to encapsulate almost every facet of online communication. Mainstream media which was once the cornerstone of unbiased opinion and discussion no longer provides a "levelling effect" that diffuses arguments and allows difference of opinion; in fact it seems to have become an extension of the social media platforms that feed this hatred. 


What can we do to stop this? 

Again its a series of simple solutions that can be very hard to implement and maintain. The first step is an easy one. Familiarise yourself with the law and legislation of where your forum is based. In most Western countries the laws are very familiar so finding out what you can legally say and not say shouldn't be too difficult. For example; someone clearly making racist comments should be immediately expelled from a community or reported to its moderators. In the case of a social media platform; report to its owners. That's it, don't comment, don't react, don't give the original poster of the comment your time. If no-one replies then that tells them that they have no audience. Secondly agree to a set of simple rules; discussion should be centred around the hobby only. discussion of any other kind of subject should be directed to a more suitable community platform. Where a member makes an inappropriate comment (step 1) from the previous chapter. Remind them that this is not the place to voice those opinions even if they feel that they are valid and politely ask them to remove the comment. If they don't remove it then a moderator should remove it and give them the same reminder. The key things here are not reacting with an opposing opinion or make a comment to

begin with even if you think its valid. A good example of a divisive comment is "I'm so glad Trump is out of the White House, maybe I can now start making models again". Post that comment on any model making community and you will be inviting arguments. Please don't think I have any opinion on Trump when he was president as I am British and therefore I have never had any say in who is elected president. Its just a good example of an inflammatory comment when its simply not required. The third and possibly the most important step is to remember that if something offends you then that's all it has done; nothing more. Its fleeting, easily ignored and quick to move on from. Not everyone shares the same opinions, values, goals and life choices as you do! If you join a hobby community then that may be THE ONLY THING YOU HAVE IN COMMON WITH OTHER MEMBERS AND THAT'S OK!!!! There is probably a fair mixture of opposing political views, gender orientation, cultural difference, sexual preference, etc in my little community and that's fine. We are all entitled to live our lives the way in which we see fit. If one of my friends tweets something I don't agree with then that's fine; I don't agree with it. It doesn't and shouldn't stop me from admiring their latest completed model or thanking them for sharing a model making tip that I had not thought of. 


In summary

Life is bloody difficult for most of us at the best of times. Marriages/relationships break down, jobs or promotions are lost, family members pass away, pandemics happen, etc, etc. Hobbies on the other hand are there to temporarily forget all of these things and hobby communities are there to talk about these hobbies so that we can forget about everything else for the shortest of times. Why bring all of life's troubles and arguments into the one place of happiness that we have?

I hope that you enjoyed reading this and if it makes you stop and think before making an "I'm offended by that" comment then you have my admiration already. 


Stay safe and keep making those models!   

Friday, 26 July 2013

1/8 Patton Bust

This is the last of my 1/8 Birthday busts. This one depicts George S Patton in his stereotypical GI helmet instead of the normal soft had worn by generals of the day. The bust is finished in enamels and oils as the other have been.


1/8 Eisenhower Bust

This is the second of my 1/8 Verlinden busts that were prt of a birthday present from my mother. Again the quality is superb and the whole thing was painted in enamels and oils.


1/8 bust Churchil

This was part of a birthday present from my dear old mum. She bought me three 1/8 Verlinden busts a few years back now and this is the first blog post of them with the other two to follow shortly.

The bust itself depicts Winston Churchill wearing his RAF uniform and smoking his cigar. The quality of the bust is superb as one would expect from Verlinden. Painting has been done with Humbrol enamels and oils.


Tuesday, 23 July 2013

My basic sculpting toolkit

Over the years, people who have looked at my sculpts always ask the same questions:

How do you do that?
What clay do you use?
What tools do you need for that?

To answer the questions; I don't really know how to explain how I do it other than to say that it requires lots of patience, even more practice and a sense of humour for when it all goes wrong! As far as the clay, I almost exclusively use a combination of super sculpey, super sculpey firm & sometimes premo sculpey. The super sculpey (both types) comes in a 454g box of beige or grey clay which can be used on its own, however I find that I cannot see enough definition in the sculpt from using the beige sculpey on its own. I choose to mix a premo colour with the clay to provide a more suitable medium to see the creases and folds easier in the sculpting process. My choice is typically elephant grey, but you can choose any colour you wish to mix with the sculpey. (I buy the super sculpey firm in grey so no mixing with premo is necessary).


As far as the tools I use, they are a combination of a very good sculpting tool set that I purchased from hobby craft store in the UK for a very reasonable £18 and some home made tools that I have identified a need for over the years. I also use some artists colour shapers which can be bought from most good art suppliers. These are fantastic for smoothing out the sculpey where folds and lines have been made as they are much less harsh than a metal tool. As far as the home made tools are concerned, the simplest of them is the rolling pin, which is a 7 inch long small diameter steel rod. I have also made some home made strippers as I have not been able to find some of small enough size for the 120mm figures that I make. I also made some sculptors calipers for comparing distances/proportions for body shapes etc. Again these can be purchased but not in a small enough form for 120mm figure sculpting. I also use straight leg calipers from time to time as shown in one of the photos. I also use a 4" blade sharp lock knife (not shown in the images). This is used to cut through the sculpey blocks to make them into smaller chunks. Its not an essential piece of kit, but very handy all the same.

Tools purchased from hobbycraft

Home made strippers, pin & base


Colour shaper's used for fine detail
Bought & Home made calipers


As far as the armature stand that I use, I again had to make a my own out of necessity due to the size of figure that I sculpt. If you are interested in making your own, there are several DIY tutorials floating around the web. A difference from the ones you normally see to mine is that I used an old "fletcher trolley" tray that was being thrown out from where I work. Its essentially a heavy set steel box with a brass plate fitted to the bottom. I inverted it so that it is brass side upwards. This has doubled up as a heavy stable base for the stand as well as a great smooth surface to form shapes that I need during the sculpt.
Zippo lighter added to give size reference


The other tools in the "arsenal" for my sculpting is a wooden base which started life as an electrical patress. This is used to mount the figure onto for baking in the oven to set the clay in between sculpts and a bottle of baby oil which acts as a solvent to sculpey. I usually brush this onto the sculpted areas to soften any sculpt lines and remove any finger prints from the surface prior to baking. I should point out that sculpey do manufacture their own solvent for this as well (I'm just a tight arse and use what I have available). I have also started to use an old tool of my daughter's from her card making phase; a "heat it up embossing power gun". Its essentially a small heat gun that's great for "flash baking" small items of sculpey without the need for baking in the oven. I will caution that judicious use of this can result in burning or charring of the sculpey if your not careful and I recommend placing the scupley that you want to "flash bake" on a tile to avoid damaging your desk with the heat. There are various small heat guns available from most general online stores such as ebay, amazon etc. Below is a picture of the one that I have:


Some more tool updates. (now 2020) 

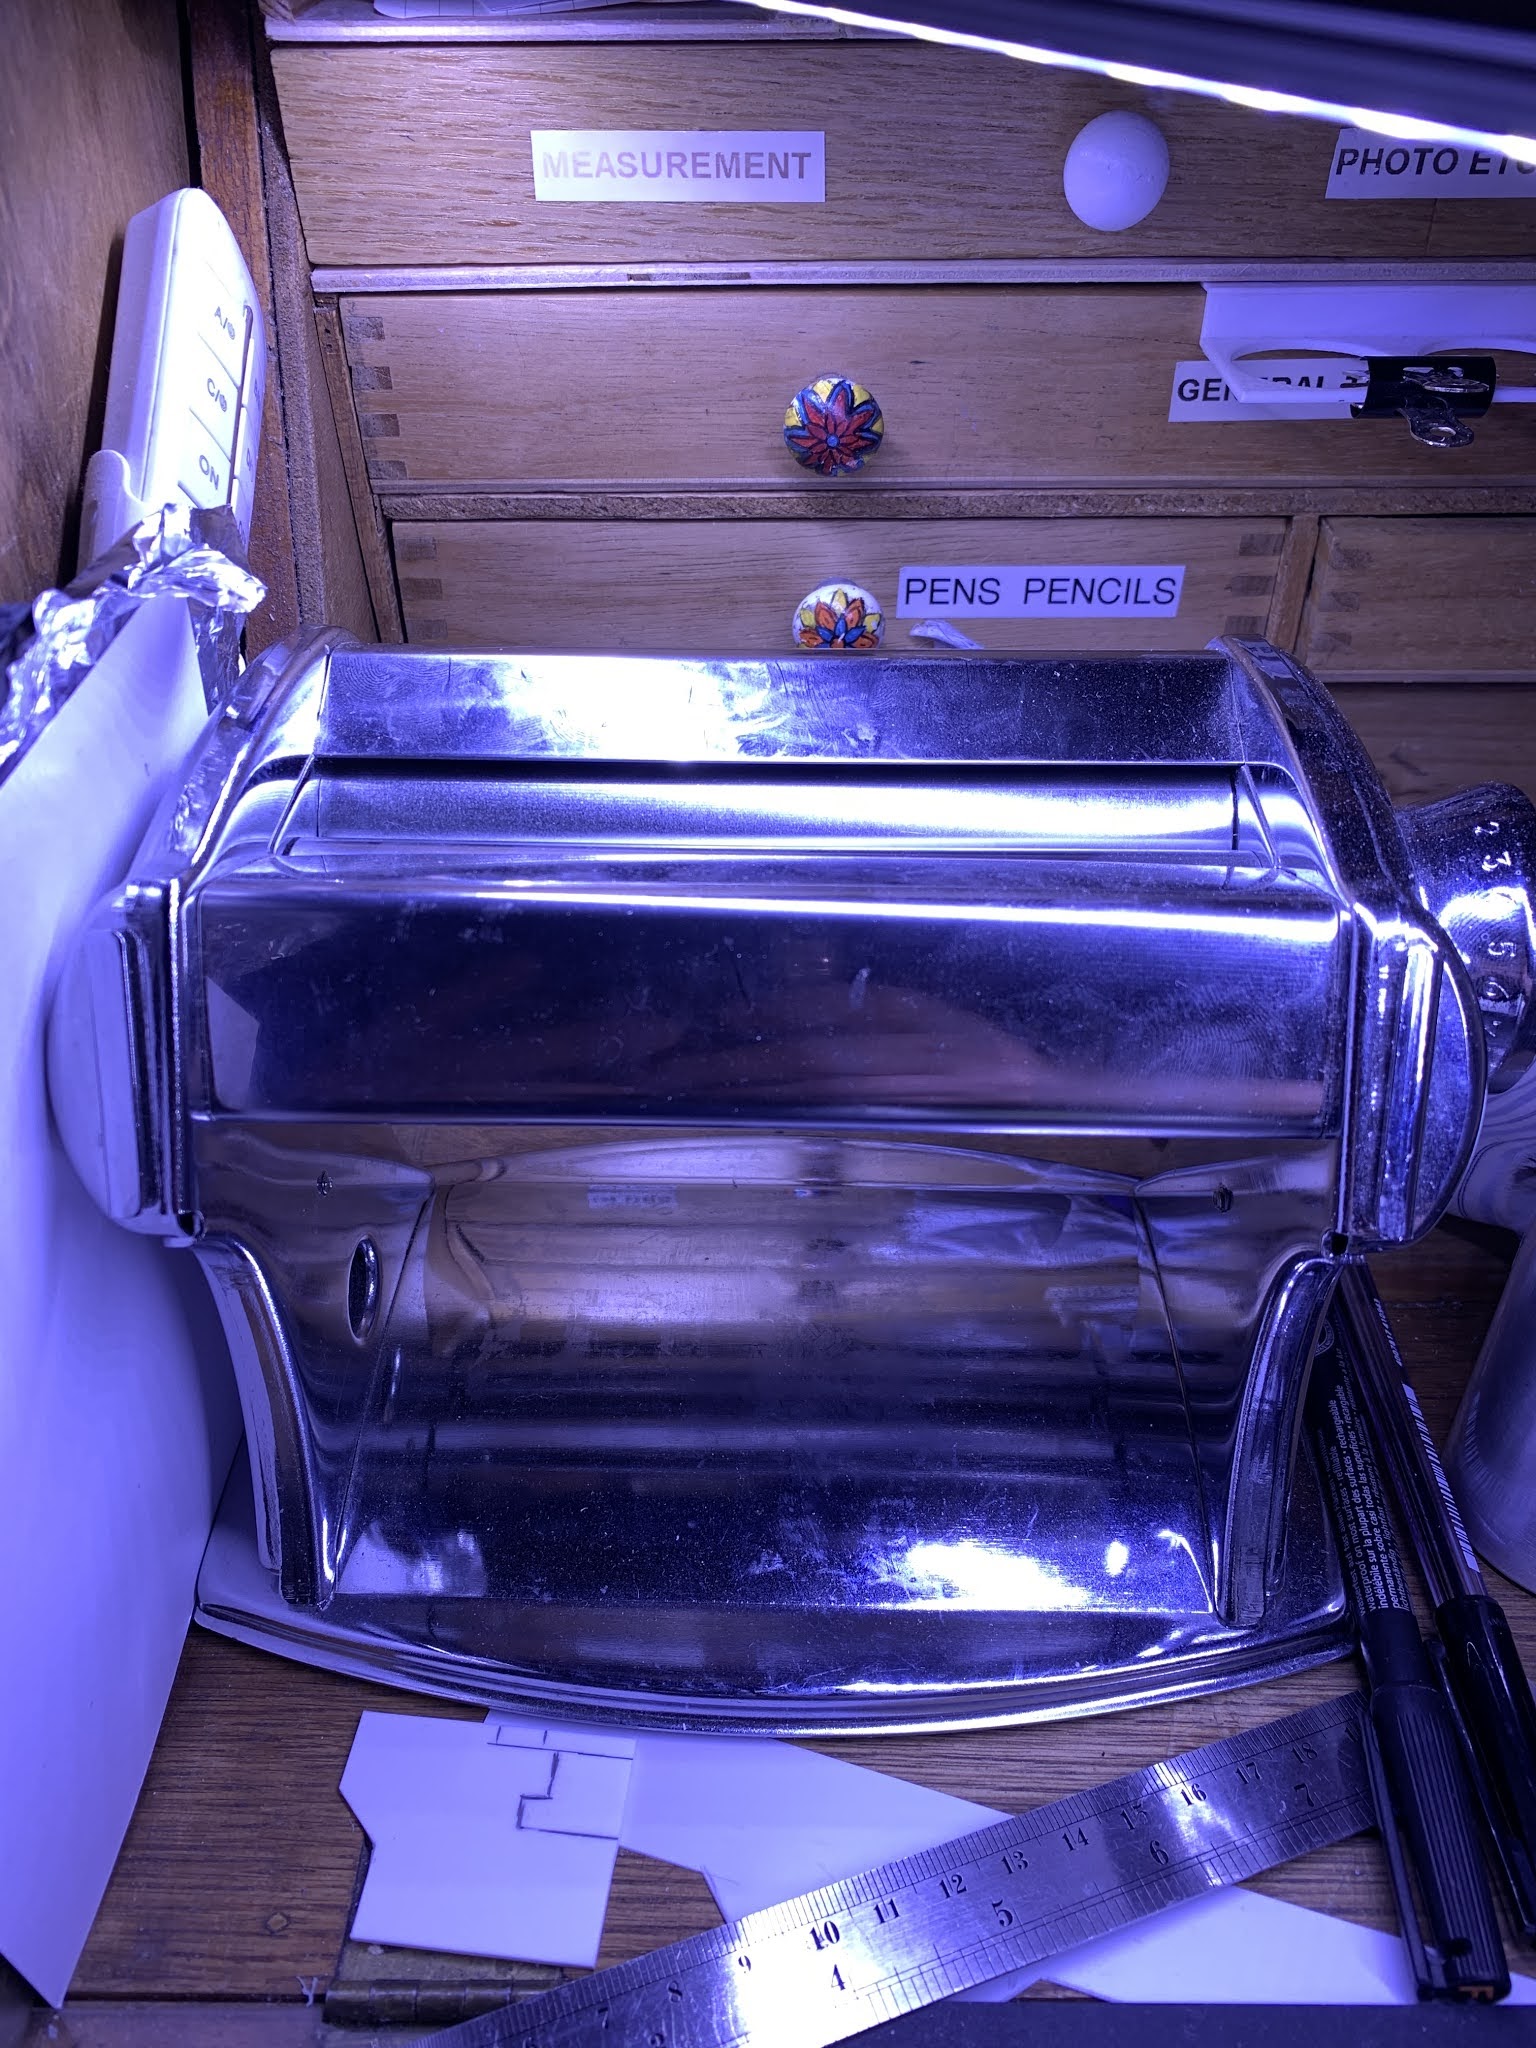
I have been sculpting intermittently for around 8 years and its been almost as long since I first wrote this post. I thought that I would provide a little update with regards to some of the tools that I use. Firstly I will say that I am still using all of the tools that I discussed in the original post however I do have some additions from some unsuspecting sources! One of the benefits of living with two women (they may read this post so I will add that there are loads of benefits and no downfalls whatsoever ;-) ), is that I see a great many "tools" that they use in the maintenance of beauty. Some of these "tools" have proved to be very effective for sculpting as well. The large silicone bladed tools in the photos are actually face mask applicators. They are supplied with a slight curve but a swift slice with a very sharp blade and they become very effective smoothing tools for large areas. The black handled tool is a tongue scraper however its also very good as a large rake tool for clay. Each tool cost me the princely sum of 99p and they are so effective! I have also invested in a 2nd hand pasta maker. This I think cost around the £25 mark but its proved invaluable for use with polymer clay. Running the clay through the pasta maker has a conditioning effect on it and makes it far easier to sculpt with. It has the added bonus of producing various thickness sheets of clay which again prove invaluable for sculpting clothes etc. I will continue to update this section of my website as I accumulate or replace tools/equipment so that you get to see the exact tools that I use to produce my figure sculpts. 


The last "essential" tool that I would recommend to anyone is Knowledge! Watch lots of videos, read lots of books and articles, speak to people who use sculpey, etc. This really is part of the hobby that you will always improve on the more you know. I am very much still a beginner but love everything about it so far.

One of the best books that I have read so far (in my opinion) is "beginners guide to sculpting characters in clay". The title is a little misleading as I assumed that this would only cover characters as the title suggests; however after flicking through the book before I decided on purchasing, the author covers everything from basic tools to human anatomy to sculpting techniques and then using a number of very different sculpts provides an excellent tutorial on sculpting. Here's a photo of the cover and one of the ISBN if you are thinking of getting a copy:


So that's it. This is a virtual complete breakdown of all of the tools that I use to sculpt any of the figures shown on this blog. I hope that you found some of this information useful and that if you don't sculpt already, you will give it a go. Oh and a final piece of advice: keep a sense of humour. You will make mistakes; you won't make a perfect sculpt on the first try and you will always see flaws in your work that maybe others can't. Please remember that its a hobby and is something to be enjoyed; especially when you make a cock-up because that means that you have learned something new and won't repeat the same mistake.

Enjoy and have fun. 
tools wrapped up and ready for use once more

Monday, 15 July 2013

Making an armature for sculpting

This is a short tutorial about how to make the armatures that I use to sculpt my 120mm figures as seen on this blog. I am not a professional sculptor (far from it) and I am sure that someone will see this and point out my many "errors" as far as the armature construction is concerned. All I can say is that this method works for me, its simple to do and costs very little.

The tools/materials needed:

Soldering Iron (optional)
Solder (optional)
Helping hands or some other way to hold the work (optional)
Small pliers
Wire cutters
Small length of household lighting circuit twin and earth wire
any other thin copper wire or aluminium armature wire.


Preparation

What I have done is to find a simple line drawing of the human body and re-size to 120mm height for reference when making the armature. This makes things very easy when it comes to referring back to size and proportion for the armature. The only other preparation really is to strip the plastic coating off the electrical wire if your not using aluminium armature wire, turn the soldering iron on (for the copper if your soldering it) and make a coffee which is always essential for any model making as far as I am concerned.

The Legs

I find it easier to start with the legs. Take a length of wire and bend it using the pliers in such a way that you get a U shaped dip in the crotch area of the armature. As mentioned I find using the printed figure that I mentioned earlier great for using as a comparator for getting the proportions correct. You will also notice from the picture that I have deliberately left the leg wires longer than the figure at this stage.
The Torso

For the torso I use a single piece of wire that I wrap around the U shape in the crotch and solder in place. Again I use the printed and sized image as a reference and leave the wire extend past the head about two inches at this stage. If your using aluminium armature wire this joint can be crushed with a pliers and it should hold without the need for solder. 
The Arms

For the arms, its a single piece of wire again that's wrapped around the single torso wire at the appropriate height (using the figure print as reference) and soldered into place. I then use the pliers to bend both sides of the wire into the shape of the shoulders and arms and trim off the excess length with the wire cutters at the finger tips of the armature. (again aluminium armature wire can have a crushed joint over solder.)


Finishing the armature
To make this a usable armature for sculpey we really need to add something to the basic frame to ensure that the sculpey can grip onto something as we begin to add it to the frame in the sculpting process. For this I use a thinner gauge copper wire that I usually scrounge from anywhere I can lay my hands on it. As long as its "solderable" then its OK to use. I begin by wrapping a small section around the leg joint at where the foot ends (remember I left the legs long) and then solder it into place. For aluminium armature wire I tend to wrap it tightly and hold it in several places with a drop of CA glue.

Once the leg has cooled sufficiently, I then begin to wrap the wire around the armature frame in a tight spiral, first up one leg and then down the other, finishing at the foot of the opposite leg. At this point I then solder it into place and trim of the excess wire. I also pick a few more places around the spiralled wire and solder these as well to ensure that the wire does not move very much around the frame wire.


I then continue this spiral wrapping of the thinner gauge wire around the entire figure, soldering at various points and trimming off the excess wire where appropriate. you will also notice that I have not extended the wrapping onto the hands or the head in the photograph. This is because I have the option to sculpt the head and hands separate from the figure if I so wish and add it later. The single wire making it easier to mount and work with. 
The Feet

For the feet I use the thinner gauge wire and take the reference point for the feet from my printed drawing. I solder a wrapped piece of the wire to the frame and then trim/bend as required. the thinner gauge wire is better for the shoes, especially if the figure is to place in an action pose and the feet flexed. I would add that as I get more and more confident with sculpting, I tend to leave the feet armature out completely, opting to sculpt the feet in a separate sculpt and then glue to the body once both are baked. Either method is OK to do and I know that there are quite a few more styles adopted by other model makers for you to choose from.


The finished product

The armature is now finished. For the extended wire at the head, I bend this into a loop allowing me to suspend the figure for sculpting from my home made sculpting stand, or I can stand the figure on a wooden base to sculpt by drilling two small holes the same diameter as the wire and popping in the extended feet portions of the armature into them. I hope that you found this little tutorial helpful and if this will be your first time sculpting, then I hope that this simple frame is as easy to work with for you as it is for me.