Introduction

This is actually not an impulse buy! For those of you who follow this web site regularly, you will probably be just as surprised as I was considering my weakness for buying a kit on a whim!! I have been keeping a look out for a well priced space shuttle with booster for quite a while to compliment my 1:144 Saturn Apollo which I built a while ago and mounted on my office wall. If your interested the link for that build its here. I found a Revell Space shuttle and boosters on Amazon for a very reasonable price of £20 delivered and couldn't resist buying it. I was already aware of some of the problems with fit and accuracy for this kit but was certainly up for the challenge. This is essentially three kits in one when you consider the Solid rocket boosters (SRB); the shuttle itself and the external tank (ET). Each of these components present their own fitment and accuracy problems as well so I will write up this build as separate sections to document the changes that I intend on making before painting and assembly:
The External Fuel Tank
There are some accuracy issues with this tank; namely the inclusion of circumferential bands along the tank which Revell decided to include even though NASA never designed a tank with these bands? In addition the ribbed section on the tank is nothing short of shocking where replication of detail is concerned. To add to the issues, the part fitment, particularly the seams is quite bad. I decided to glue up as best as I could and then assess the problems once I had a solid base to work from:


To fill the seams I used squadron green putty. This presented its own problems for me as the putty that I had was quite old and almost cured in the tube making things a little more interesting for me! Once the initial layer of filler was sanded down I then sprayed the entire tank with a coat of grey primer. This makes any seam lines really obvious and also lets me know when I have levelled a seam satisfactorily and not to overwork it. Once I was happy with the seam I then began the laborious job of carefully sanding off every band from the tank by hand while ensuring that I maintained the shape of the tank. This is a job that really couldn't be rushed. Several cups of coffee later and another coat of primer to check my work; I was left with a very smooth tank and the daunting task of removing the ribbed section and replacing it with something a little more accurate:


For the ribbed section of the tank there is an aftermarket kit available if you don't fancy scratch building one yourself. Be warned though it is three times more expensive than the kit itself! There is of course a lot more in the upgrade kit than just the ribbed section of the tank but I just couldn't bring myself to pay that kind of money for this kit as I intend on using it as a wall display not as a hyper accurate scale model desk display or competition entry. The plan of attack I decided on was to remove the existing details from the tank, leaving the bands there as a sanding guide, then cutting two sheets of the the thinnest styrene sheet that I had and taping them to the tank. I then roughly sketched the details onto the sheets in pencil. I then laid the sheets on a flat surface and added raised details using strips of thicker styrene. The bands were then sanded off the tank and the sheets glued onto the tank surface. This was then left to harden and set overnight. I was then presented with the daunting task of cutting 0.8 mm strips of styrene and gluing to the newly made section of the tank. Once allowed to set again overnight I then gave it another coat of grey primer and a thorough check over to make sure that I haven't missed anything.


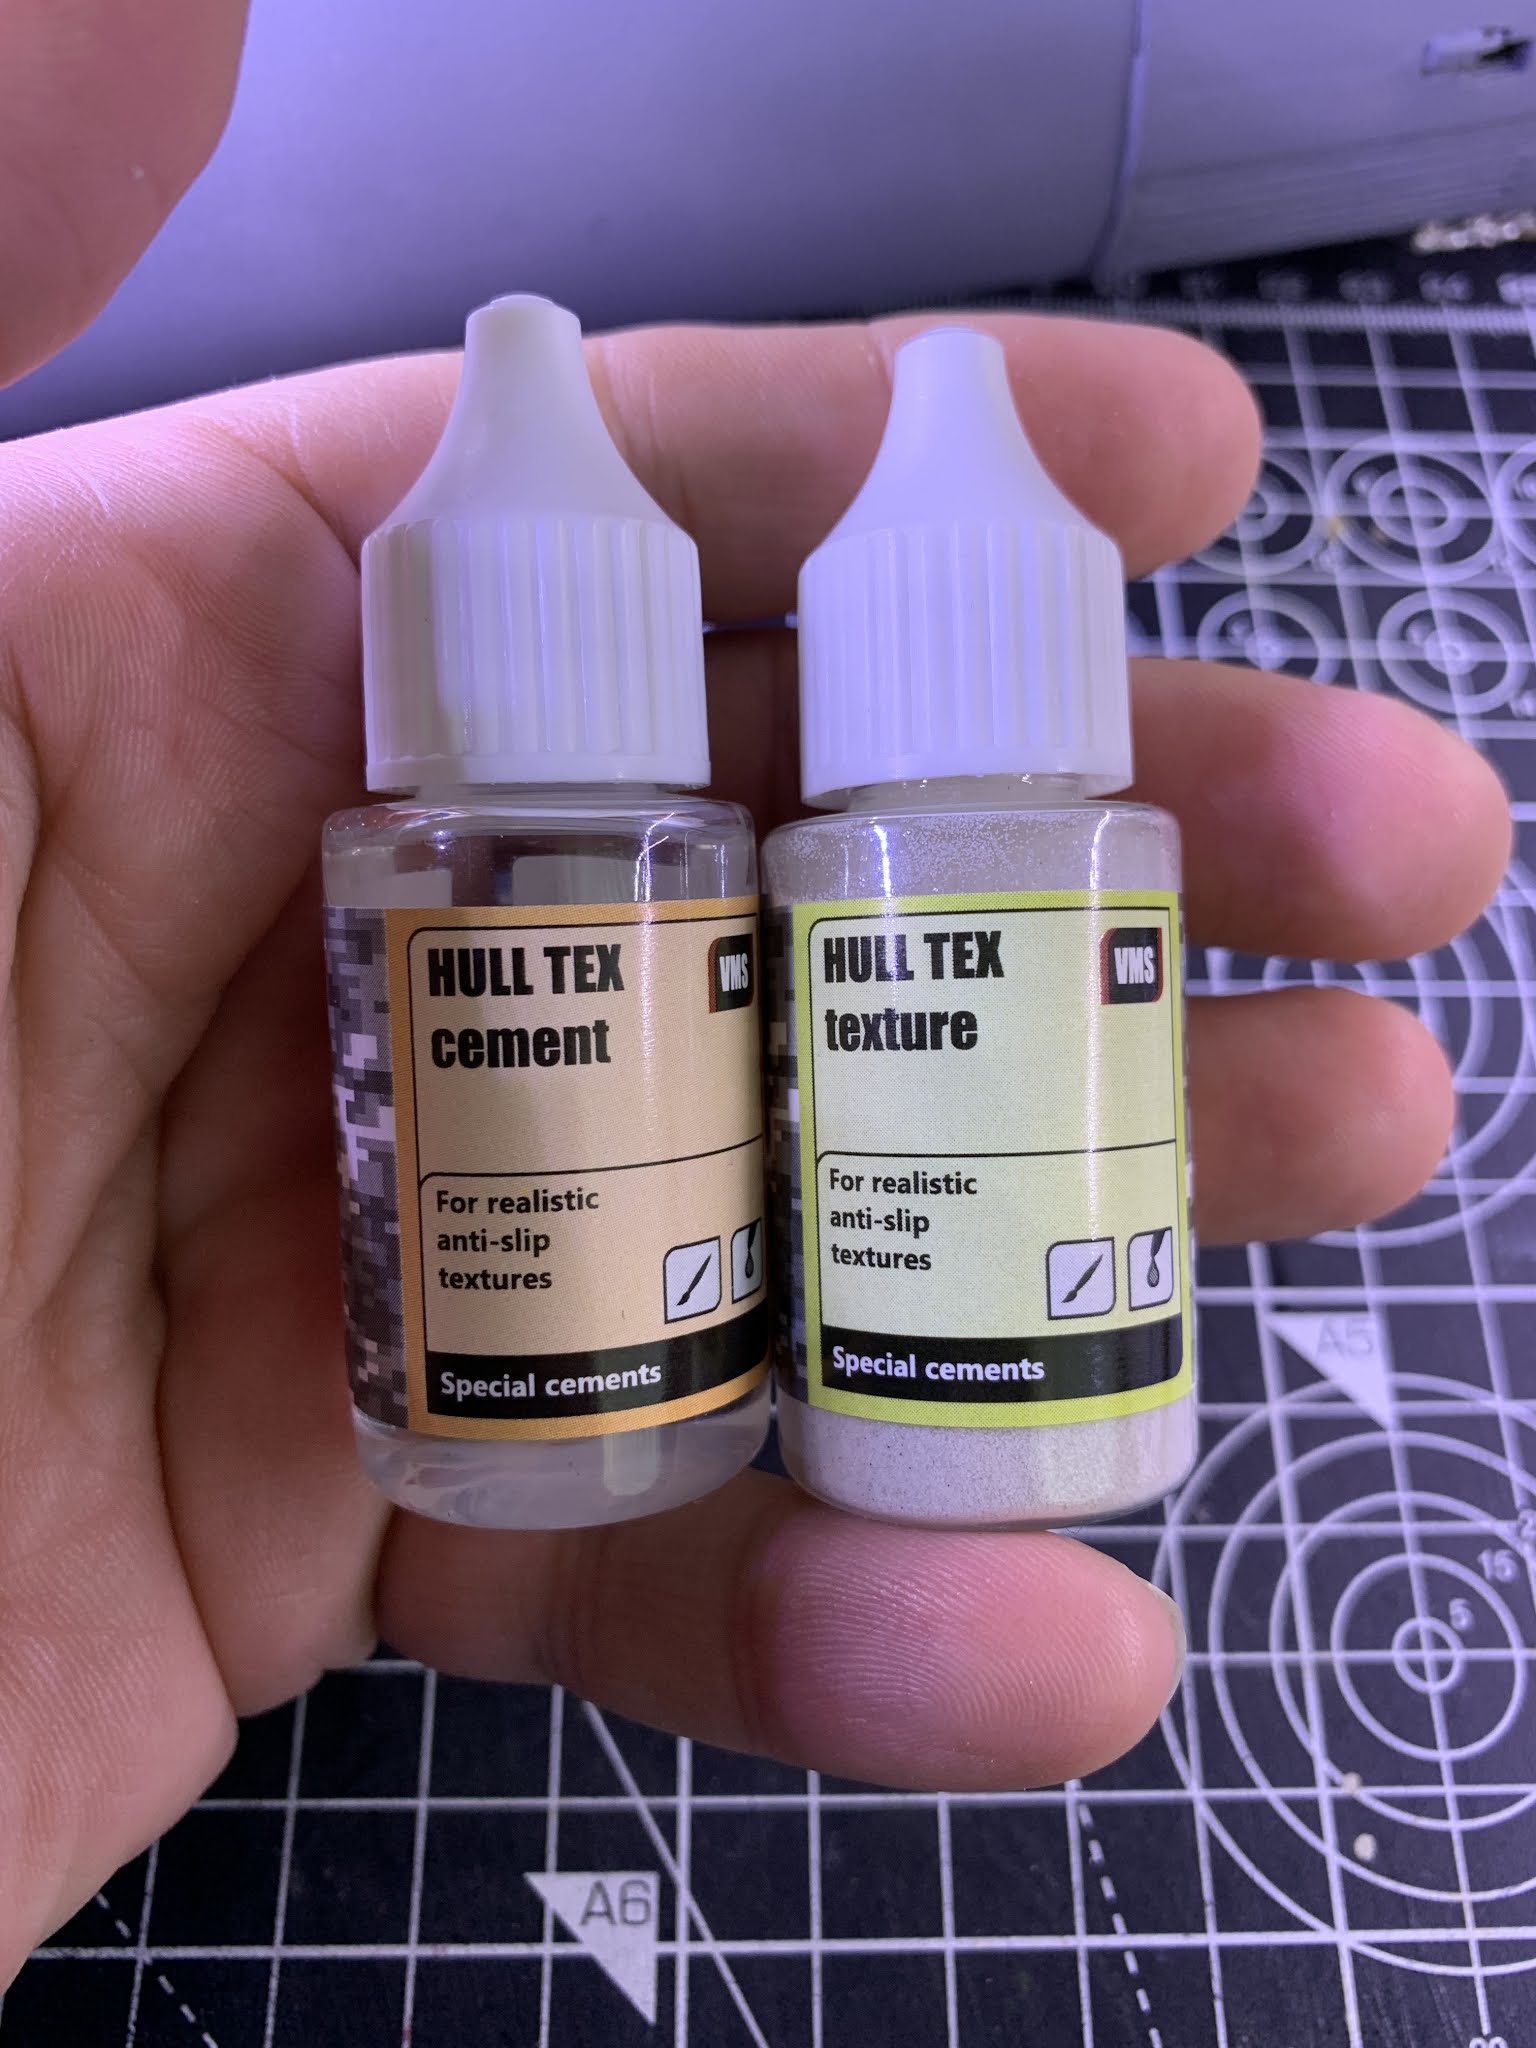
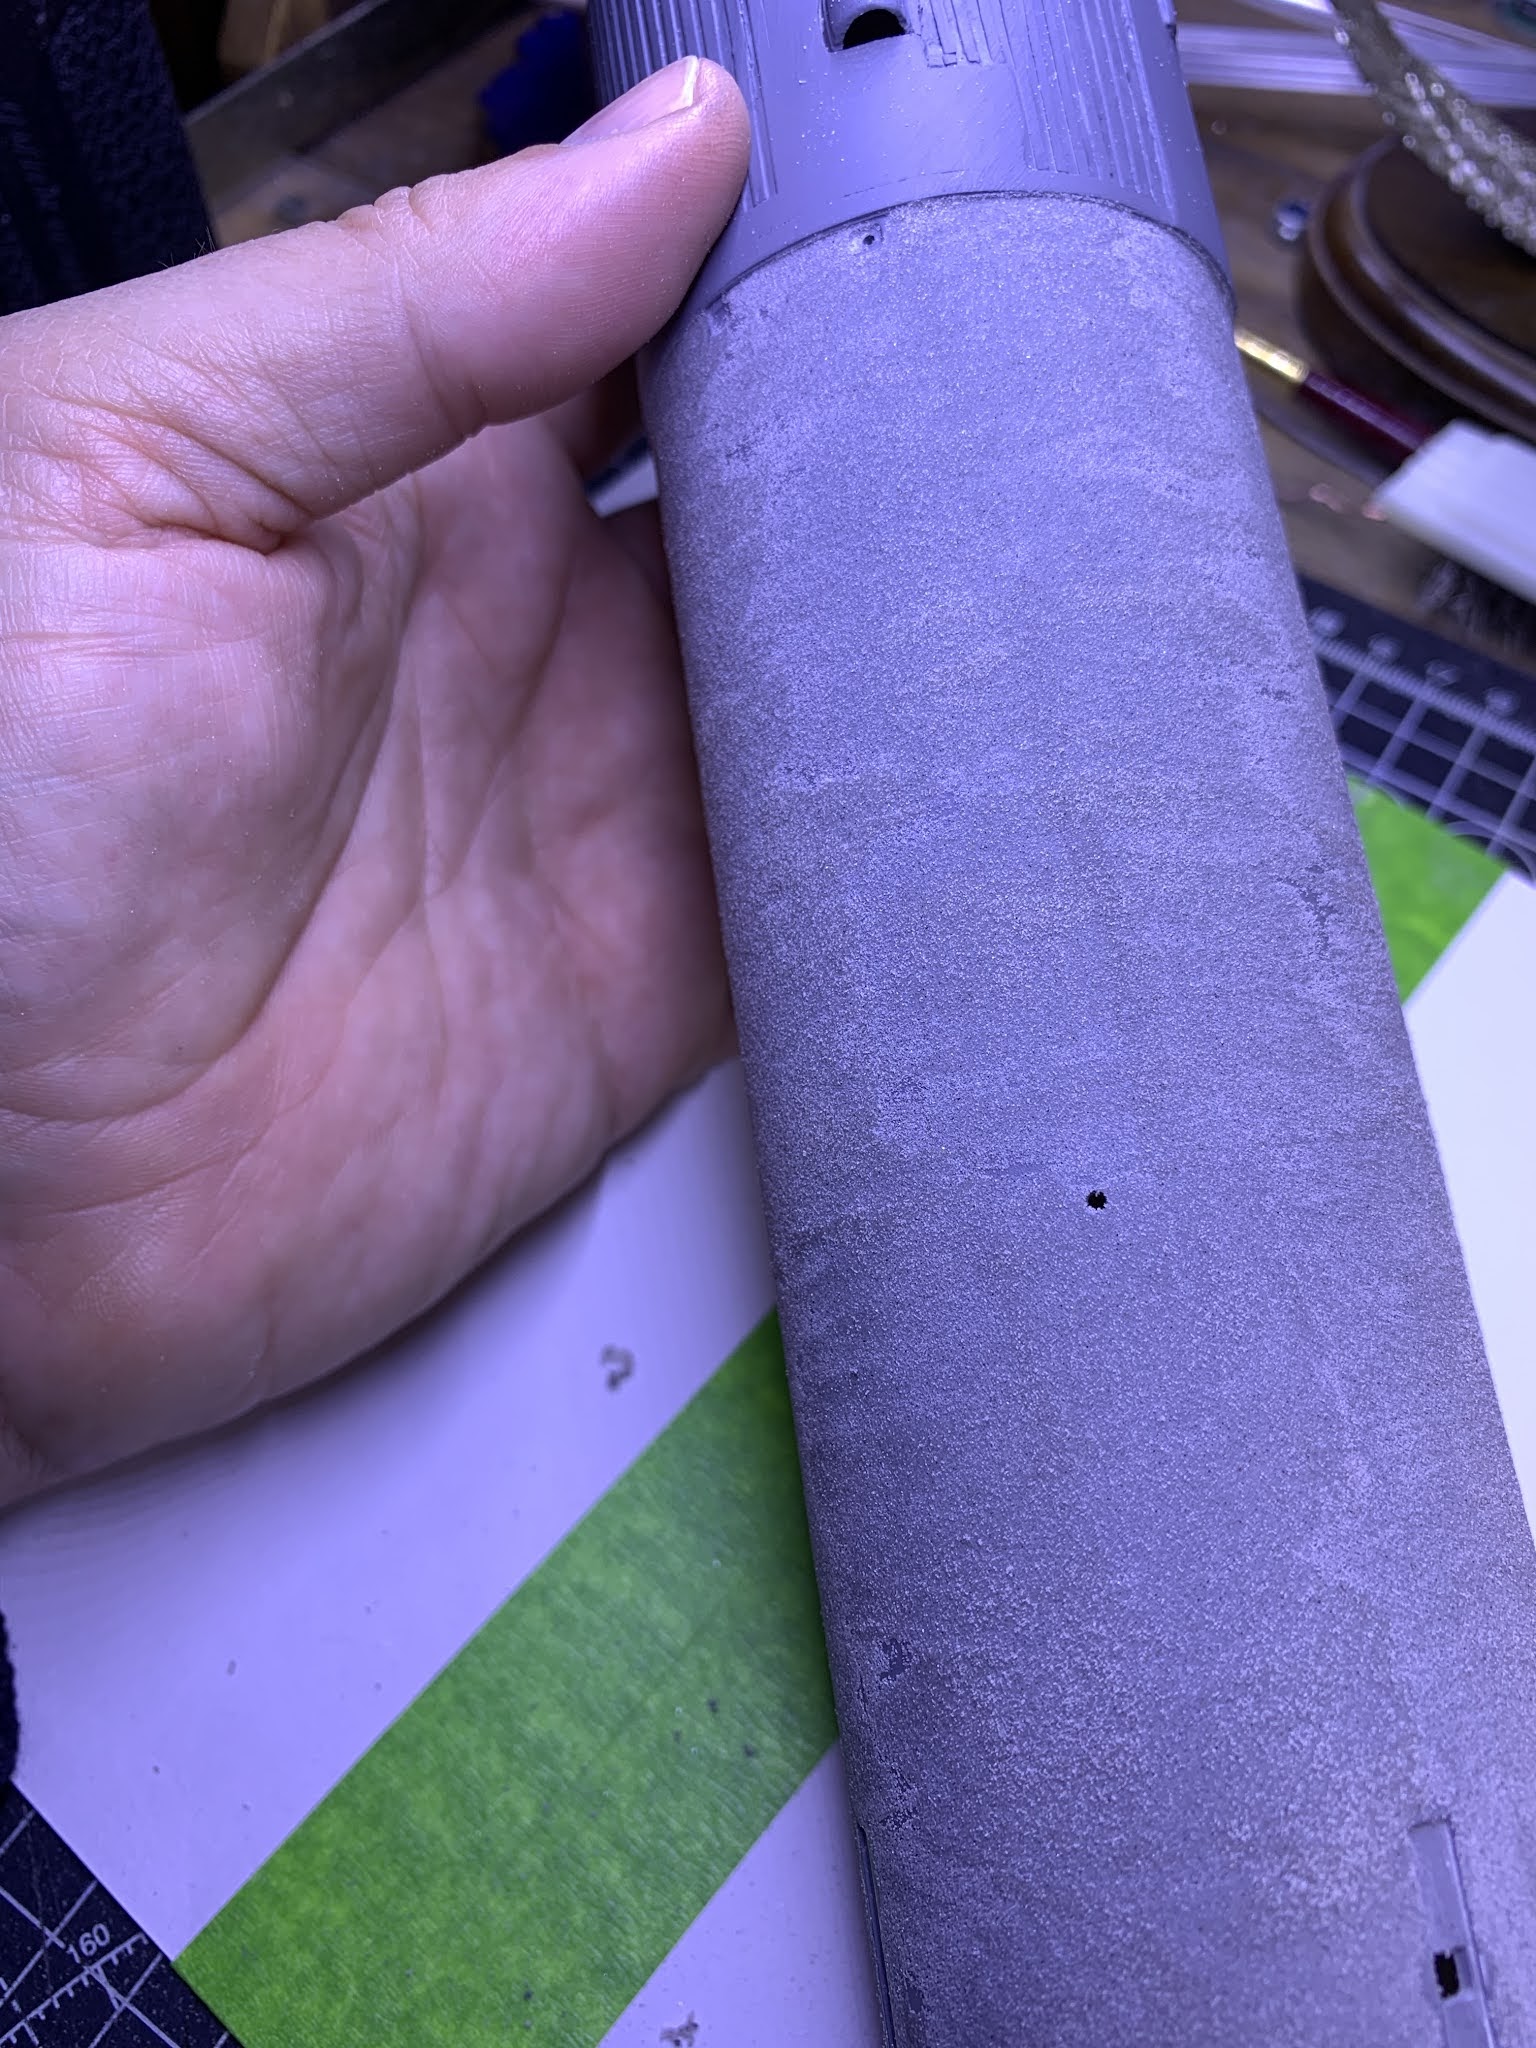
The tank finish has a rough surface. I have seen a number of different approaches to achieve this effect and I considered a few of them until I remembered that I had bought a textured finish from VMS for my Challenger tank a while ago. For those of you who are interested its called Hull Tex texture and its a little bit of fuss to use but the result is really good (for scale military vehicles anyway). I figure that this should provide an approximation of the rough foam finish on the shuttle tank. If you are interested in this finish for any scale model project, The only supplier that I am aware of in UK is this one. While I am not affiliated with the model shop or VMS products I can highly recommend both of them. If you want to see the effect that the Hull tex air creates then you can check out my Challenger tank build here. However after some more thought and consideration to the finish that I needed I realised that the Hull Tex Air would be a little too fine a finish so I opted to buy the other Hull Tex product from VMS which provides a more grained affect and is a little easier to apply (does not need to be airbrushed). The initial textured finish and its application can be viewed below:


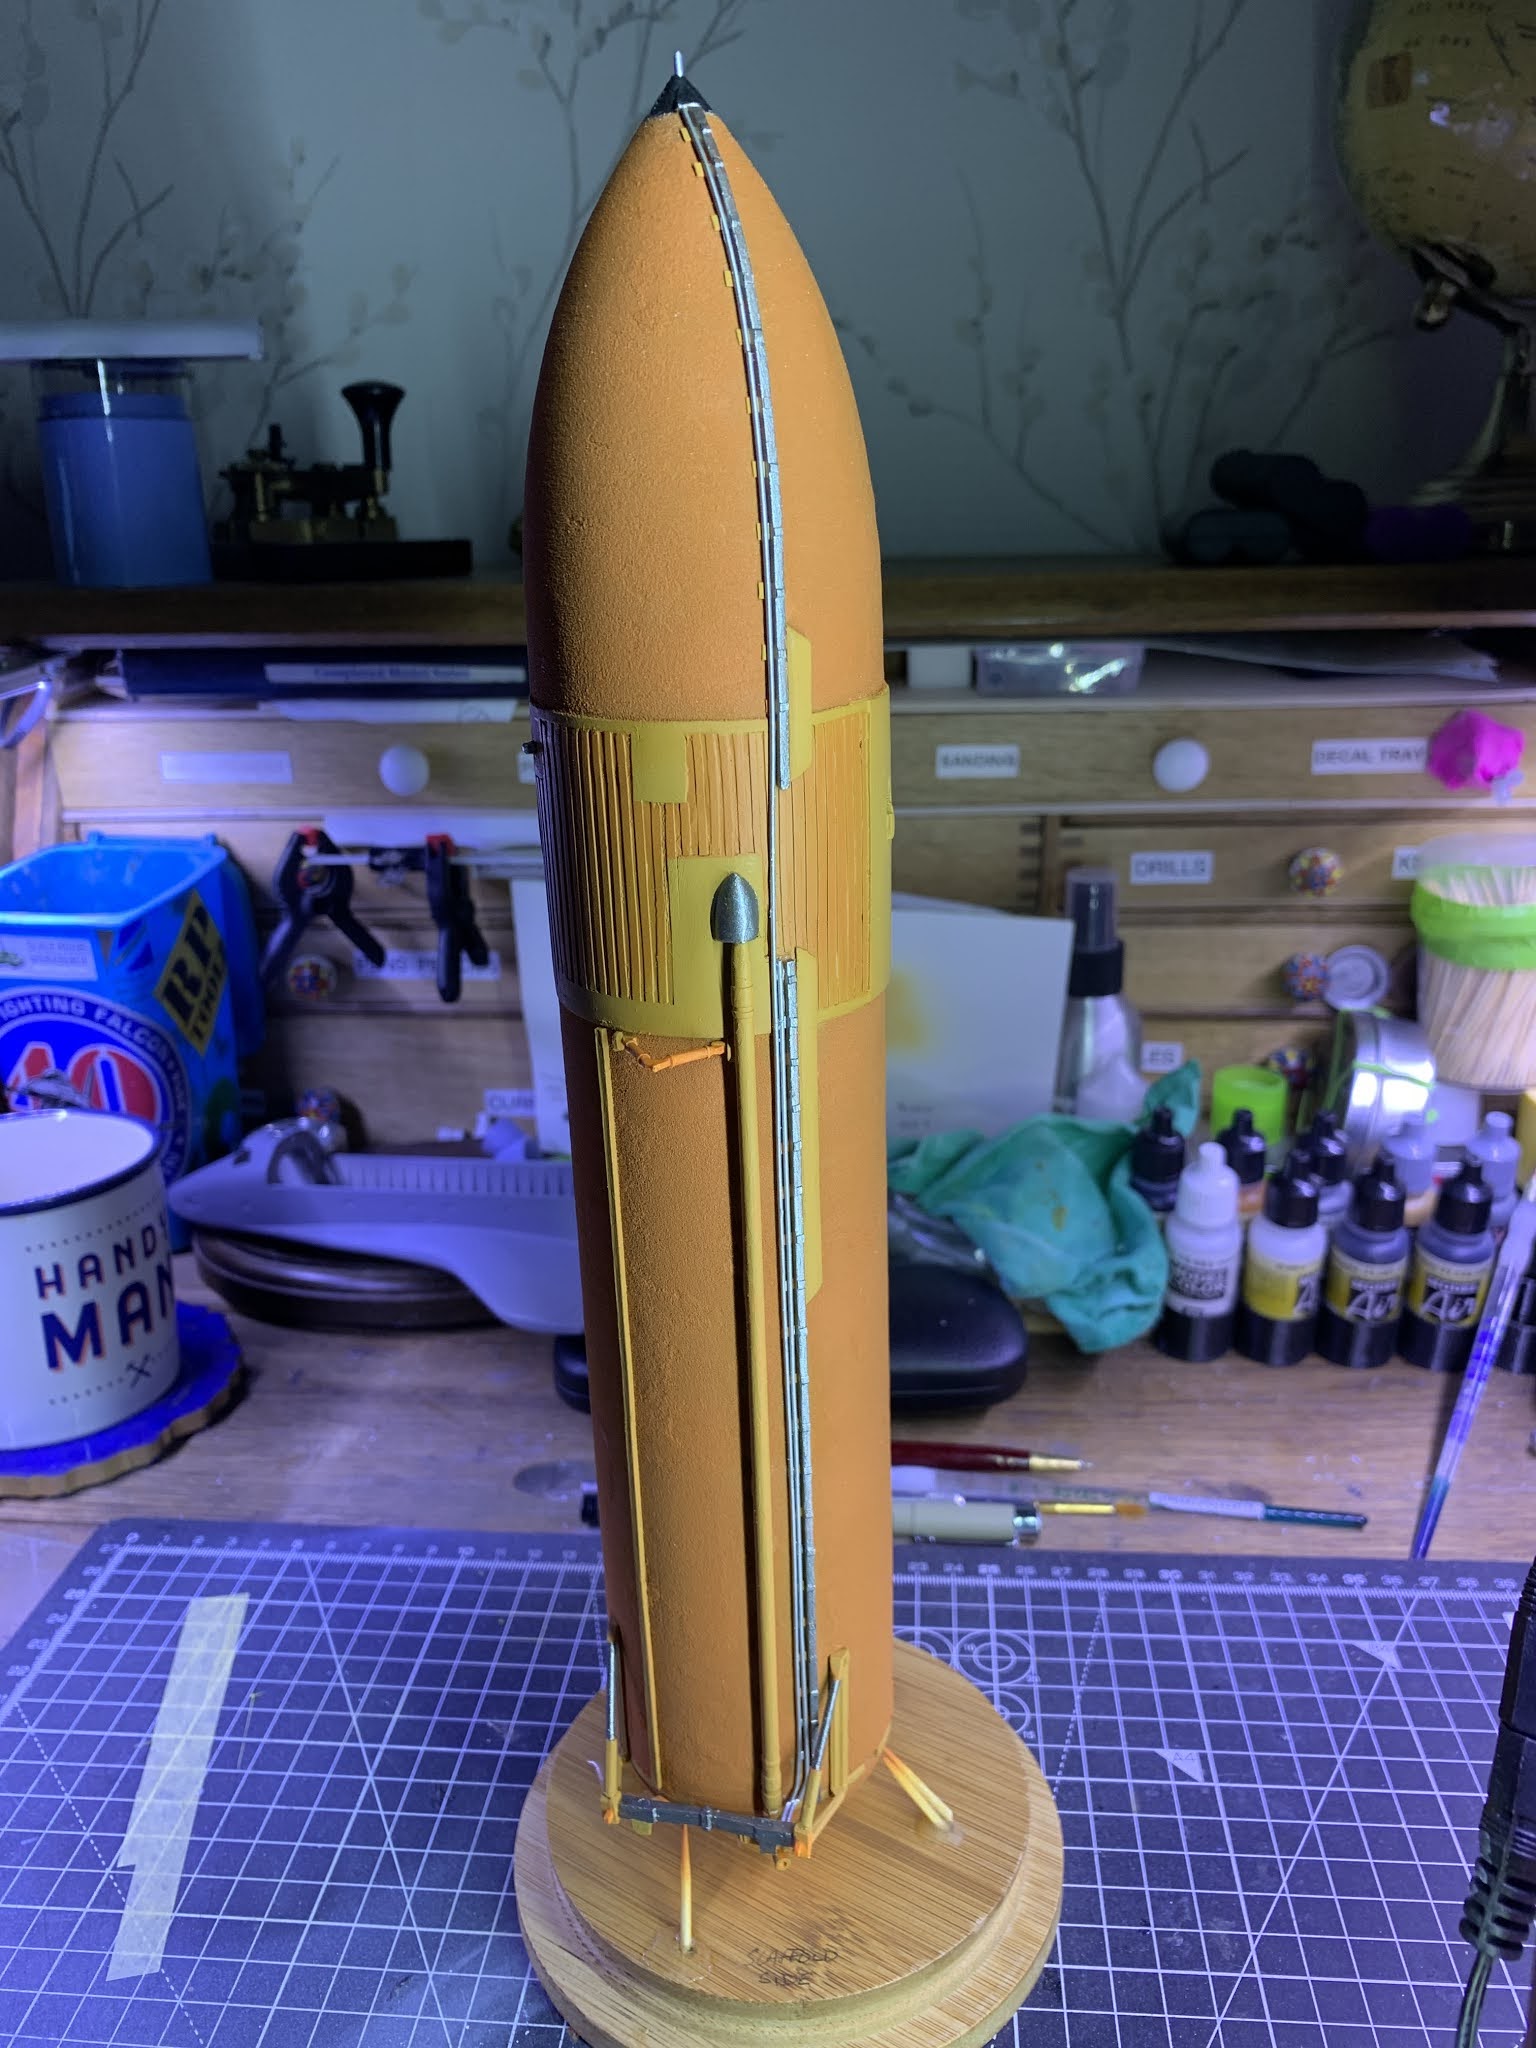
I've purchased three different orange colours from Vallejo's Game effects, model air and Game extra opaque range as I wasn't sure which would result in the best colour match for the tank. On closer observation of images of the main fuel tank it soon became obvious that it really didn't matter which colour I chose (or combination of) as each tank varied in colour from manufacture as various environmental factors altered the surface over time. For this reason the colour chosen will be strongly influenced by what I think will have the best aesthetically pleasing affect once finished and mounted.
Before the painting can begin I was now faced with the completing some of the additional details that are either missing from the tank or are poorly represented on the kit. The first improvement was to the main mount between the tank and the shuttle. The stay/shock absorber mount was poorly reproduced so some styrene rods were cut to size to replace the kit item:


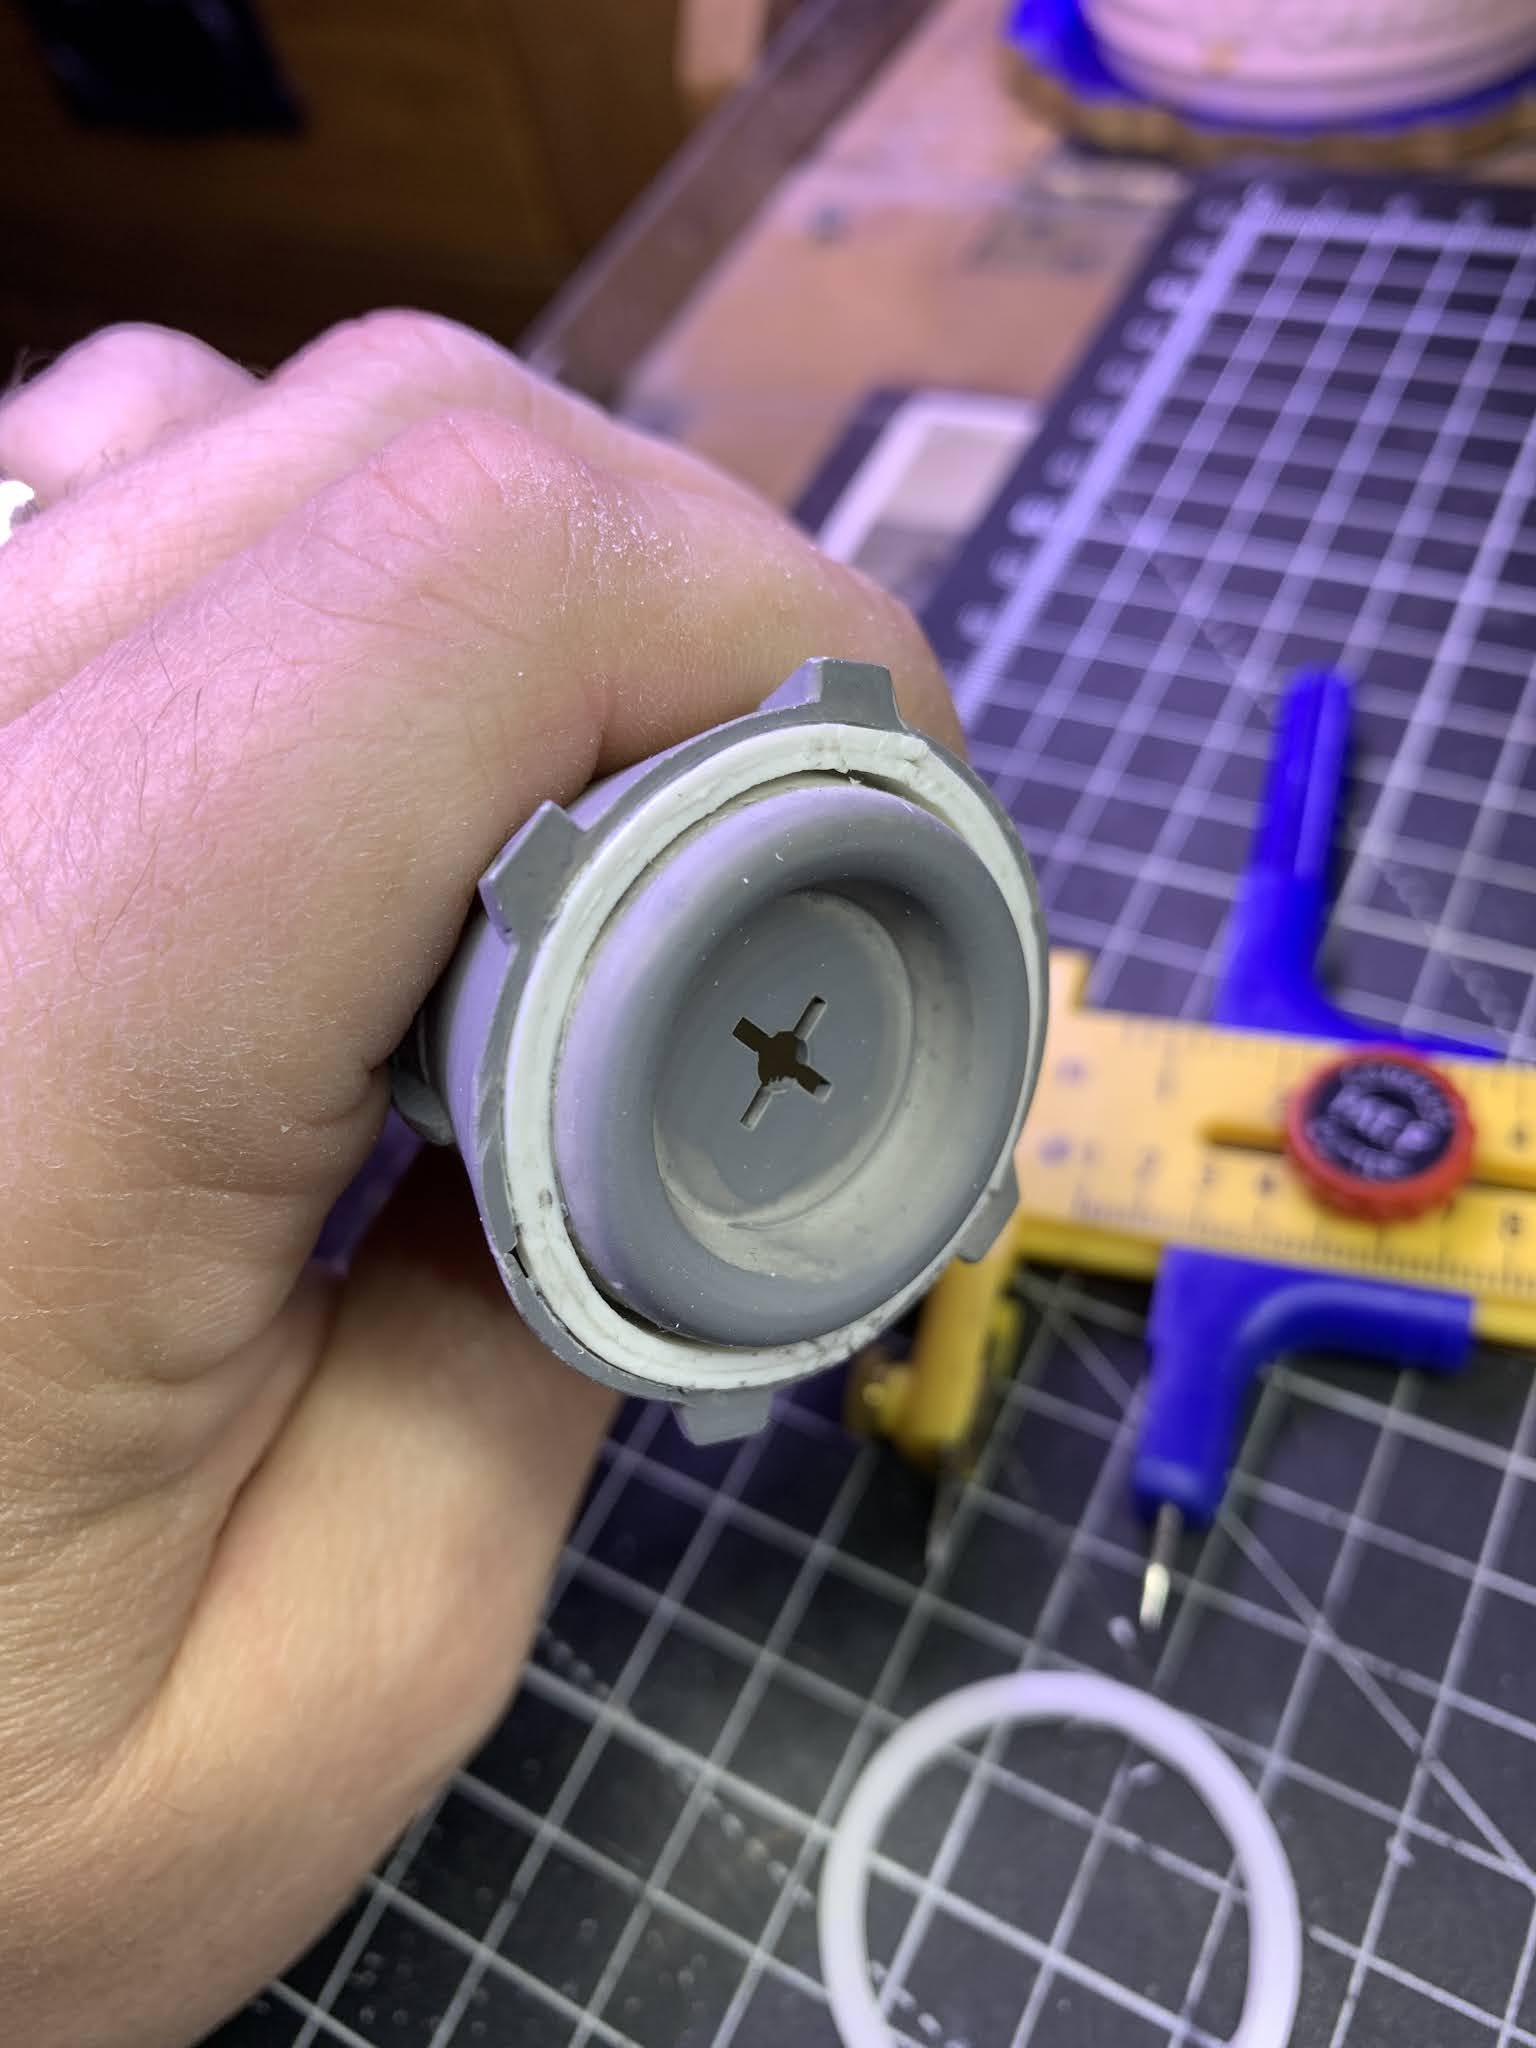
I am almost at the point where I am ready to begin painting the main tank in its resplendent orange but I have another problem in that so far I have held this tank for painting by passing through a wire in the bottom two holes that I created and intend on covering with two small styrene discs as per the actual tank. While this worked out quite well for priming, it isn't the best solution for airbrushing the final colours. I am fortunate in the fact that we recently changed our tea/coffee/sugar canisters and I salvaged the bamboo lids in the anticipation of using them as figure bases at some point in the near future. They have now been adapted for use as rocket motor and main tank stands while I paint and will later be sanded smooth again for the future figures.


I left the tank for 24 hours to fully dry and harden before carrying on with the second paint finish. I have long been a fan of the Frog tape, decorators masking tape. I've even written a review of the tape for me website here. However; concerned with protecting the finish as this was the first time that I had used the Hull Tex original I decided to buy the Frog Tape Delicate surface just in case. The quality of this tape is just as brilliant and the original. So good is this stuff that I will now only use this tape for airbrushing from now on (I've even updated my tape review page). The second colour is another product that I'm not familiar with; Vallejo Game Extra Opaque. This has to be thinned for airbrush work but as every other Vallejo product I've used to date, it did not disappoint. Two coats of the thinned paint through the airbrush and it was complete. I spend a further hour or so with a fine brush and various Vallejo colours completing the finer details of the tank and I was a very camper indeed with the finished quality of the tank. I've also tried to take some detail shots of the textured finish of which I am really happy with. The scale is spot on for the foam and I am especially happy with the "crunchy" non uniform surface that is believe it or not intentional. Every close up photograph of the main tanks that I have seen reveal a non uniform, beaten up appearance and I wanted mine to replicate this as much as possible. I resisted the urge to weather the tank with various shades of the orange coat purely for aesthetic reasons. This model, when complete will be a wall mounted item next to my Apollo rocket which is also non-weathered. I want this to be part art-work, part model so complete authenticity of finish is not as important as the "wow factor". (well that's my reasoning anyway).


The Shuttle
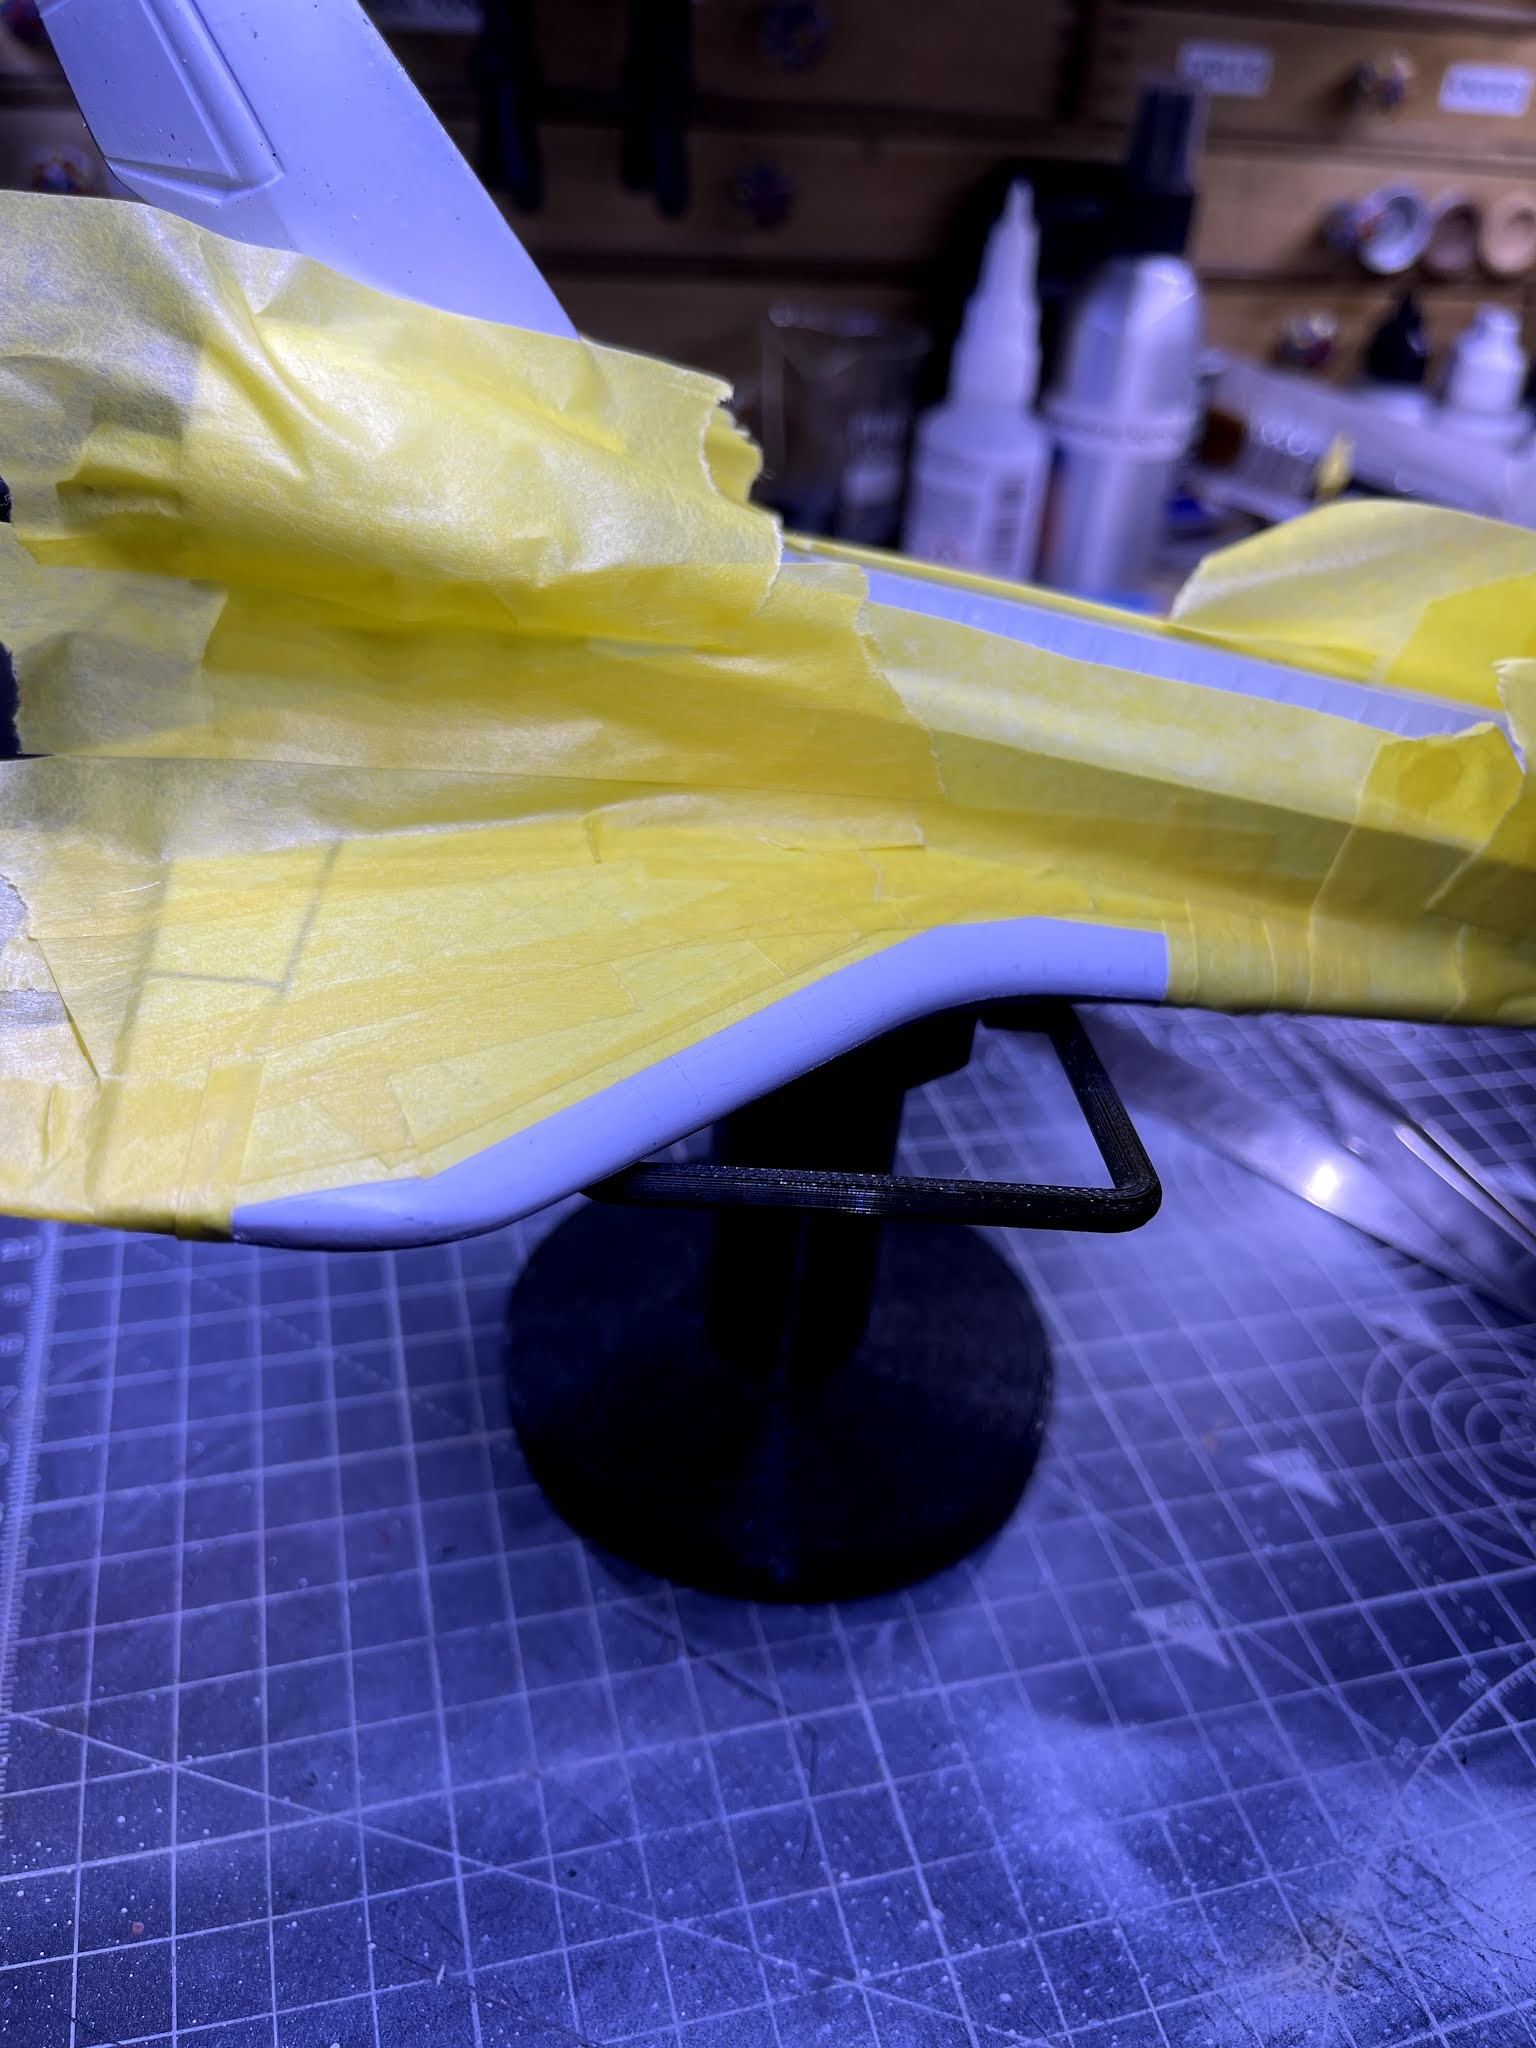
The shuttle is rather bad in terms of parts fit and detail. Again if you are looking for ultimate accuracy I would not recommend this particular kit, however after reading around the internet there are not many good choices around at the time of writing this and upgrade kits are few and expensive. For me though I just want a good presentable wall display model so I am hoping that after a few well thought out simple improvements and some hard work I will be left with a presentable model that I am proud of. Not surprisingly the fit between the wing and body of the shuttle was bad as was the fit between the hull sections. The application of Tamiya ultra thin quick setting glue and my trusty Frog tape masking strips made a decent enough job of aligning the hull as best as possible before filling and sanding. Mercifully Revel did not include any surface detail on the underside of the shuttle so this allowed me quite a lot of freedom to fill and sand to a smooth finish. There are aftermarket decal sheets available for this particular kit that include the underside tile details for the shuttle. While I am not a huge fan of the aftermarket industry due to the price ( I know that these companies need to charge the amount that they do to stay open; I'm just a tight git!) I would seriously consider buying the decals if I was making a stand alone shuttle to enhance the detail and overall look of the model. I have decided to not add the additional tile details on the underside as this will have a limited view once assembled and fixed to a wall mount plate.
The hull joint underneath was really bad and in all honesty I was really surprised that Revel would produce such a poorly fitting kit. It took two filling and sanding attempts to get a suitable finish. The wing joints were equally as bad as well. There are also some issues around the cockpit windows that I am still working on as well. I have also bought a tube of Deluxe materials perfect plastic putty to use for the rest of this project so I will leave my thoughts on this product as I haven't used it before but heard good things.


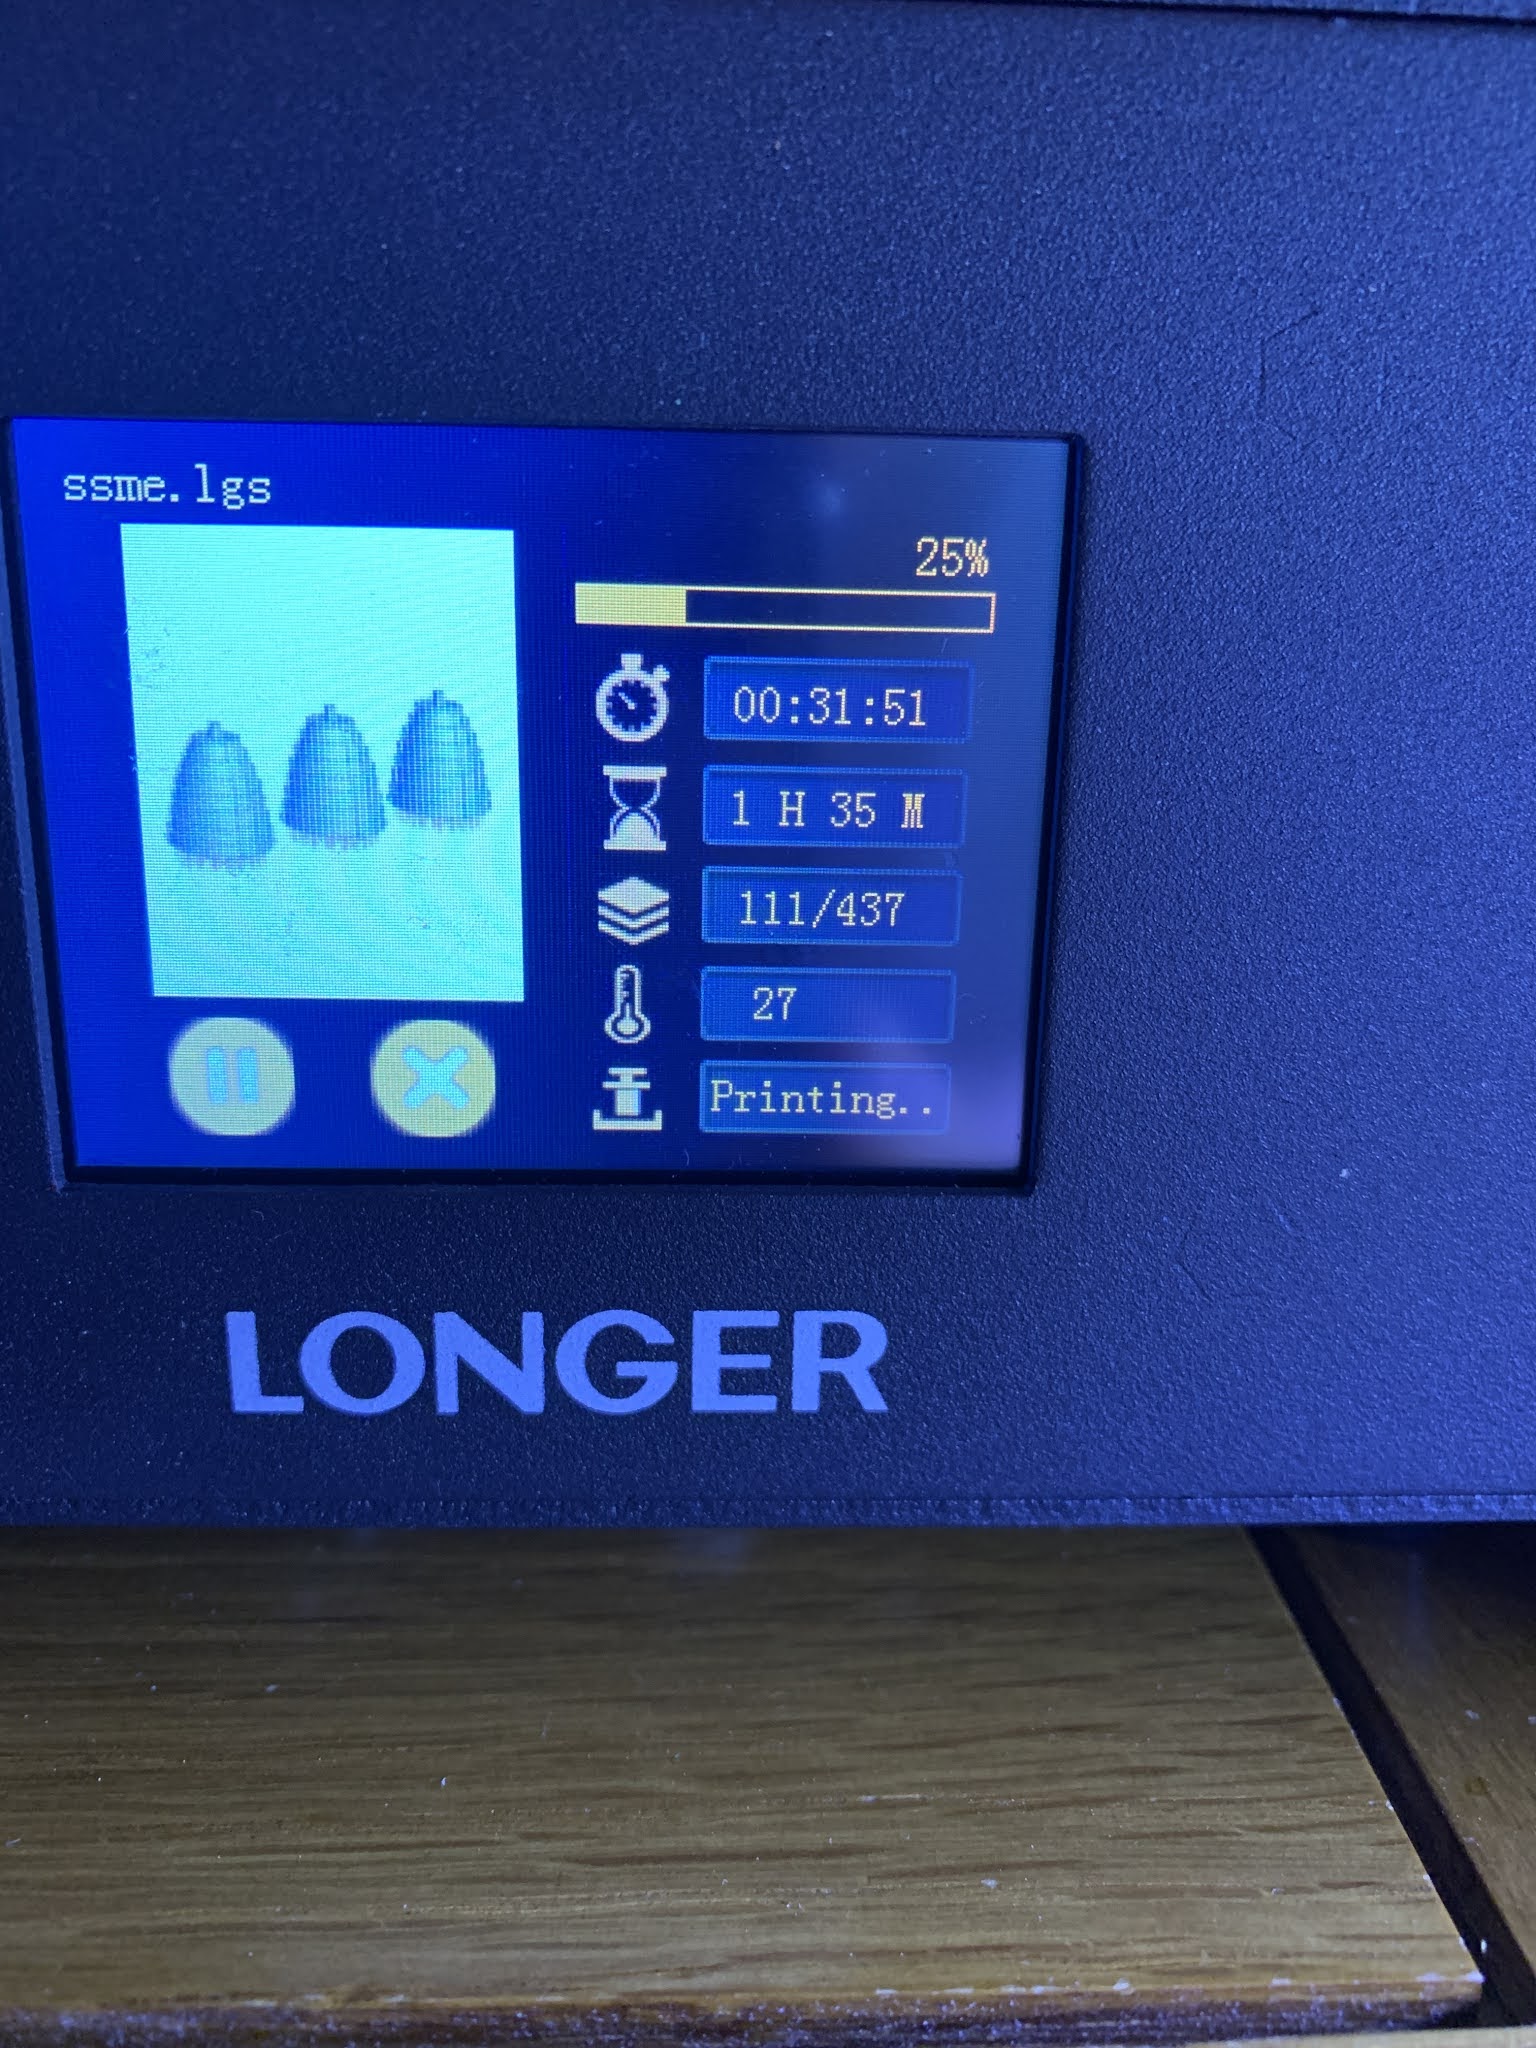
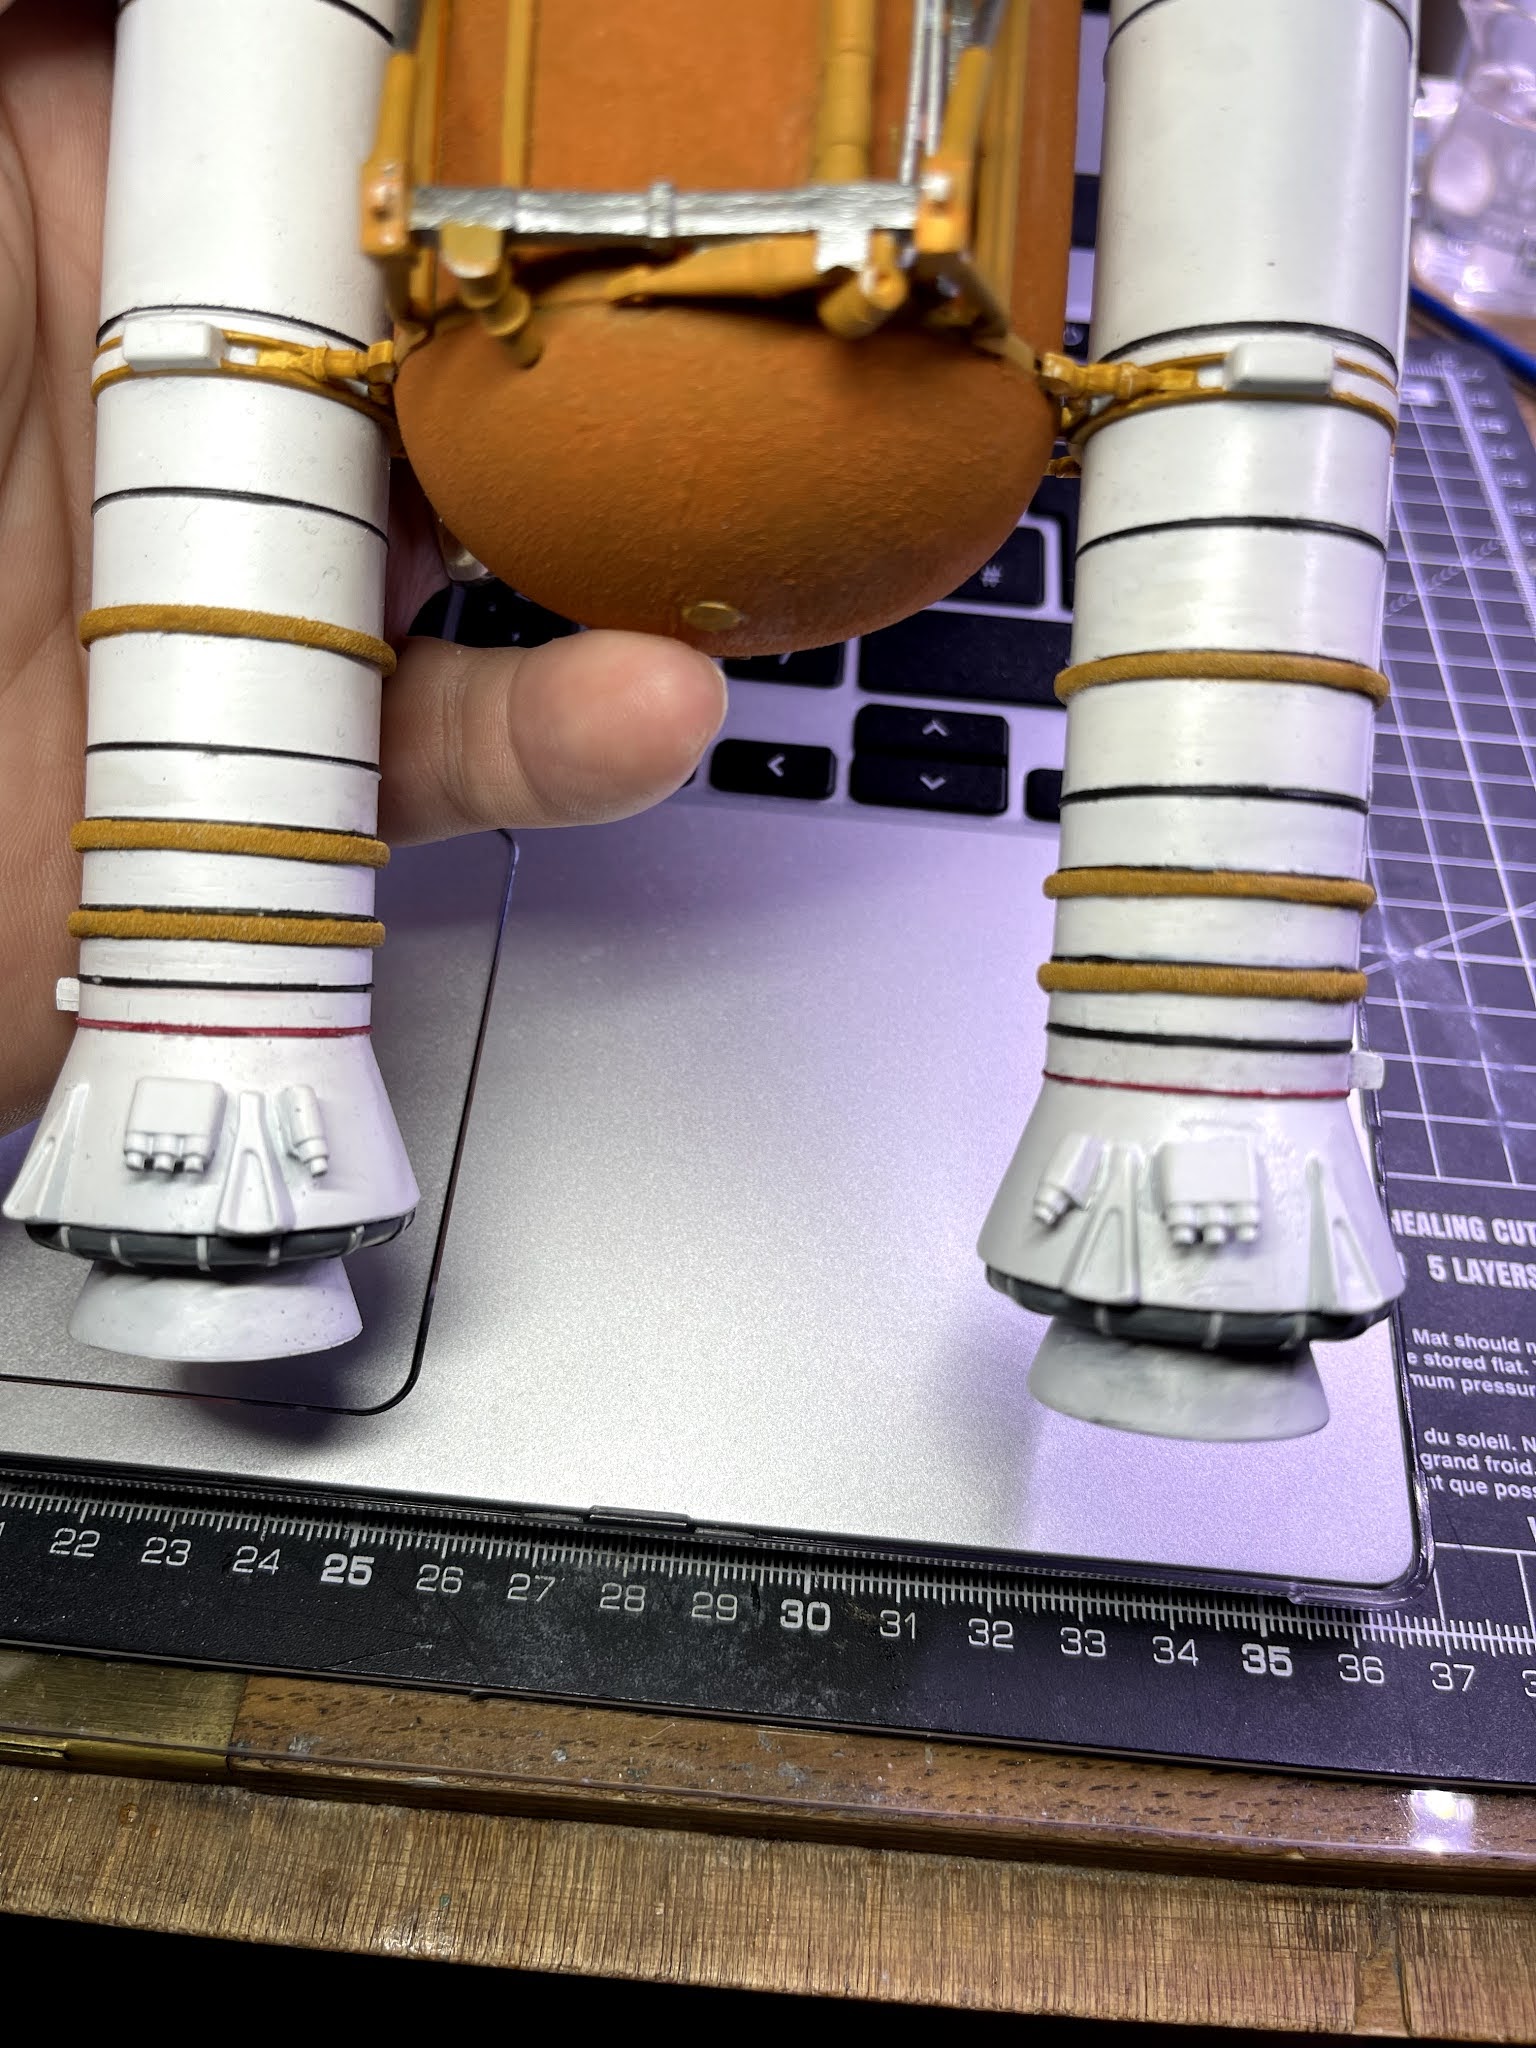
The lower half of the hull was filled and sanded in much the same way as the tank; filed, filled, sanded, primed and filled/primed again. Fortunately it doesn't need the undercarriage open (poorly detailed undercarriage supplied) so a really good finish is achievable. This is important as well for anyone considering buying and applying the decal set I have previously mentioned as well. The rocket motors for the shuttle are also something to be desired in terms of detail and these are supplied in the upgrade resin kit that I have already mentioned. I am lucky though that I found a set of rocket motors that a very generous model maker had uploaded to Thingiverse (if your not aware, its a 3D printing website where designers upload their files for people to download and print for free). I am fortunate as a well to own both an FDM and SLA 3D printer so I opted to print these in resin on my SLA printer. The difference between the kit parts and the printed parts are night and day and I will be eternally grateful for the designer for these great items. I have included a photo of the parts for you to see the difference yourself.

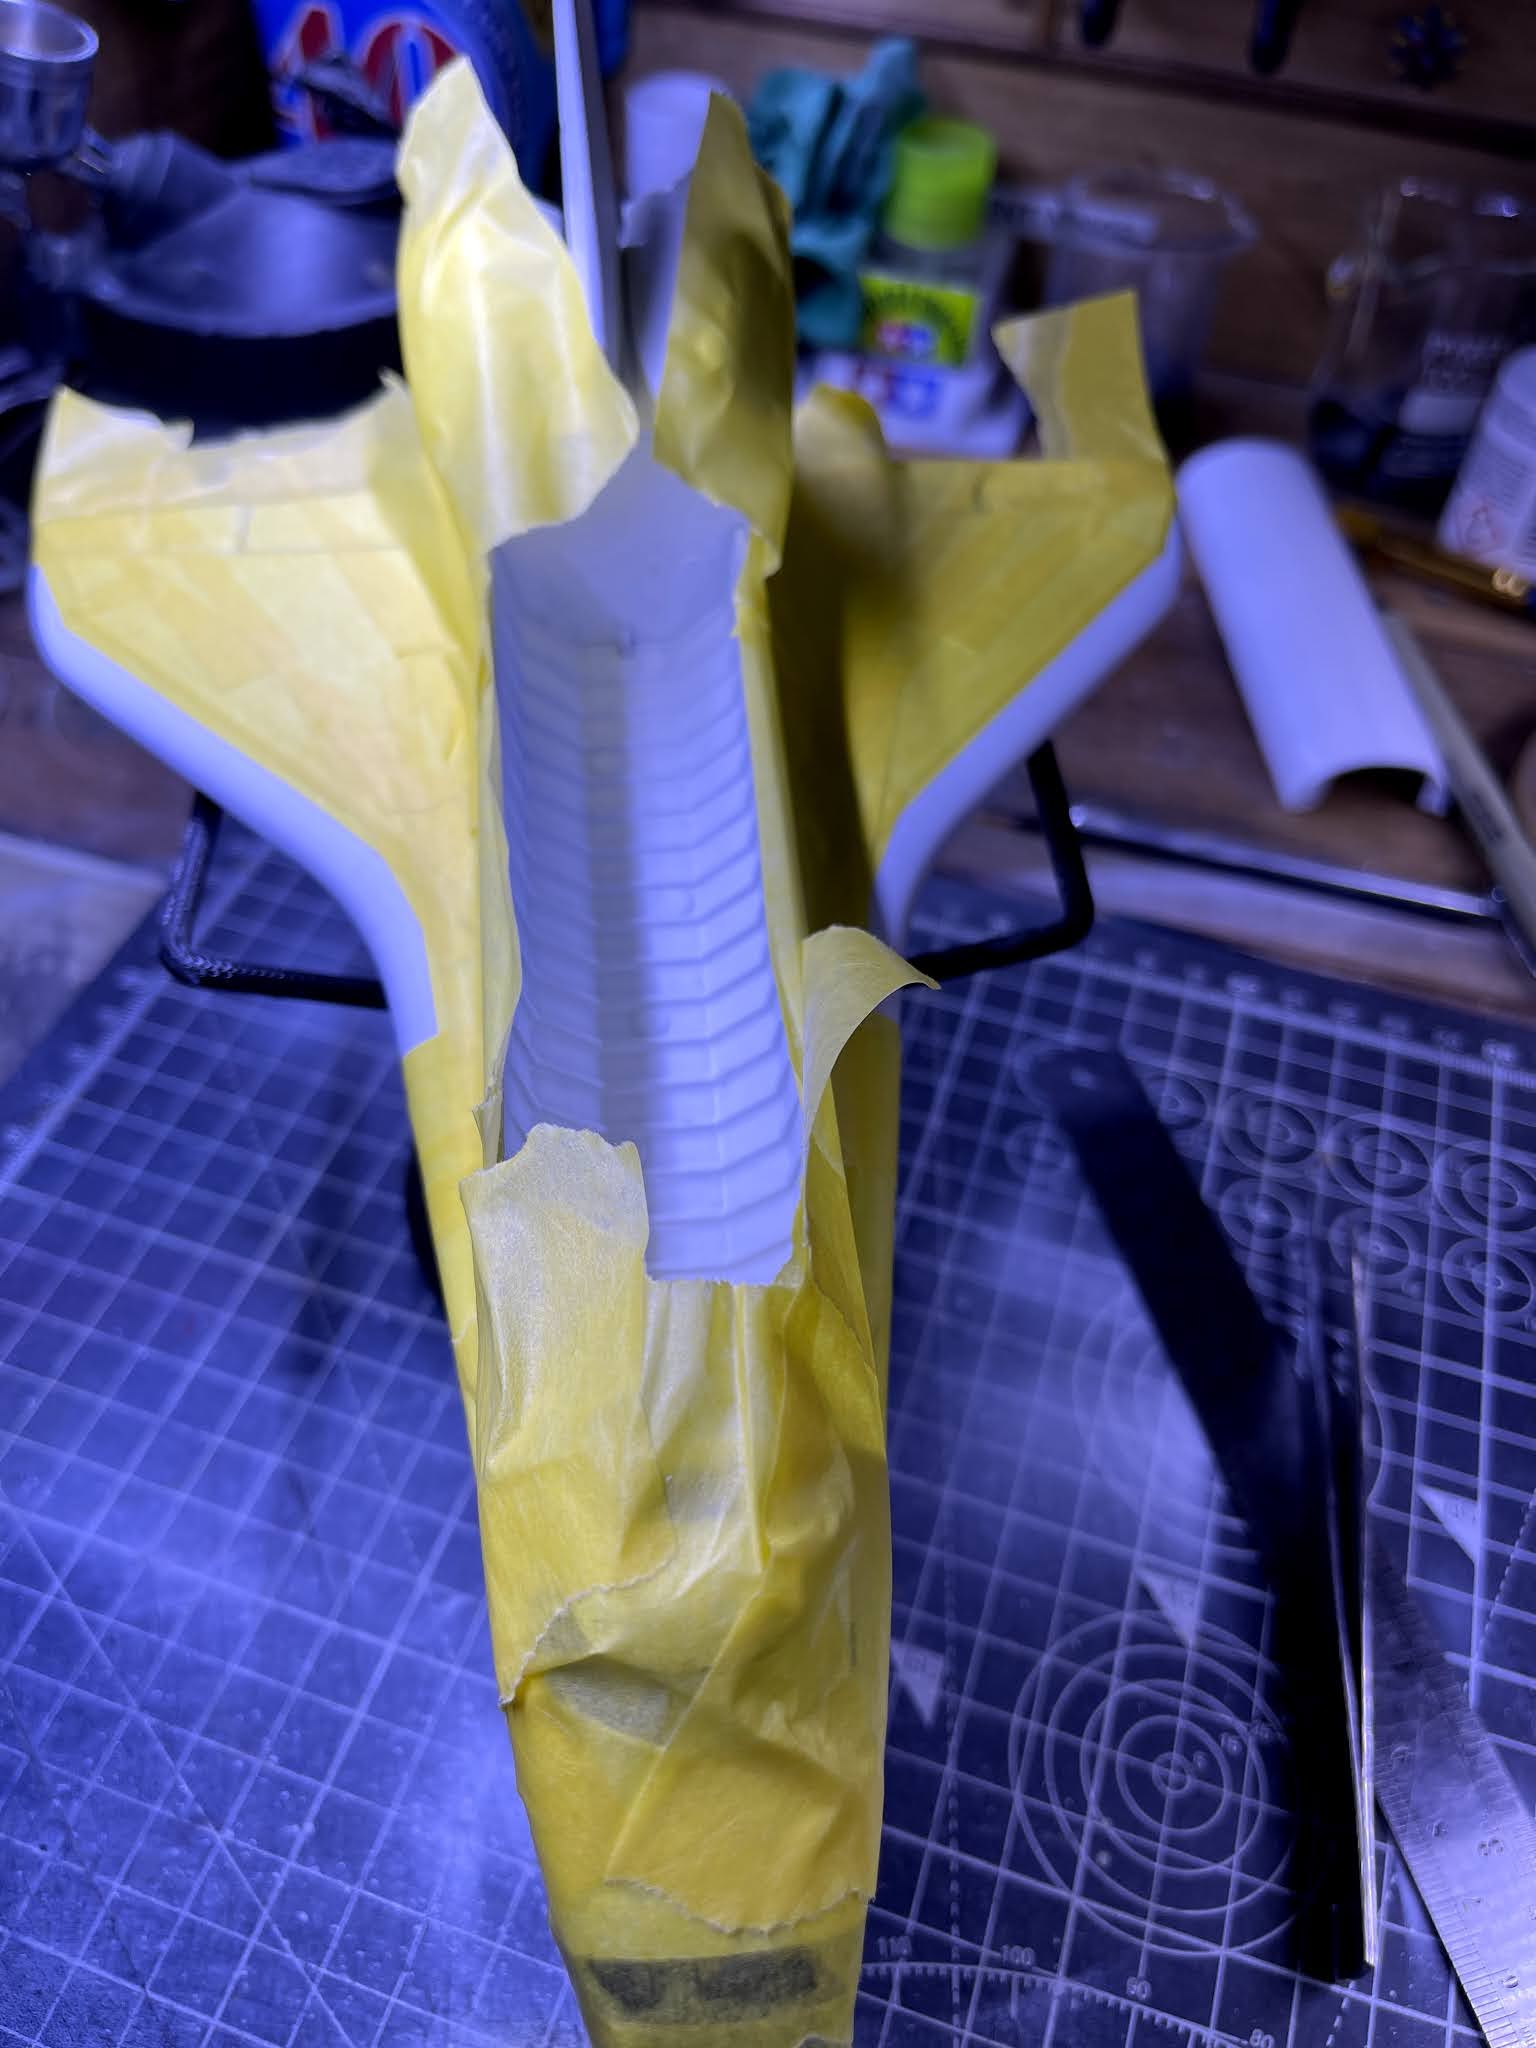
The shuttle doors have also presented a significant problem in terms of fit (no surprise there) but a simple fill with standard putty would not really produce a good result because these still need to show as a separate item to the fuselage of the shuttle. To solve this I glued various thicknesses of styrene sheet along the edges where the gaps were too large. These new edges were then carefully sanded down to give a good uniform fit against the fuselage. I also used deluxe materials perfect plastic putty for the seam lines along the upper wing/body joint. This I have to say is just about the best filler I have yet to use. I am in the process of creating a review section of my website that deals solely with reviews of model making tools and materials that I have bought and will write up a complete review of this product very soon.


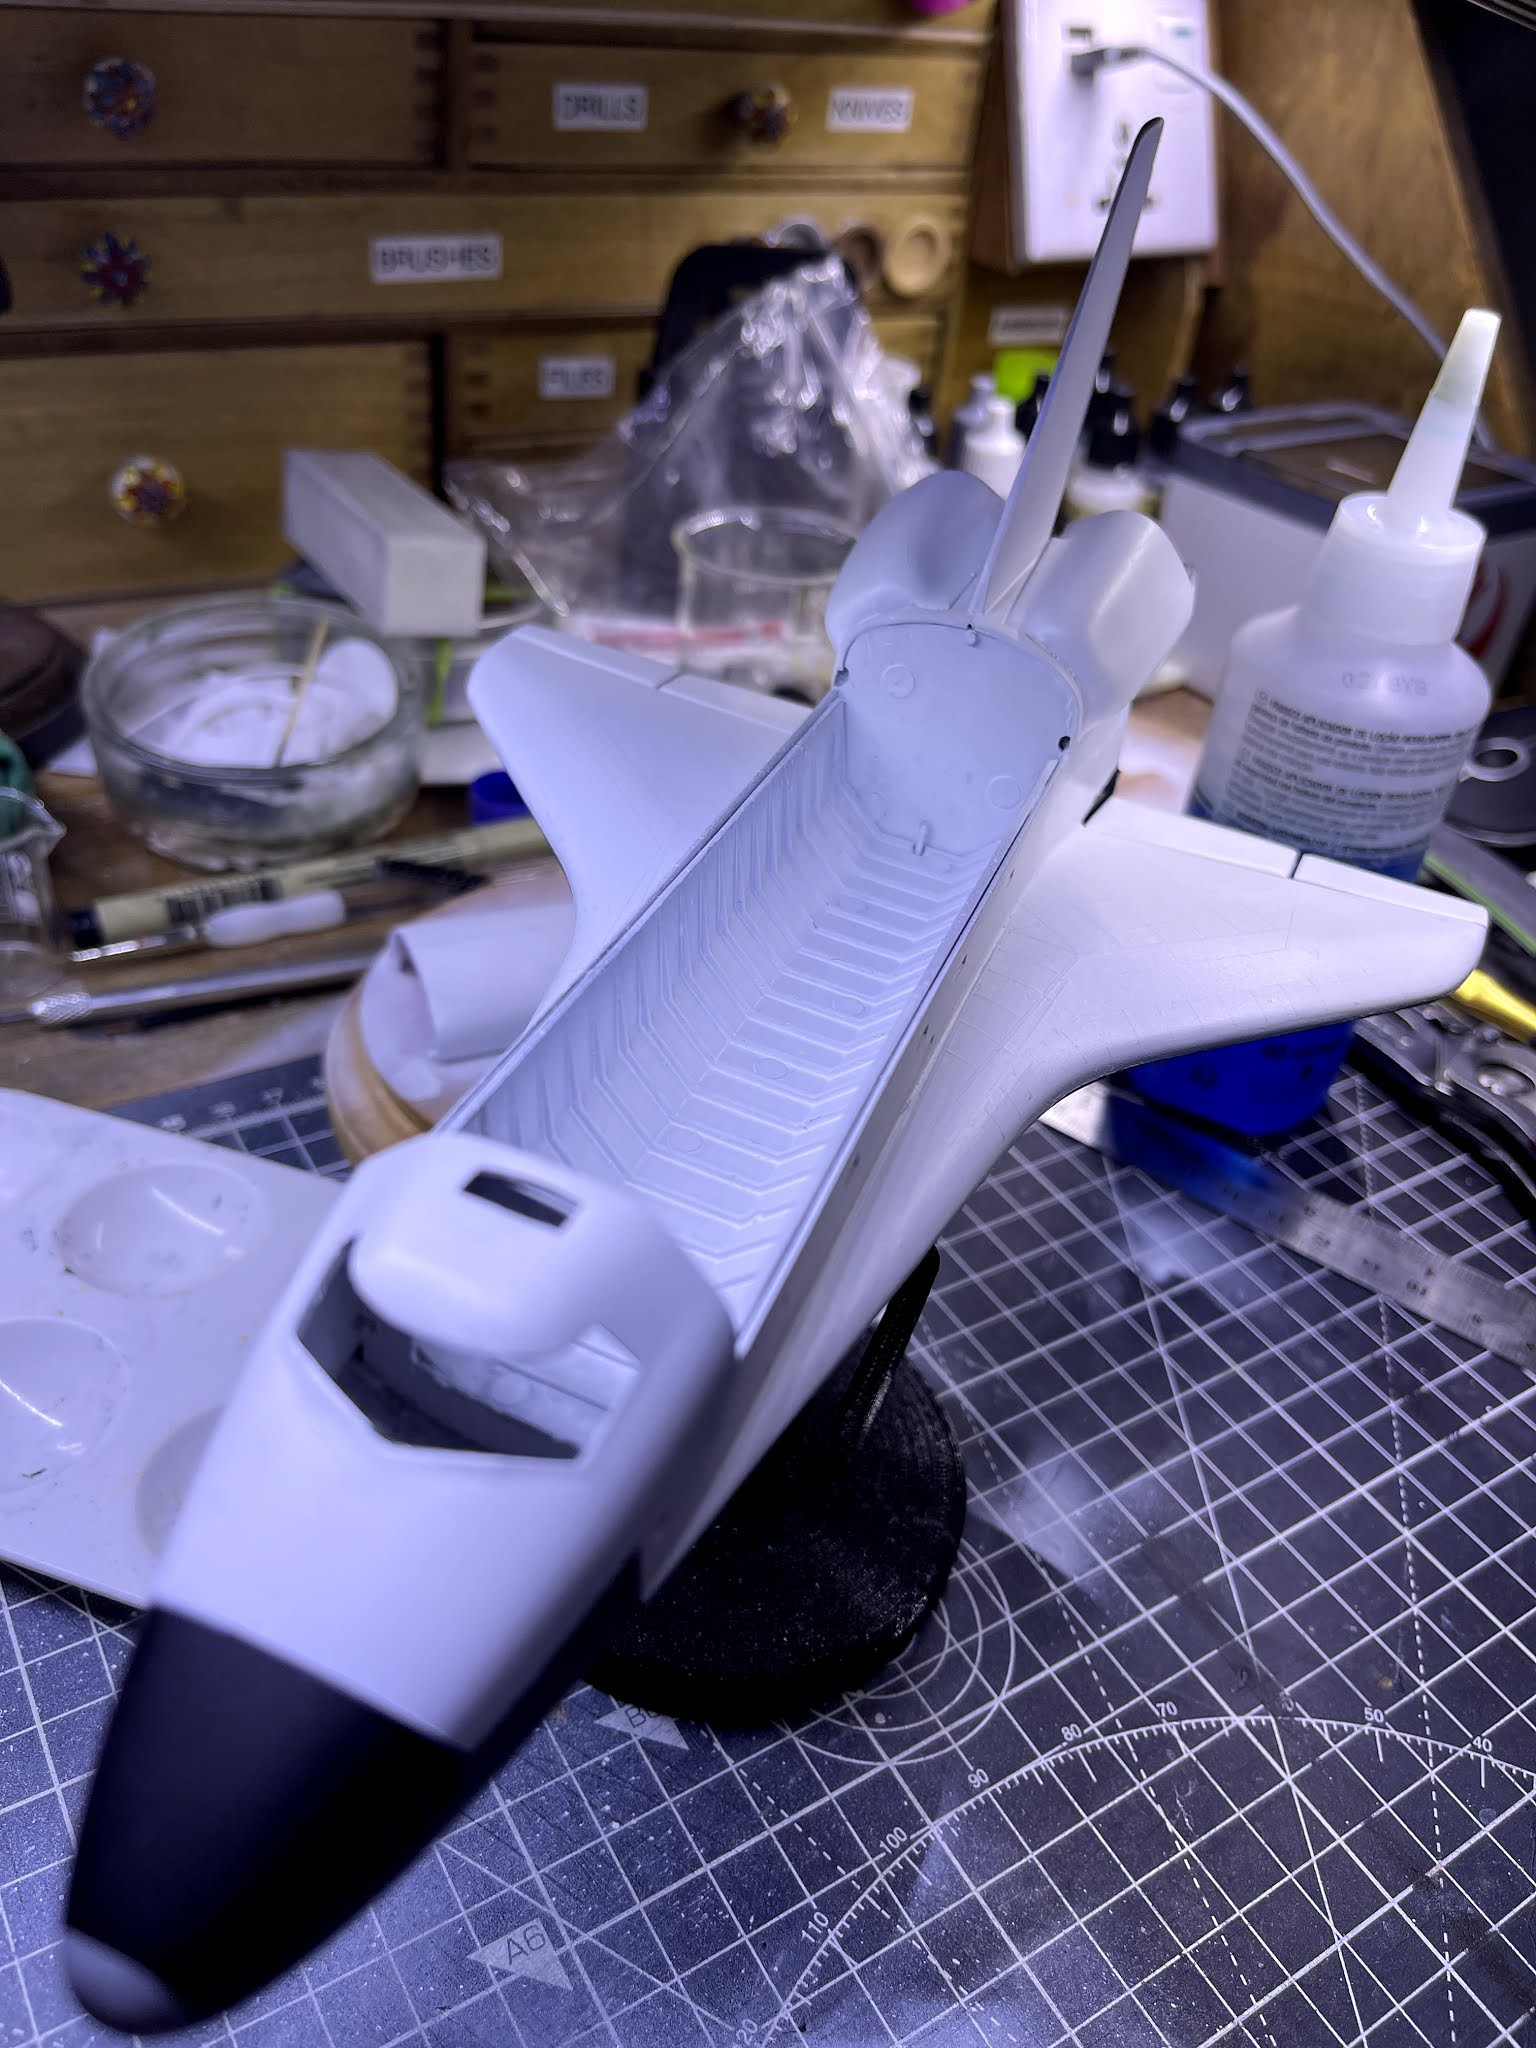
One job that I have been aware of from the point that I initially glued together the fuselage halves is the upper cockpit panel that meets the clear glass panel. The fit is obviously terrible and I spent a little time trying to come up with the best solution to remedy this. I have opted with adding some plastic card and filing it to match the shape (as done for the bay doors) as the best solution. In addition I have also drilled the manoeuvring thrusters and slightly modified the rear control surface mounts to closer match the actual shuttle:


After fitting the rear control surfaces I also did some additional filling work on the underside of the shuttle. just to get rid of any additional imperfections that you tend to notice as you live the model for a while. For the moment all of the required work on the underside is complete and ready for another coat of Vallejo model air dark grey.


The upper surface white has been a complete nightmare for me if I'm honest and for once in this project its not the model to blame! The Vallejo model air white colour caused me no end of issues. If your a regular reader of my website then you probably already know how much of a fan I am of Vallejo acrylics; however the white continually spat, run and dried prematurely in the airbrush nozzle etc! I did consider operator error or perhaps an issue with my airbrush but I immediately filled the airbrush with a different colour and it flowed beautifully (mental note not to make anything else that's white!) I found that I had to gently rub down the imperfections between coats in the hope that I would end up with a presentable surface finish that I could eventually coat in a protective coat of varnish:


The Solid Rocket Boosters (SRB)
The boosters are OK in terms of assembly with a little filling required in comparison to the rest of the kit. There are some detail issues in terms of the nose cone and exhaust for these and again these are addressed in the upgrade kit available. I have a few simple detail ideas for these and hopefully it will result in a pleasing enhancement to the model. Here's some images of initial assembly:


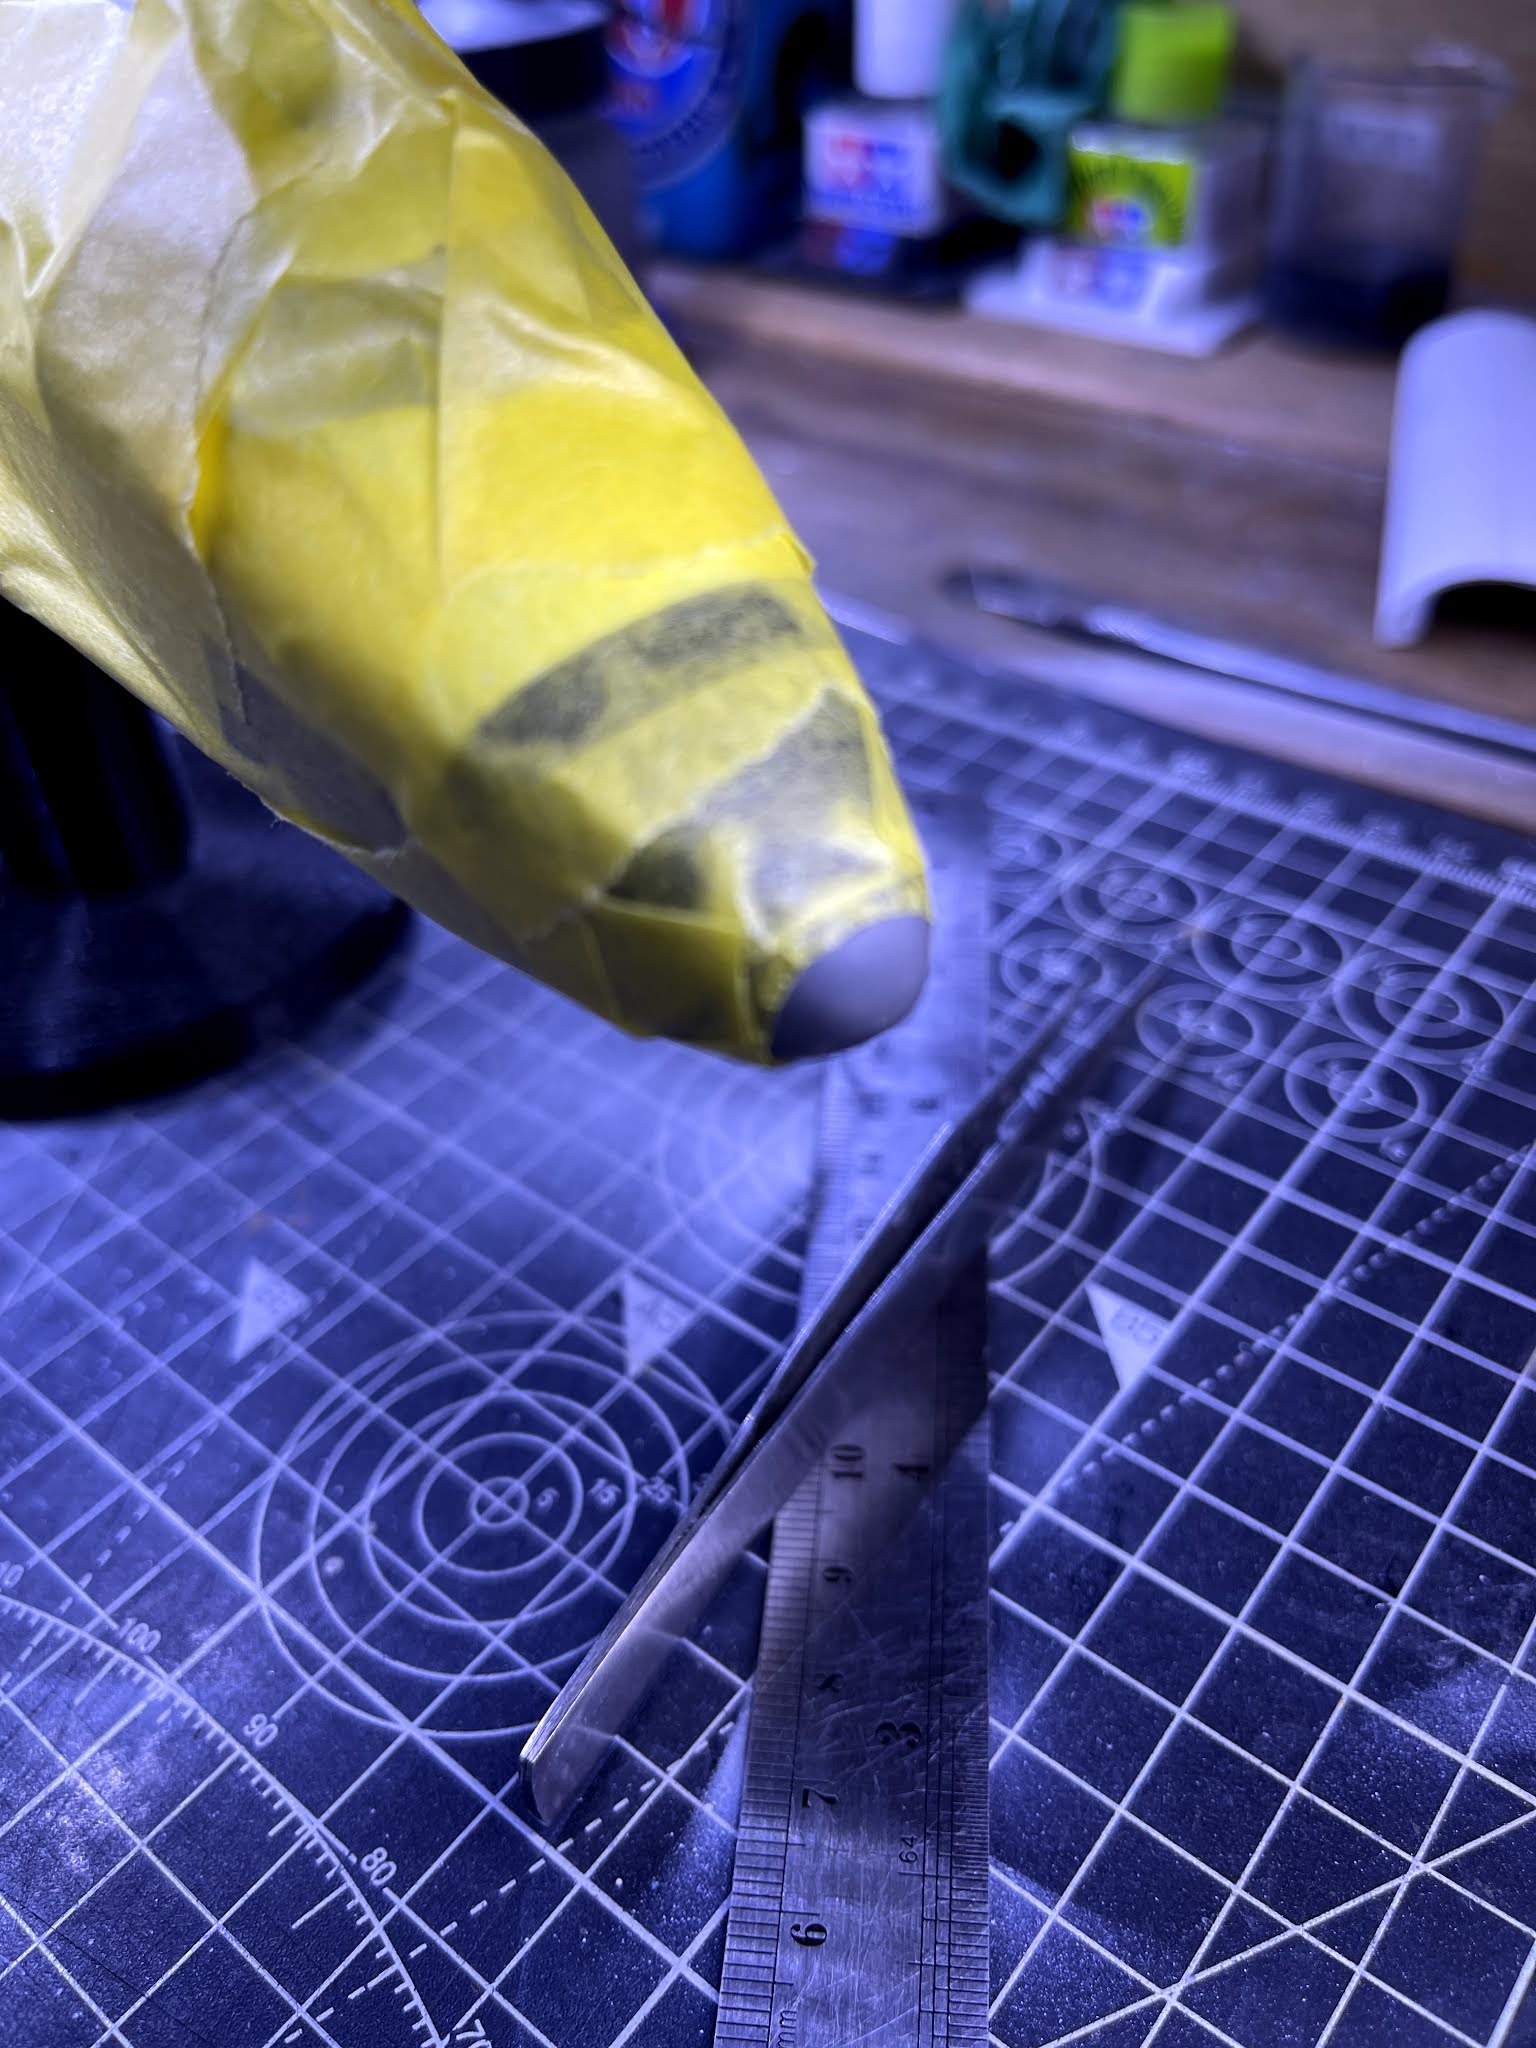
For the nose I found as many reference images as I possibly could and then set about marking up a pattern on some of the thinnest styrene sheet that I had in the spares box. I then carefully cut out the pattern by hand with a very sharp blade and glued to the circumference at the top of the rocket. What followed was a coat of primer followed by filing/cutting/filling followed by more primer until I was left with a pair of detailed nose cones for a few pence in plastic additions. I also added some strips up the nose towards the point as these are completely missing from the Revel kit. To add to the detail I used a small punch that I acquired in a closing down sale a few years ago from a local art shop to provide some more detail missing from the original design. Again I will stress that in comparison to the detail available with the resin upgrade kit there is no comparison however, when you consider cost there is also a world of difference!


Just as I thought the boosters were finally complete I noticed a major cock-up on my part!! Where I had modified the Revell part at the bottom of the boosters; I had placed them on exactly the same side for each booster without realising that they needed to be polar opposites to one another!! It was only when I dry assembled the boosters to the main tank that I realised my mistake. This meant that I had to remove the modified parts; re-glue in the new position and then rub down and re-spray the part where I had removed from the booster. (Mistake on the left & re-worked part on the right).

Final Assembly and wall mount manufacture.

Before I marry the parts together permanently I have the decals to contend with. I have read mixed reviews of these decals so I have a little bit of trepidation about applying them. I am going to try and use the VMS decal setting and softening solution to aid in this process. This is another new product that I have not used before as I have always used micro sol and micro set. The VMS versions are about half the price of the micro solutions so I figure its worth a go based on my experiences with VMS products so far:

The products are without question comparable to other decal fixers and hardeners that I have used before but they do leave a sticky surface on the model which has to be cleaned with clean water on a cotton bud after the decals have hardened. This obviously has to be carefully done to avoid damaging the decals that you have just placed on the model. I found that waiting a few hours for the decal to fully cure offers the best chances of success.
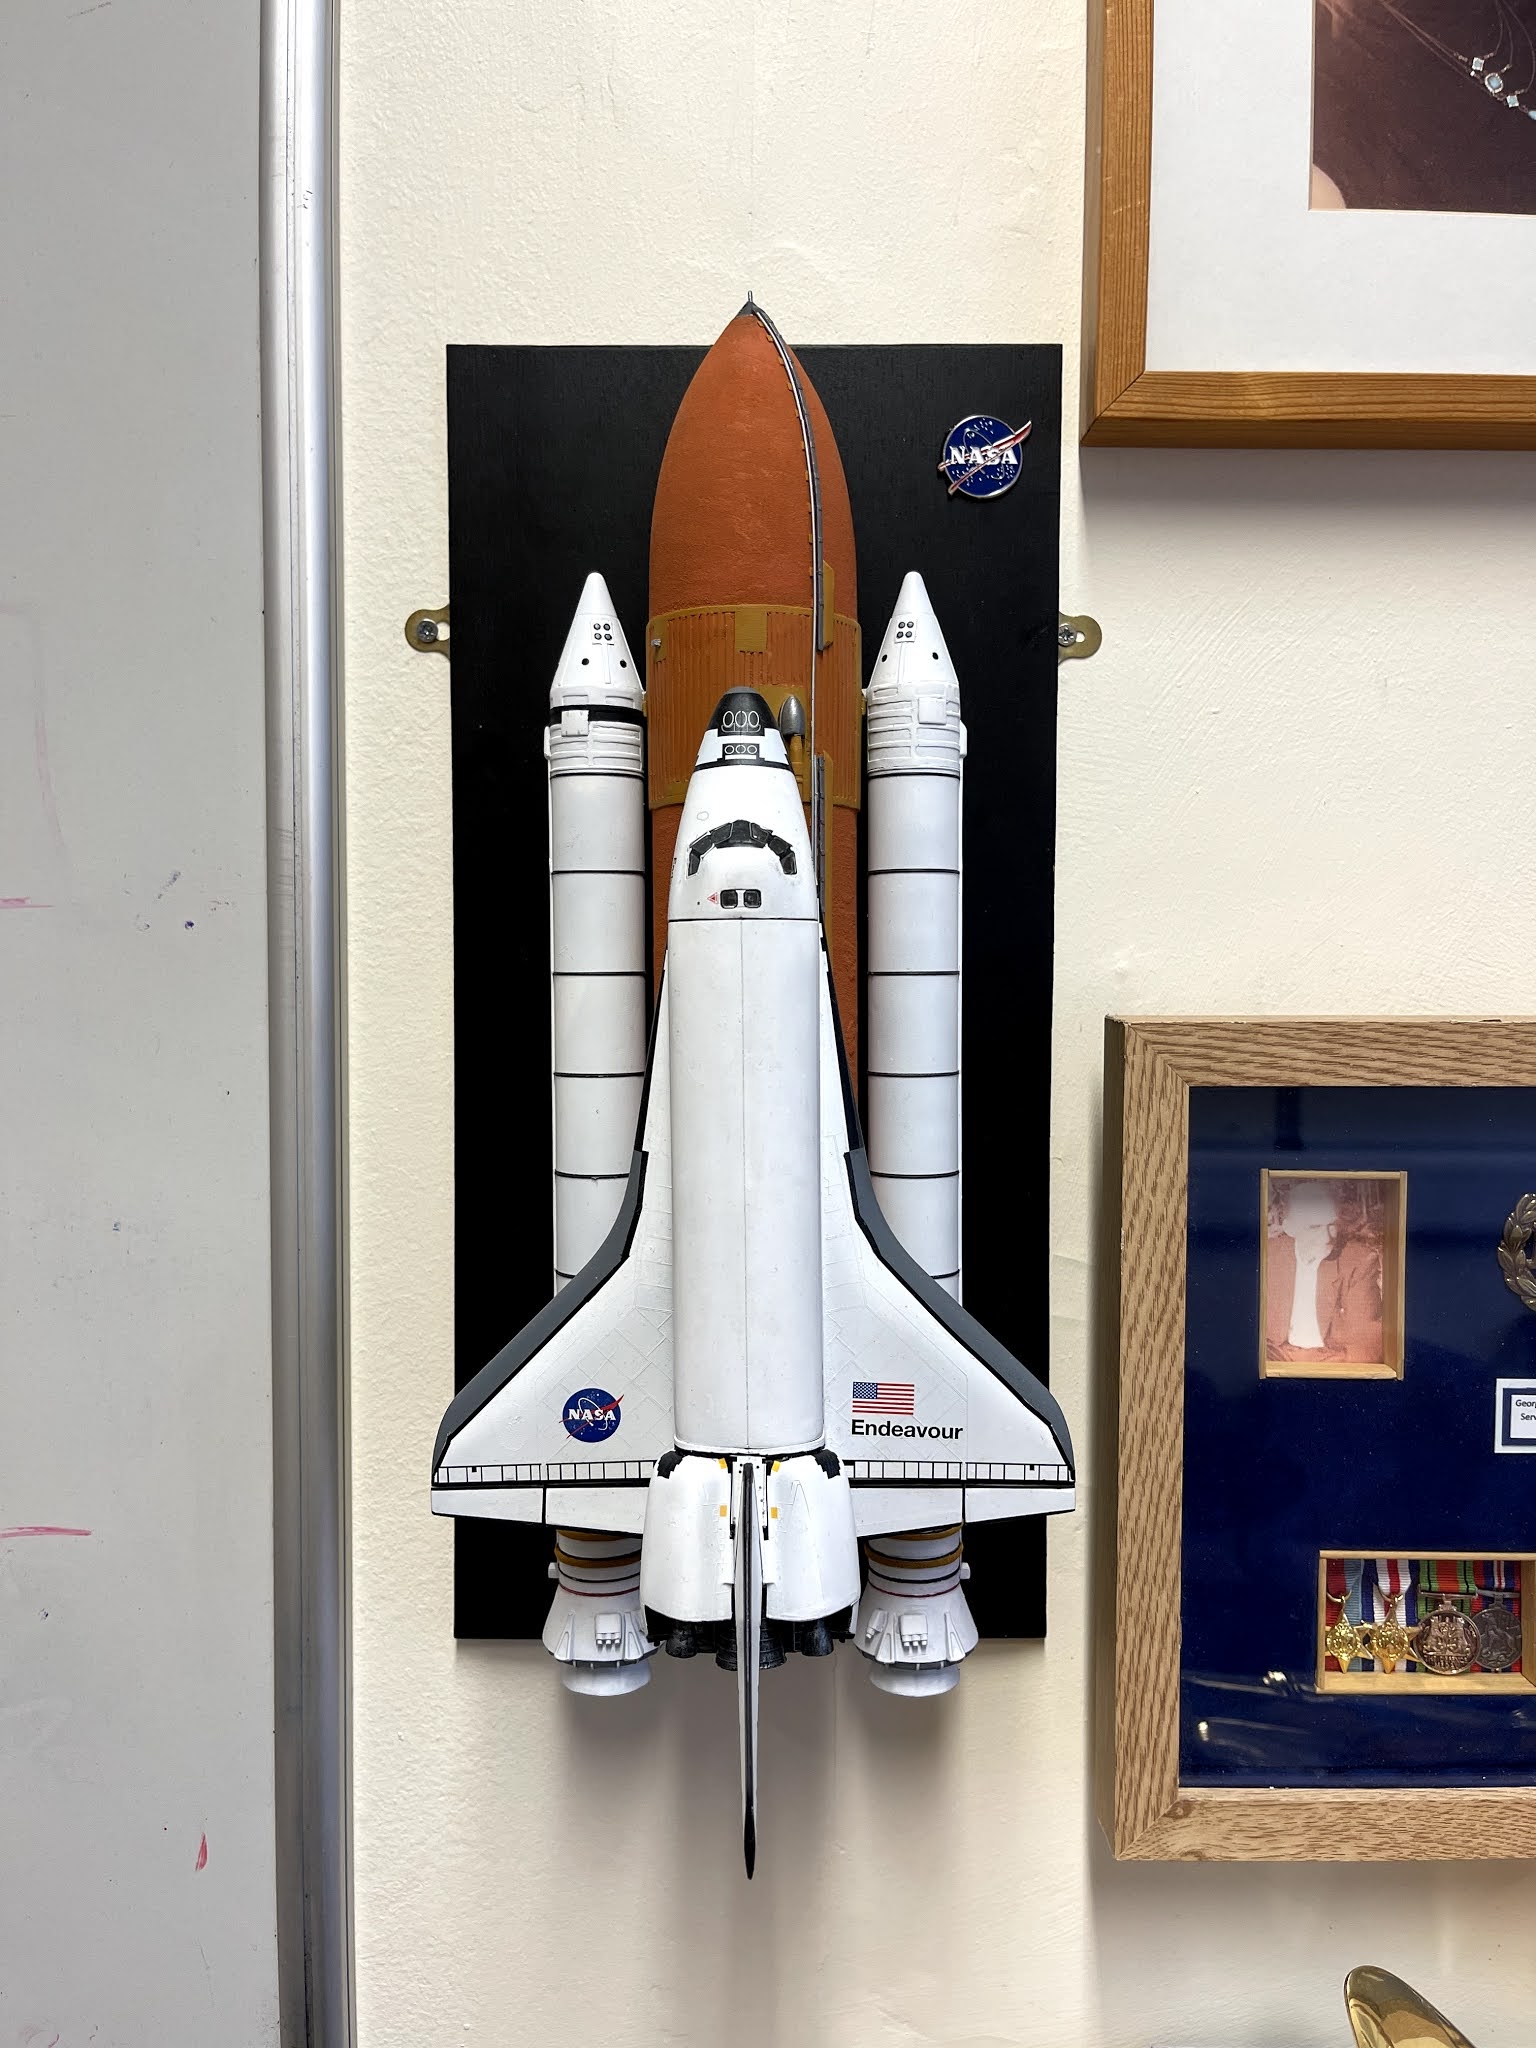
The Revell decals are certainly not the best quality that I have used but they are certainly not the worst. I am also really happy that there is no noticeable silvering after application. This may be of course to the VMS products and not the decals. In either case I am really happy with the finish of the decals and can only assume that I either have a new batch model or the decals are not as old as some of the review decals that others have used and had problems with in the past. (I'm due a little luck with this model and I'll take it whenever it presents itself!). From the following photos you will see that the shuttle Endeavour was chosen from the supplied decal set. Full credit for the choice goes to my wife who stepped in after seeing me dither on the choice of names for the shuttle. I will also go on record right now and say that I will not be building the other three any time in the near future!!!


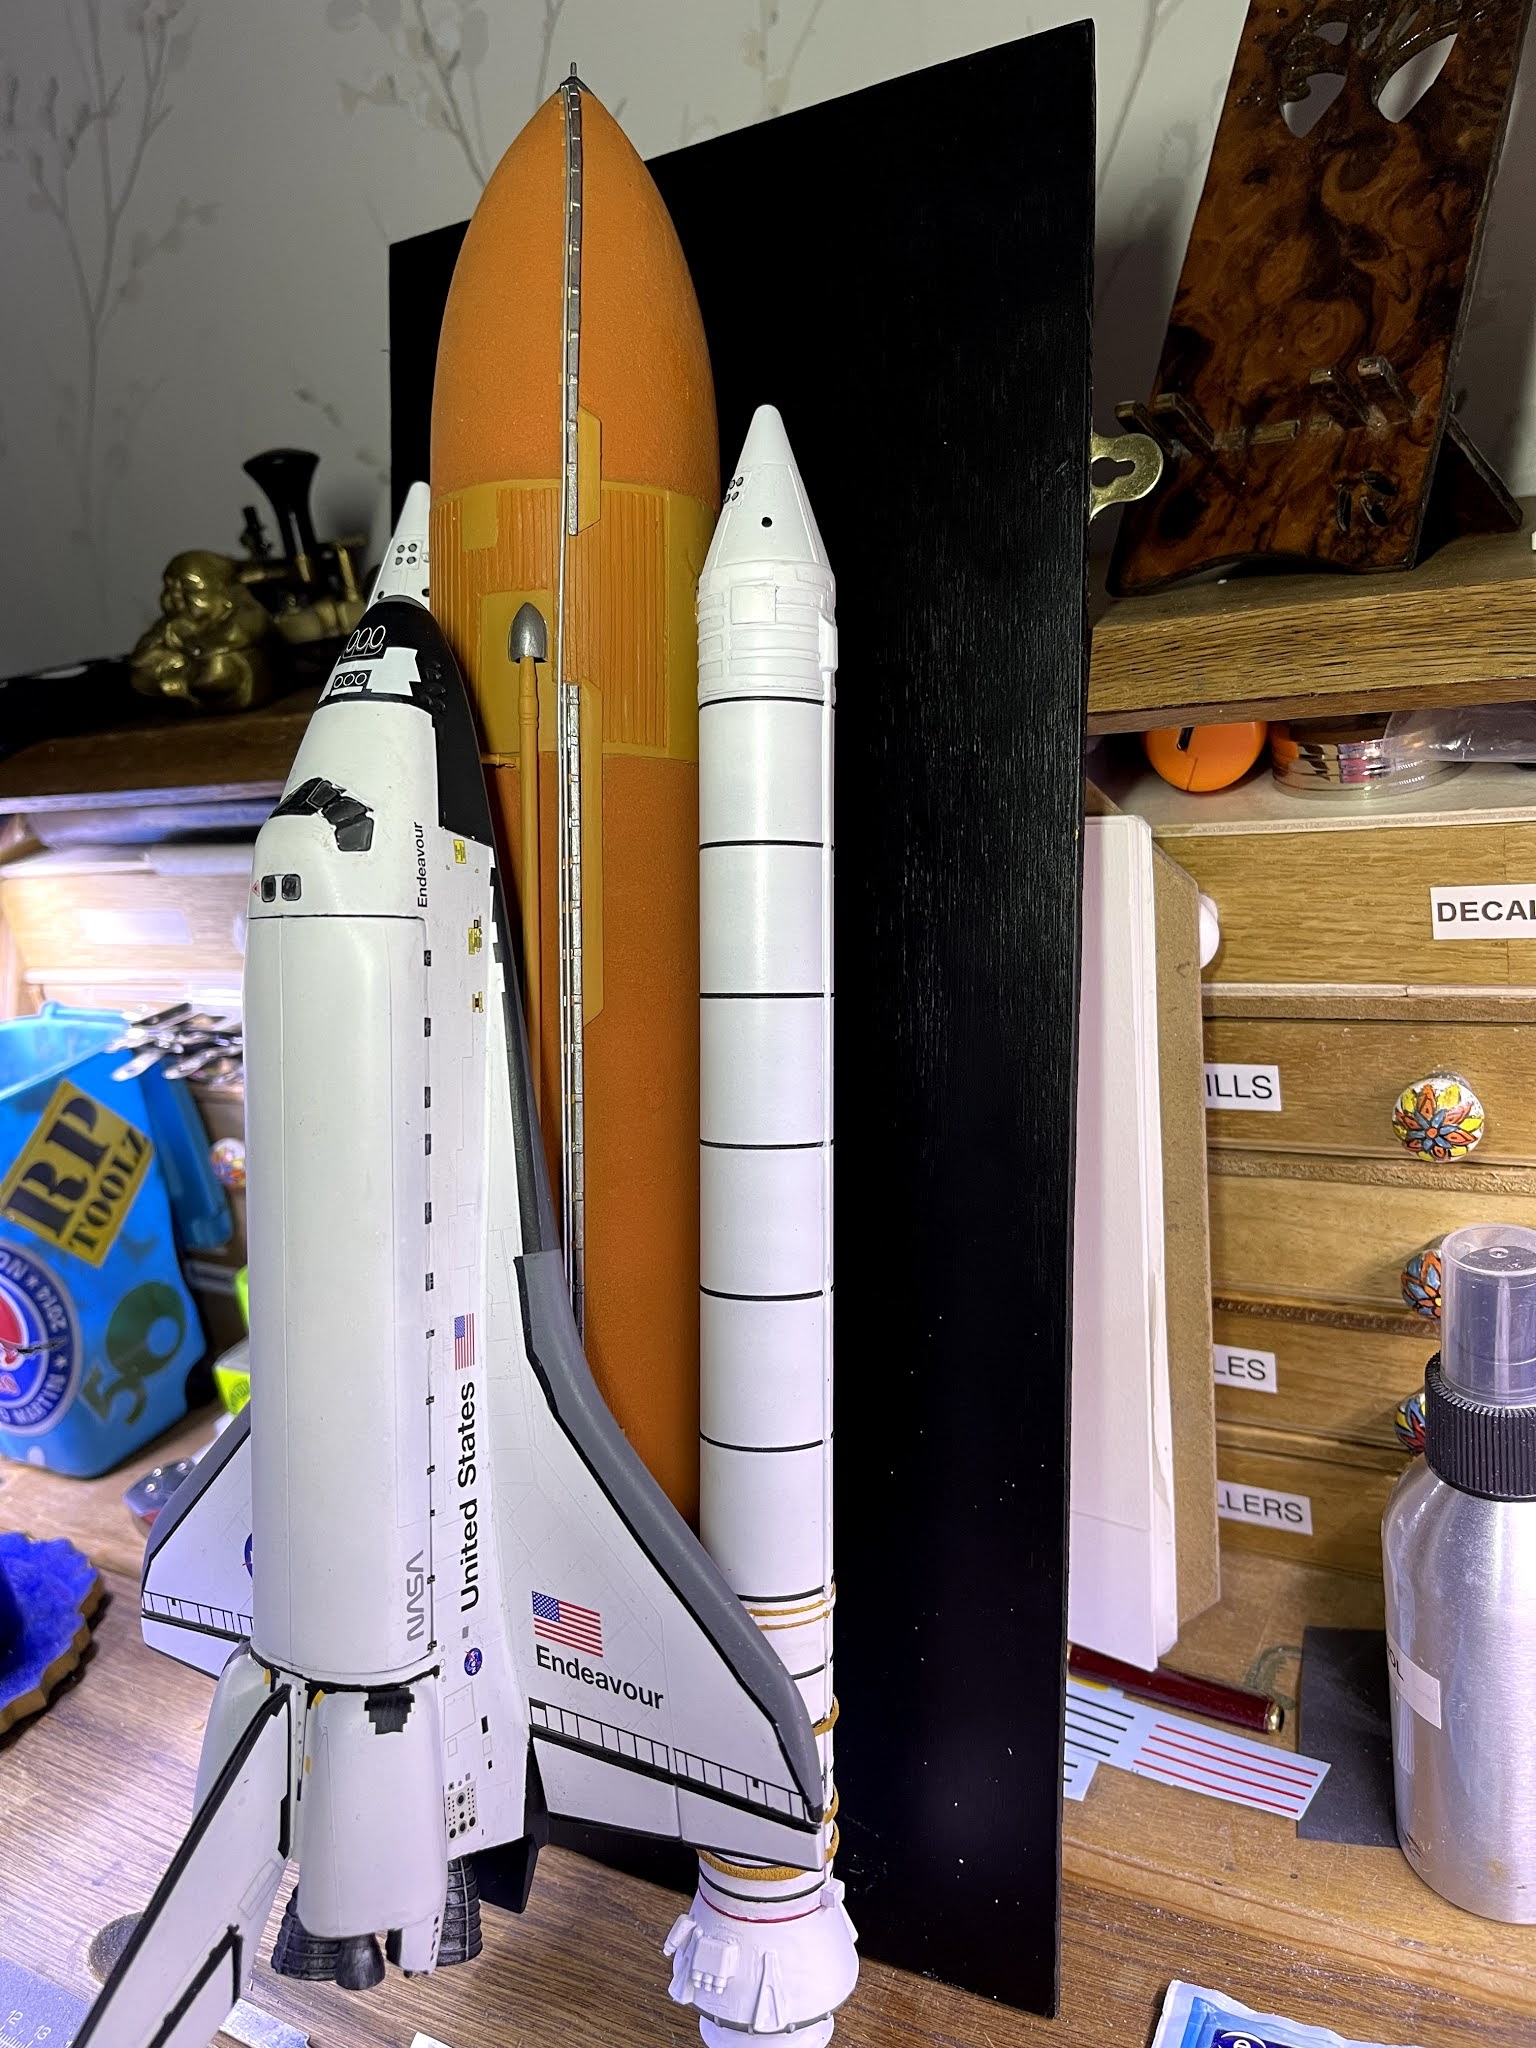
For the base board I had initially thought about using some thin MDF as I had done for the Saturn rocket that will partner this build. Unfortunately I realised that I had run out of this but had some very thin ply board that should do the trick. To simulate the smooth appearance of the MDF I first sprayed the board in high build primer and then wet sanded the surface smooth. An application of grey standard primer was then applied followed by satin black to replicate the Saturn back board finish. On the back of the board I glued on two picture hanging mounts with two part epoxy resin as the screw mounts would be useless because the board was so thin. The epoxy glue did provide however a really solid mount for the picture mounts and I am really happy with the finished solution. To mount the shuttle I had the painful job of drilling two holes in the main tank to accommodate the square clear perspex bar that I had decided to use as the stand off mounts for the shuttle from the mounting board. It was then a simple case of gluing the bar into the shuttle tank and then drilling corresponding holes in the mount board to accommodate the bars and gluing them into the board. That its folks!! All complete! Normally I would weather the model before saying its complete however this one is made to resemble a manufacturers style of display model in the same way the Saturn rocket that I built a few years ago was. I've taken some initial shots for this page and will update with some mounted shots when I finally get a chance to return to my office (still in the grip of COVID semi-lock-down here in sunny Wales). Until then I woulld love to here your comments as always:


And hers some photo's of the finished shuttle (including an enamel NASA pin logo) on my office wall

Superb job, worth all the hassle and extra work.
ReplyDeleteThanks Matt. I almost lost the plot about half way through but I'm happy I stuck with it!
Delete