Introduction
I decided to buy this model using some birthday cash from Ali Express in 2018. This is the first time I'd really used the web site and I've seen a few places selling the MAIM Front 46 models; so I thought "why not". At the point of ordering I had it in my mind to use a set of figures in my stash from Ian Mcque entitled deckhands. There's something about the look of the figures and that of the aircraft that seem to fit together in my mind.
The kits.


The kits are both resin casts and the difference in quality is night and day! The figures are absolutely fantastic where as the Maim kit looks OK prior to assembly with no air bubbles etc; however when closely examining the pieces prior to assembly; parts fit and poor casting soon became an issue.


and that is about as far as I got with the kit! I applied some paint which went horribly wrong, the finish was crap, the colour choice was terrible and I just lost all interest in the kit. It was put away in the "attic stash" and forgotten about. Fast forward 4 years and after a long period of a lack of enthusiasm for anything model related, I found myself scrolling my way through my twitter feed and I came across a post by Ian McCue showing a recent sketch of his. Around 2 hours later after surfing the web for images of his work to familiarise myself with it again (I've been a long time fan for a number of years) and other works similar to his and I found myself rummaging around the attic looking for this kit and the figures.
The new idea
I have it in my mind that rather than making this diminutive fighter the focus of a small dio; I would make it a part of a much larger wall hanging diorama! What the end result would look like, I have no idea but I know there will be a lot of scratch building involved throughout the whole process. One of the first items on my preparation list was going to be a few hours on the Thingiverse website for greeblies of any description. If you are unfamiliar with the word greeblies; its simply a word used to describe small interesting parts that when added to something like a scratch-built spaceship; help sell the idea that its a purposeful part of the ship and adds to the "feel" of the overall piece. I believe the term was first used in Industrial Light and Magic (ILM) when they started to scratch-build the ships for Star Wars a New Hope (I may be wrong but this is something I have always heard about the origins of greeblie). I have to give credit here to the wonderful designers who upload their work to thingiverse. I was literally spoilt for choice on what to use and after around 14 hours of printing and a half pint of resin, I was armed with a good amount of various parts, doors, panels, bottles, etc to use in my dio. I of course could not resist downloading the "universal greeblie"; a name coined for a specific part from a model kit by ILM. I increased the size of the greeblie before printing so it would be better suited to a 1/35 scale piece.
The next order of business was the strip of the old paint from the fighter using some cheap liquid oven cleaner in a plastic bag and leaving it eat away at the acrylic paint for an hour or so. A short wash off with some clean water and I'm left with a primed model ready for a new (and hopefully better) paint job:
The next order of business was the strip of the old paint from the fighter using some cheap liquid oven cleaner in a plastic bag and leaving it eat away at the acrylic paint for an hour or so. A short wash off with some clean water and I'm left with a primed model ready for a new (and hopefully better) paint job:


I normally spend a little time describing what my initial plan is going to be for the finishing and completion/display of the particular model that I am about to make. In this instance I don't really have a completed or formulated idea of the end result. I can however share with you what my initial thoughts are:
- A self-contained dio that tells a story as you view it
- A sci-fi model that's unusual in its appearance
- A wall mounted dio rather than an "on the shelf" as its not something you see often
- A model inspired from an original series of art works (in this case Ian Mccue and other similar artworks as I discover them on the internet)
- A model that's free of any plans or instructions
- Something scratch built using plastic card, 3D printing and my imagination (inspired by McCue)
As for the rest of the plan? I simply don't have one. I'll just keeping looking at his and others artwork for inspiration as I hit different roadblocks or problems that need solving.
The Diorama base is going to be based on a single sheet of A4 styrene sheet (because its the largest size that I have). The sheet was then glued to some light MDF to add strength and a little rigidity to hang on wall once completed. I then set about cutting and shaping various pieces of styrene sheet, rods, tubes and shapes to build a control tower of sorts, a landing pad and some platforms which I intend on building some interest around using greeblies and parts from the spares bin.


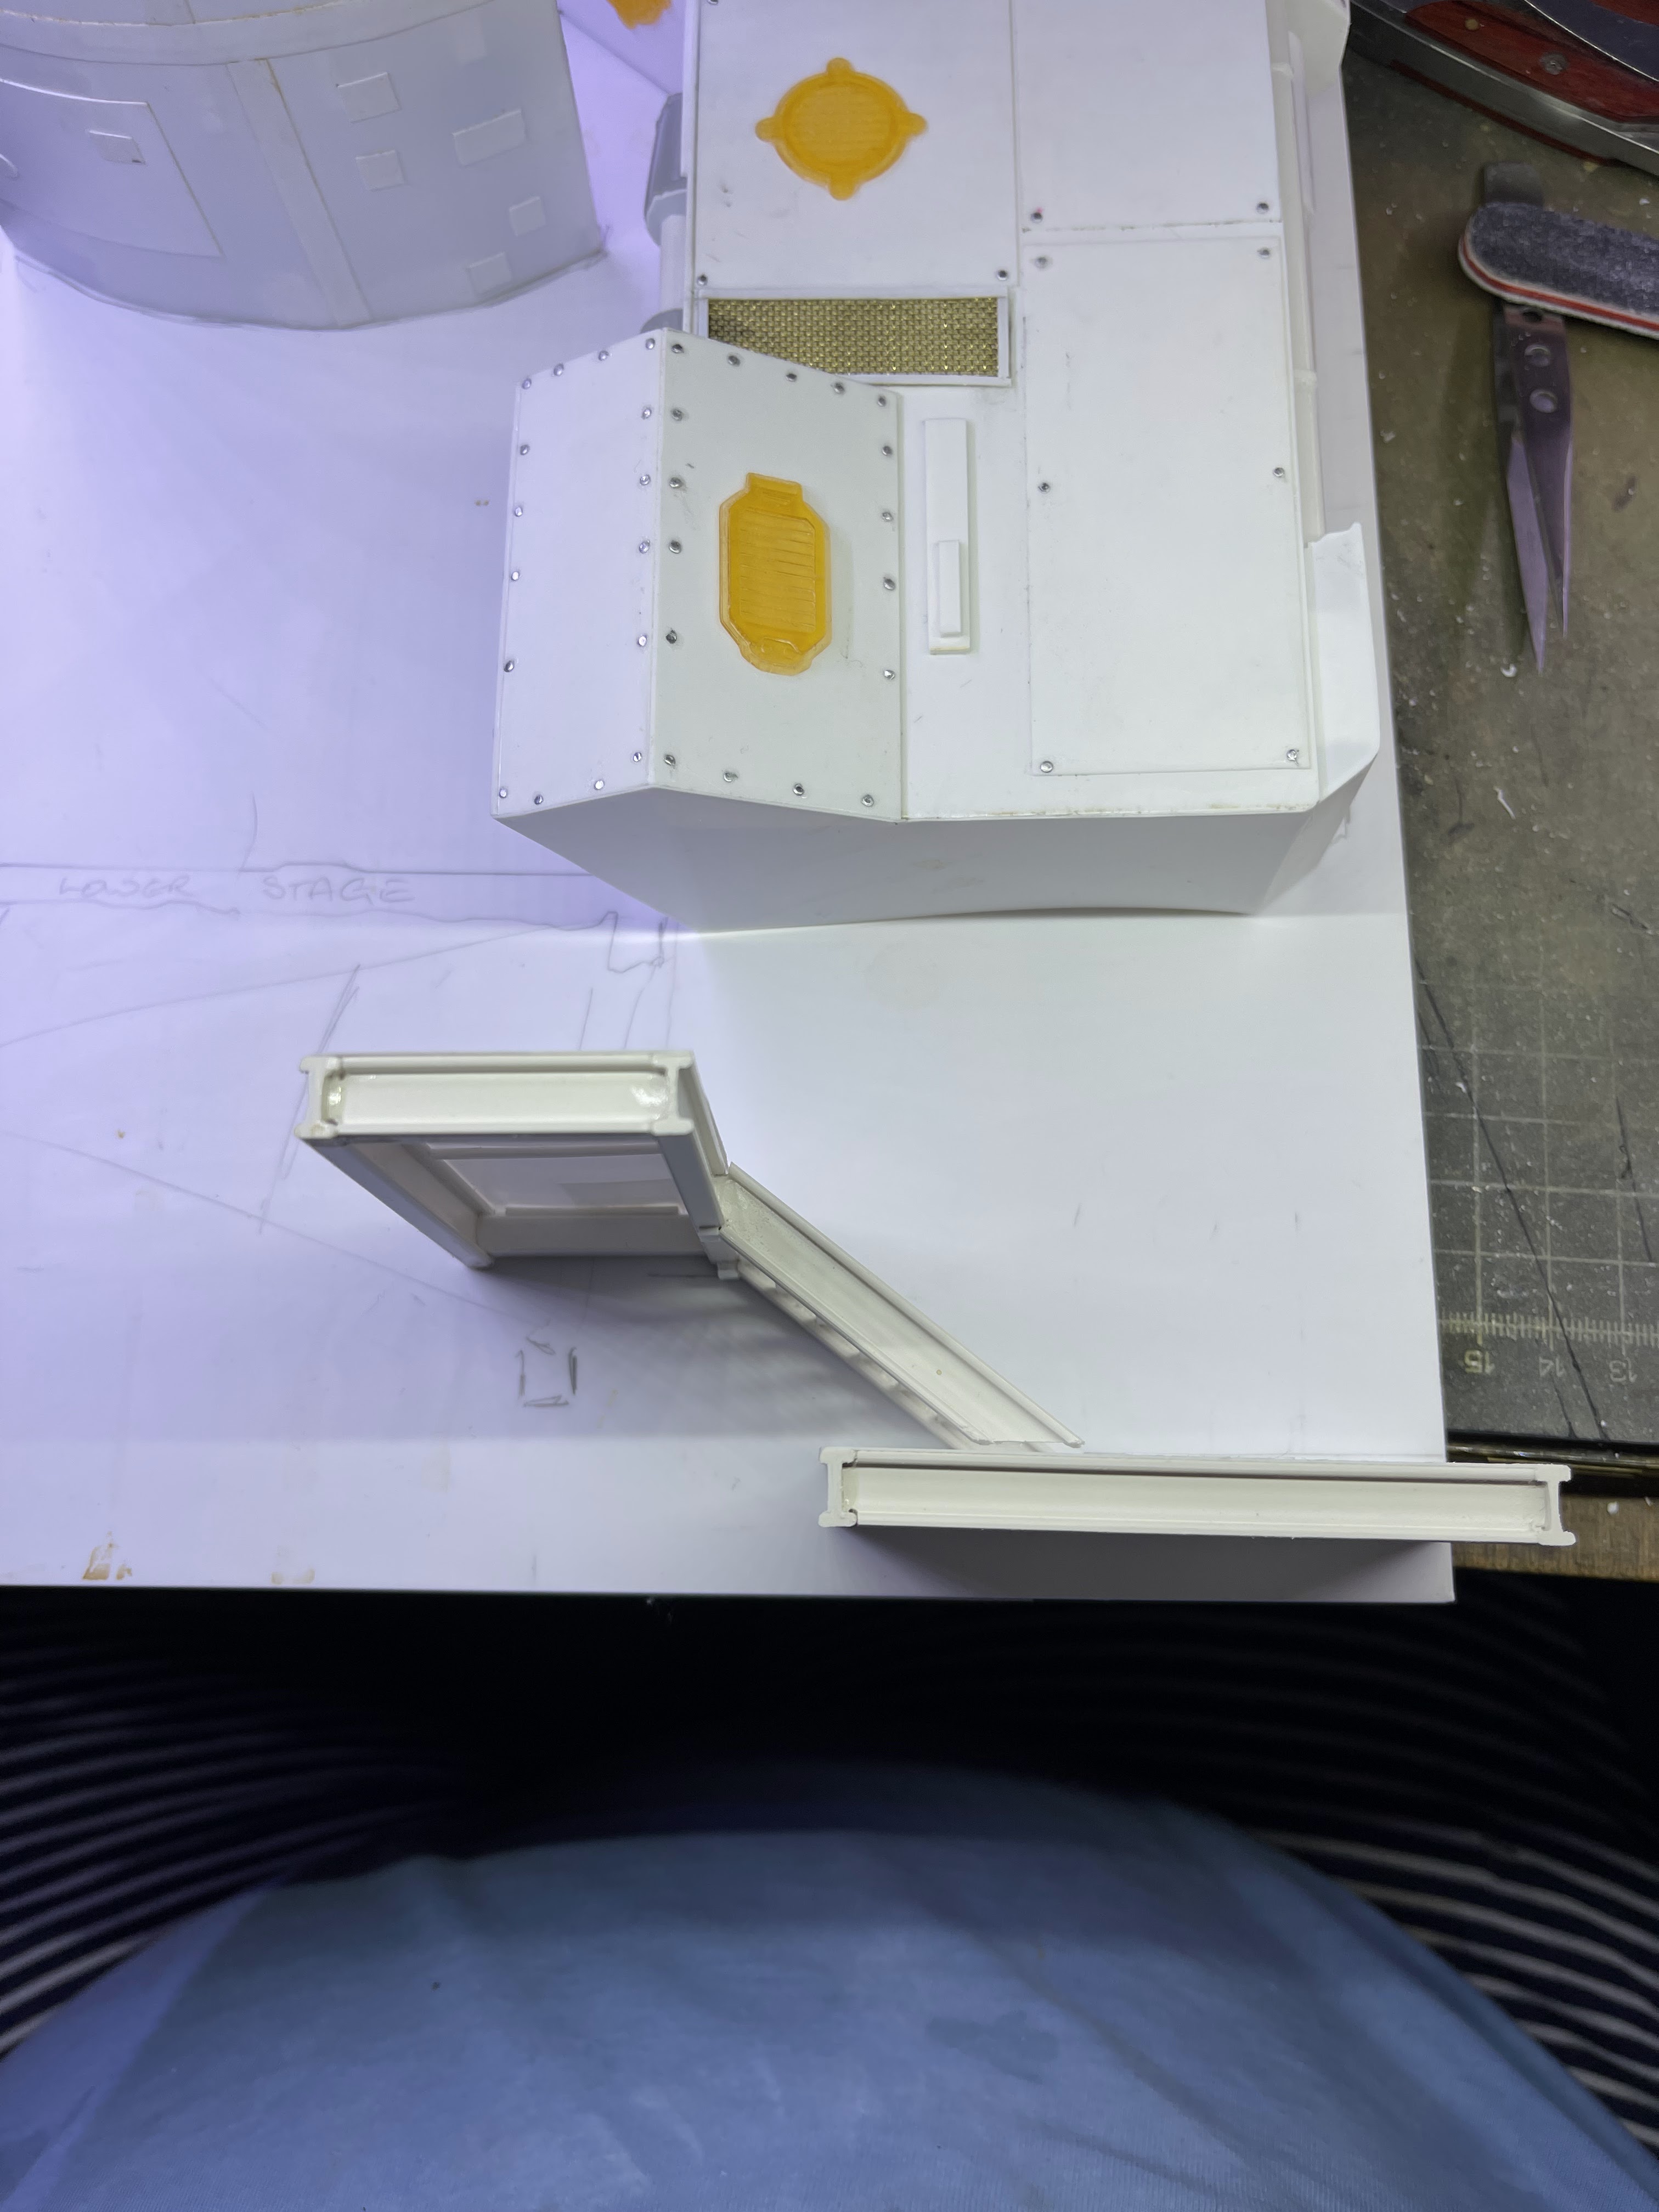
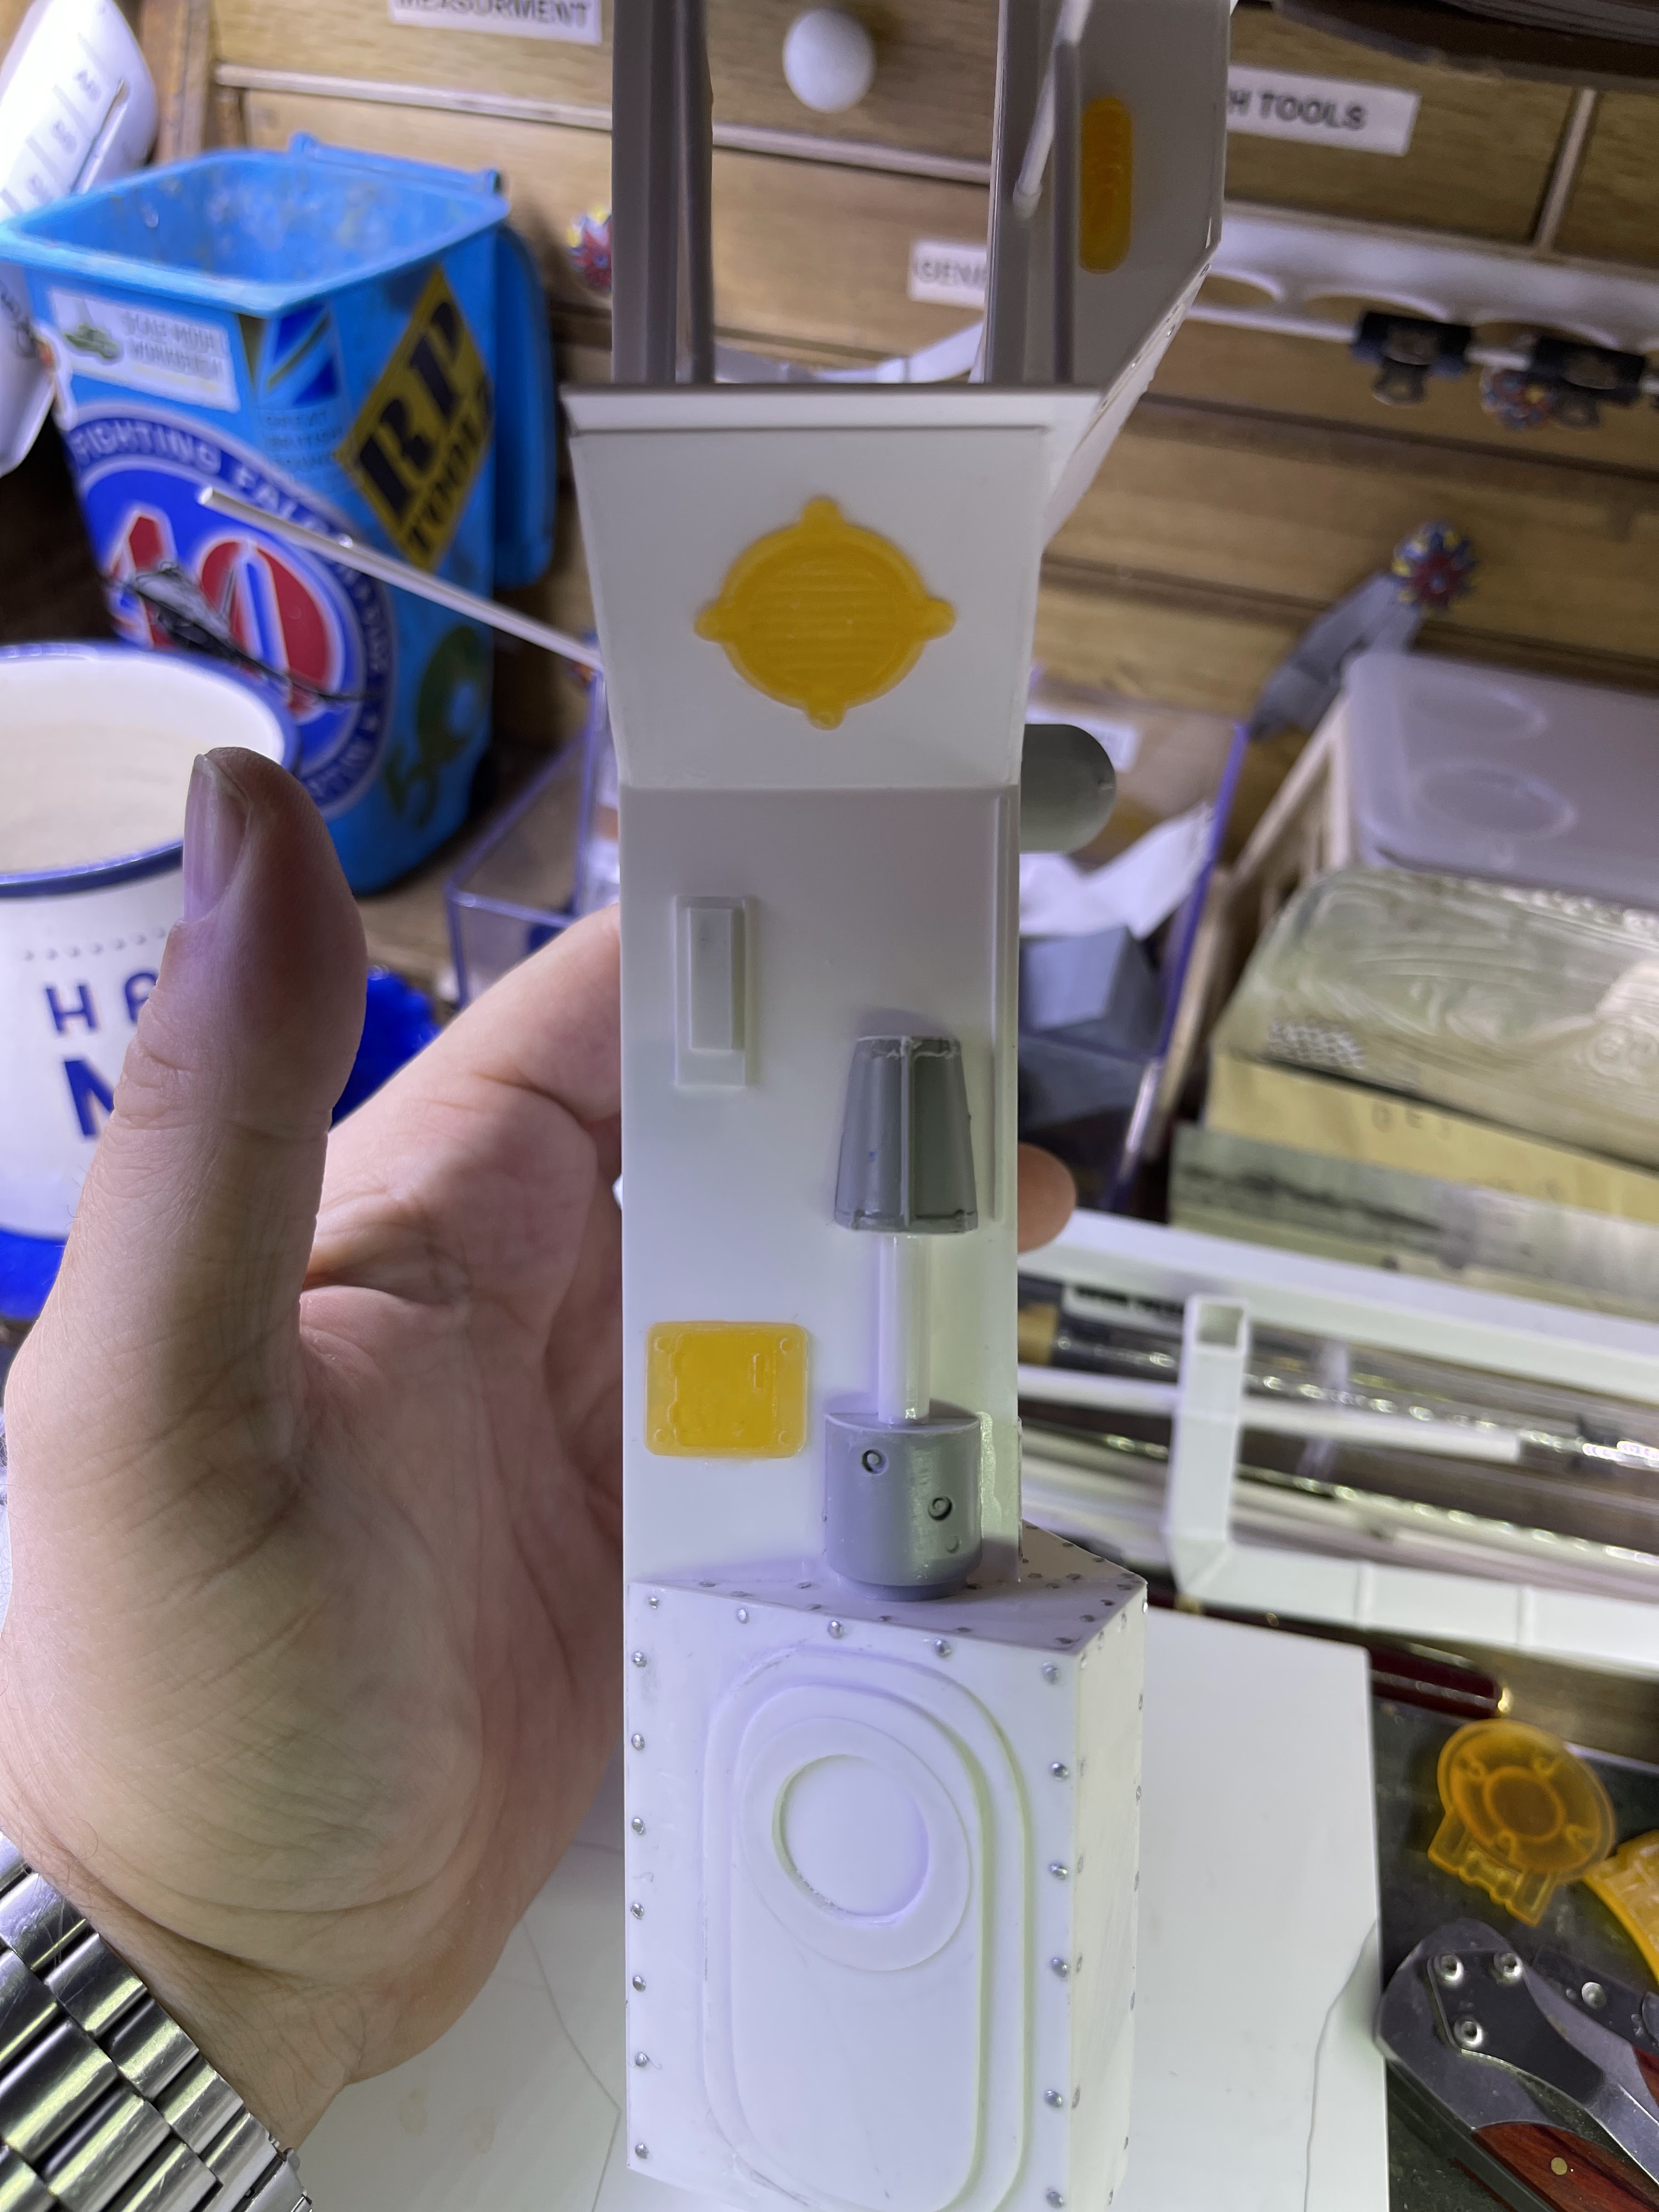


At this point I wish I could explain what exactly the finished model is going to look like now that I have began major construction but unfortunately I still don't know! I have already changed aspects of the design around three times and I am at the moment taking a break from the model to update this write up while considering another change in plans!!! I have though finalised the design of the control tower and started to add detail in the form of panels, greeblies, rivets and doors. I've also finalised (ish) the platforms and glued them into place on the back board. I also started detailing the backboard around these glued on platforms to get an overall "feel" for what the finished piece will eventually look like. I've included some build photos of the diorama piece that hopefully shows the build up of the greeblies as they are added along with using strips of styrene in-between and around them to tie them all together:

.HEIC)
After what seemed like an eternity of cutting styrene and fixing resin pieces, I felt that I was at the stage of priming the whole dio in one colour. I decided to choose a black primer as this will hopefully provide a good base for the various colours I'm planning on using and help "sell" the decrepit look that I'm aiming for in the end. The other bonus of priming in all one colour is that it will hopefully give me an idea of a completed model rather than a collection of individual pieces on a bit of plastic card:
.HEIC)
.HEIC)
.HEIC)

.HEIC)
.HEIC)
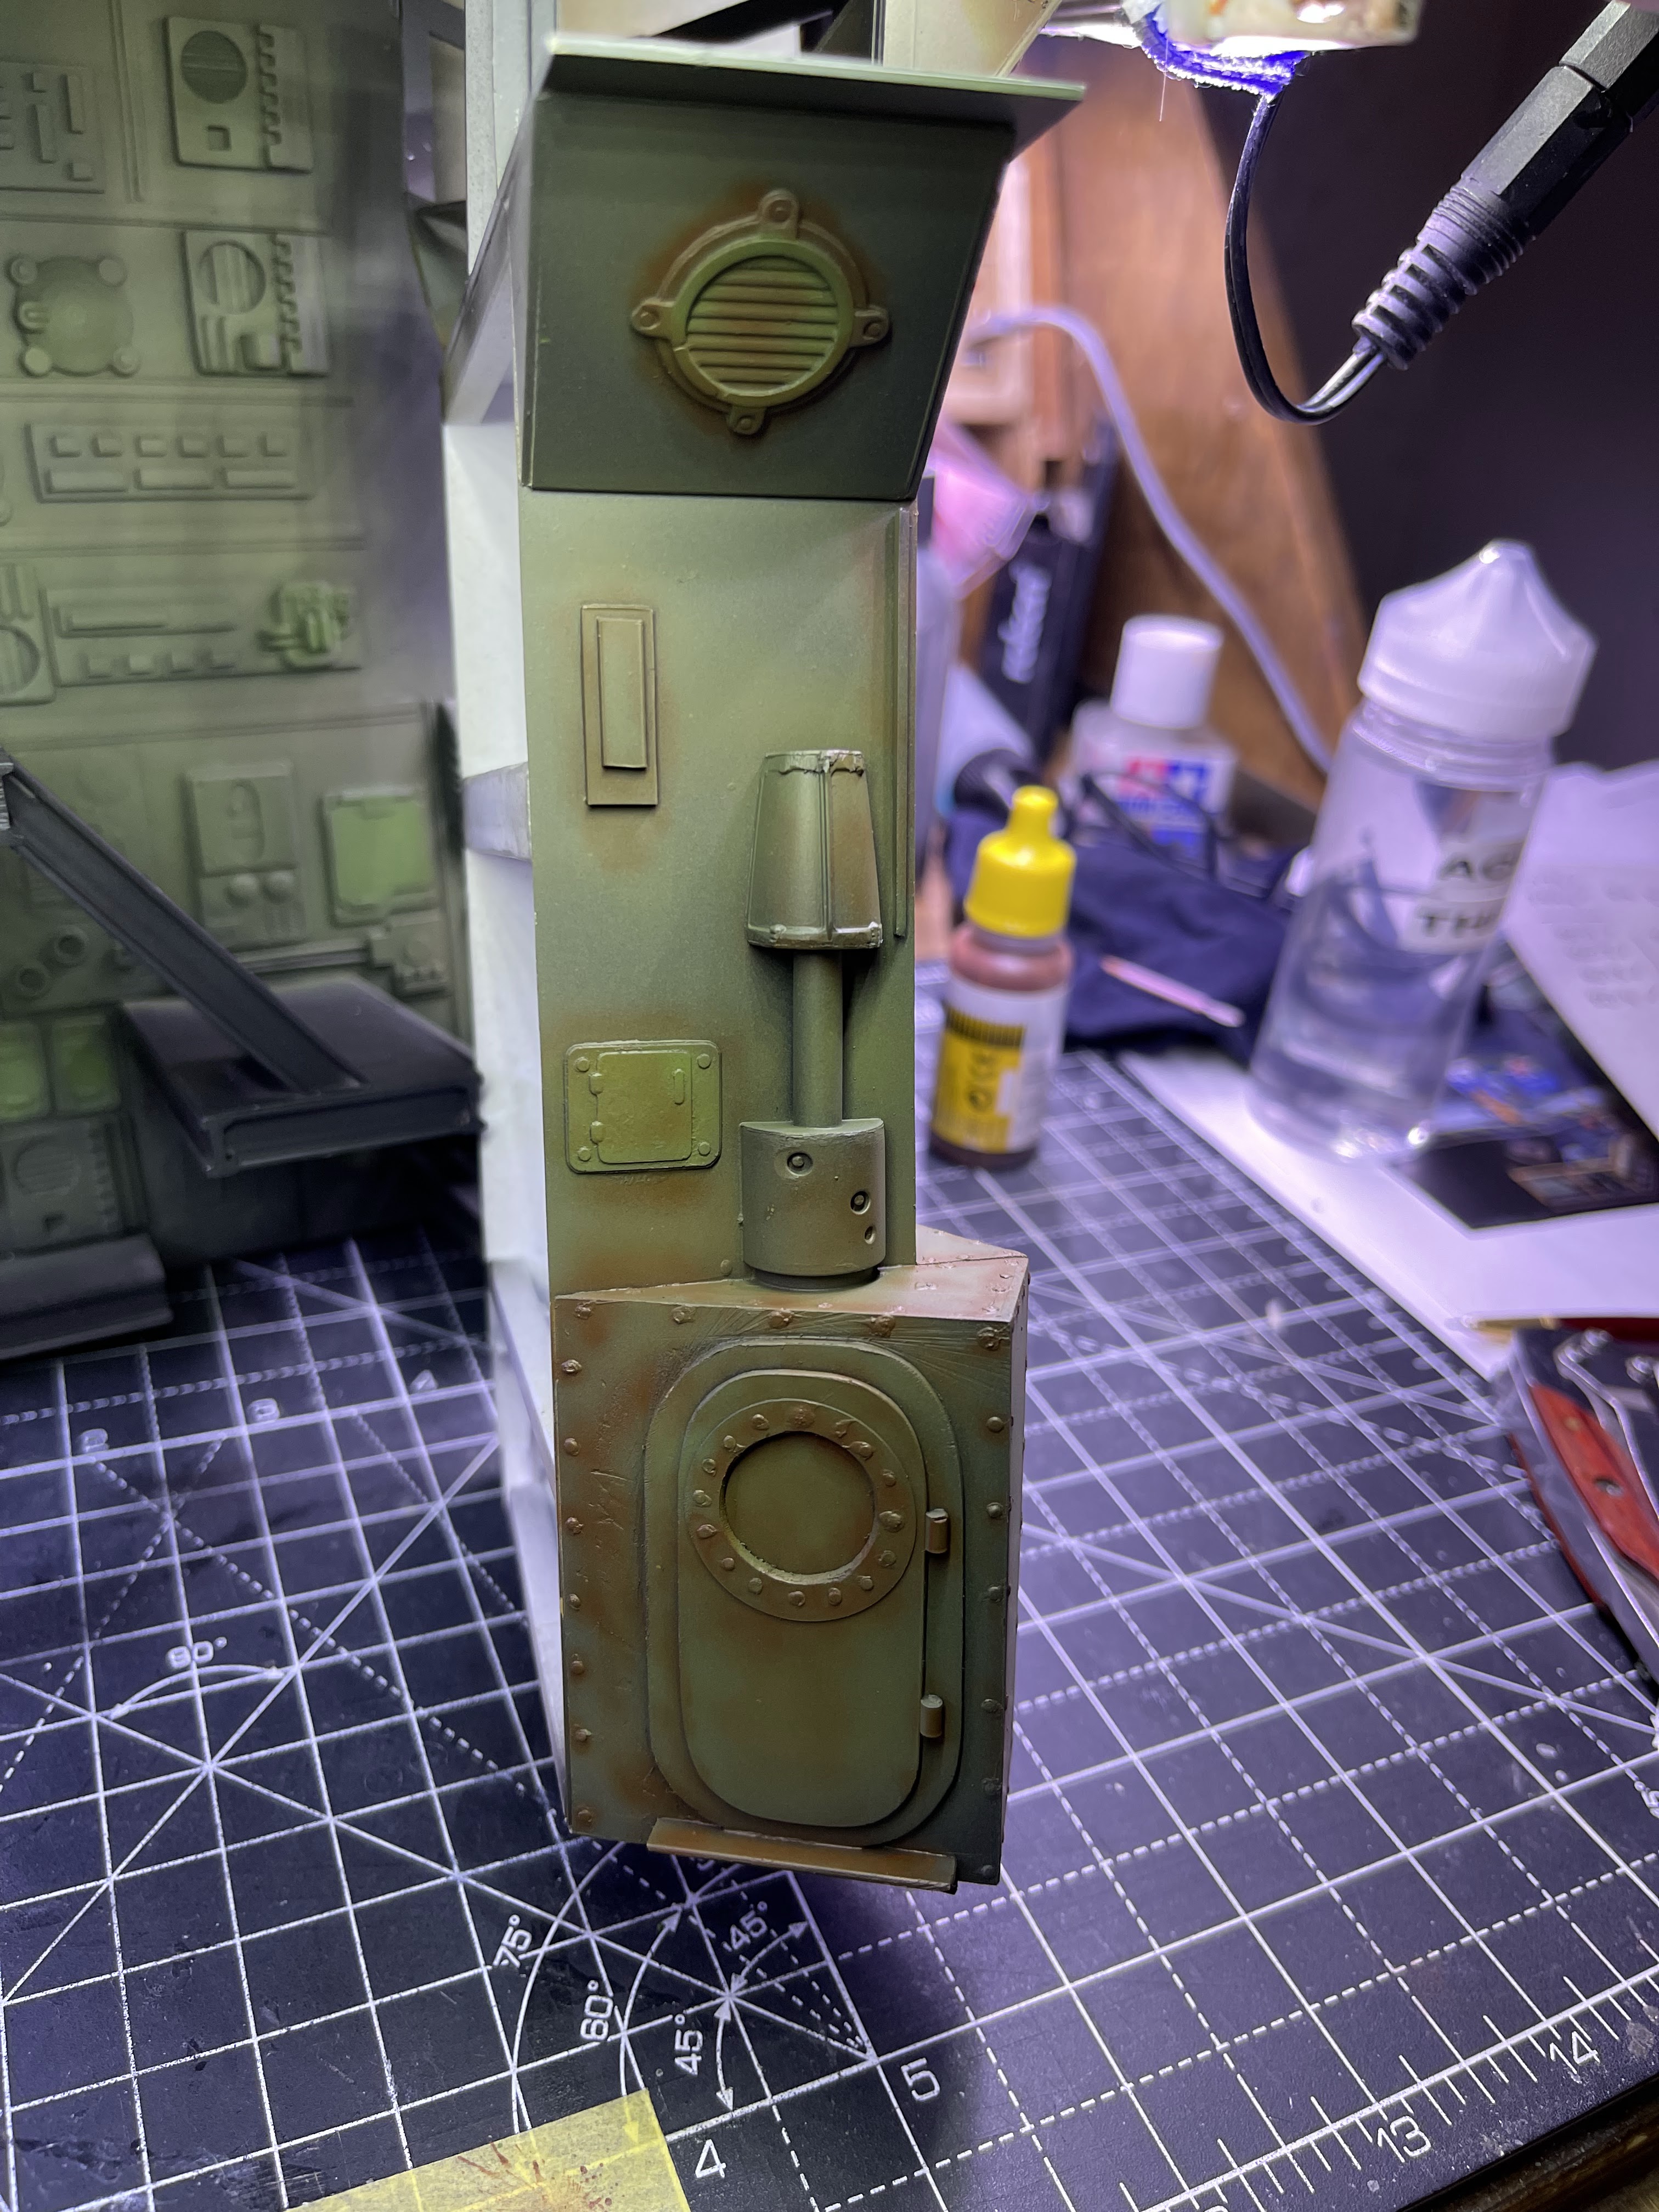
For the colour choices I decided to go with a few shades of green. These were progressively added in no real pattern to the model and applied in light coats only; letting the black primer show through in various places. I has also decided that the platforms would be finished in a different colour and that I was going to place a band across the control tower. These were masked off on top of slightly uncured primer (it normally takes at least 24hrs for the primer to harden). Now normally I would never do this as even though I'm using low tack adhesive tape I am still at risk of tear outs. For this model I didn't mind this as it would create an irregular paint surface and variations in the top coats of paint; my idea didn't let me down as can be seen in some of the photos below.


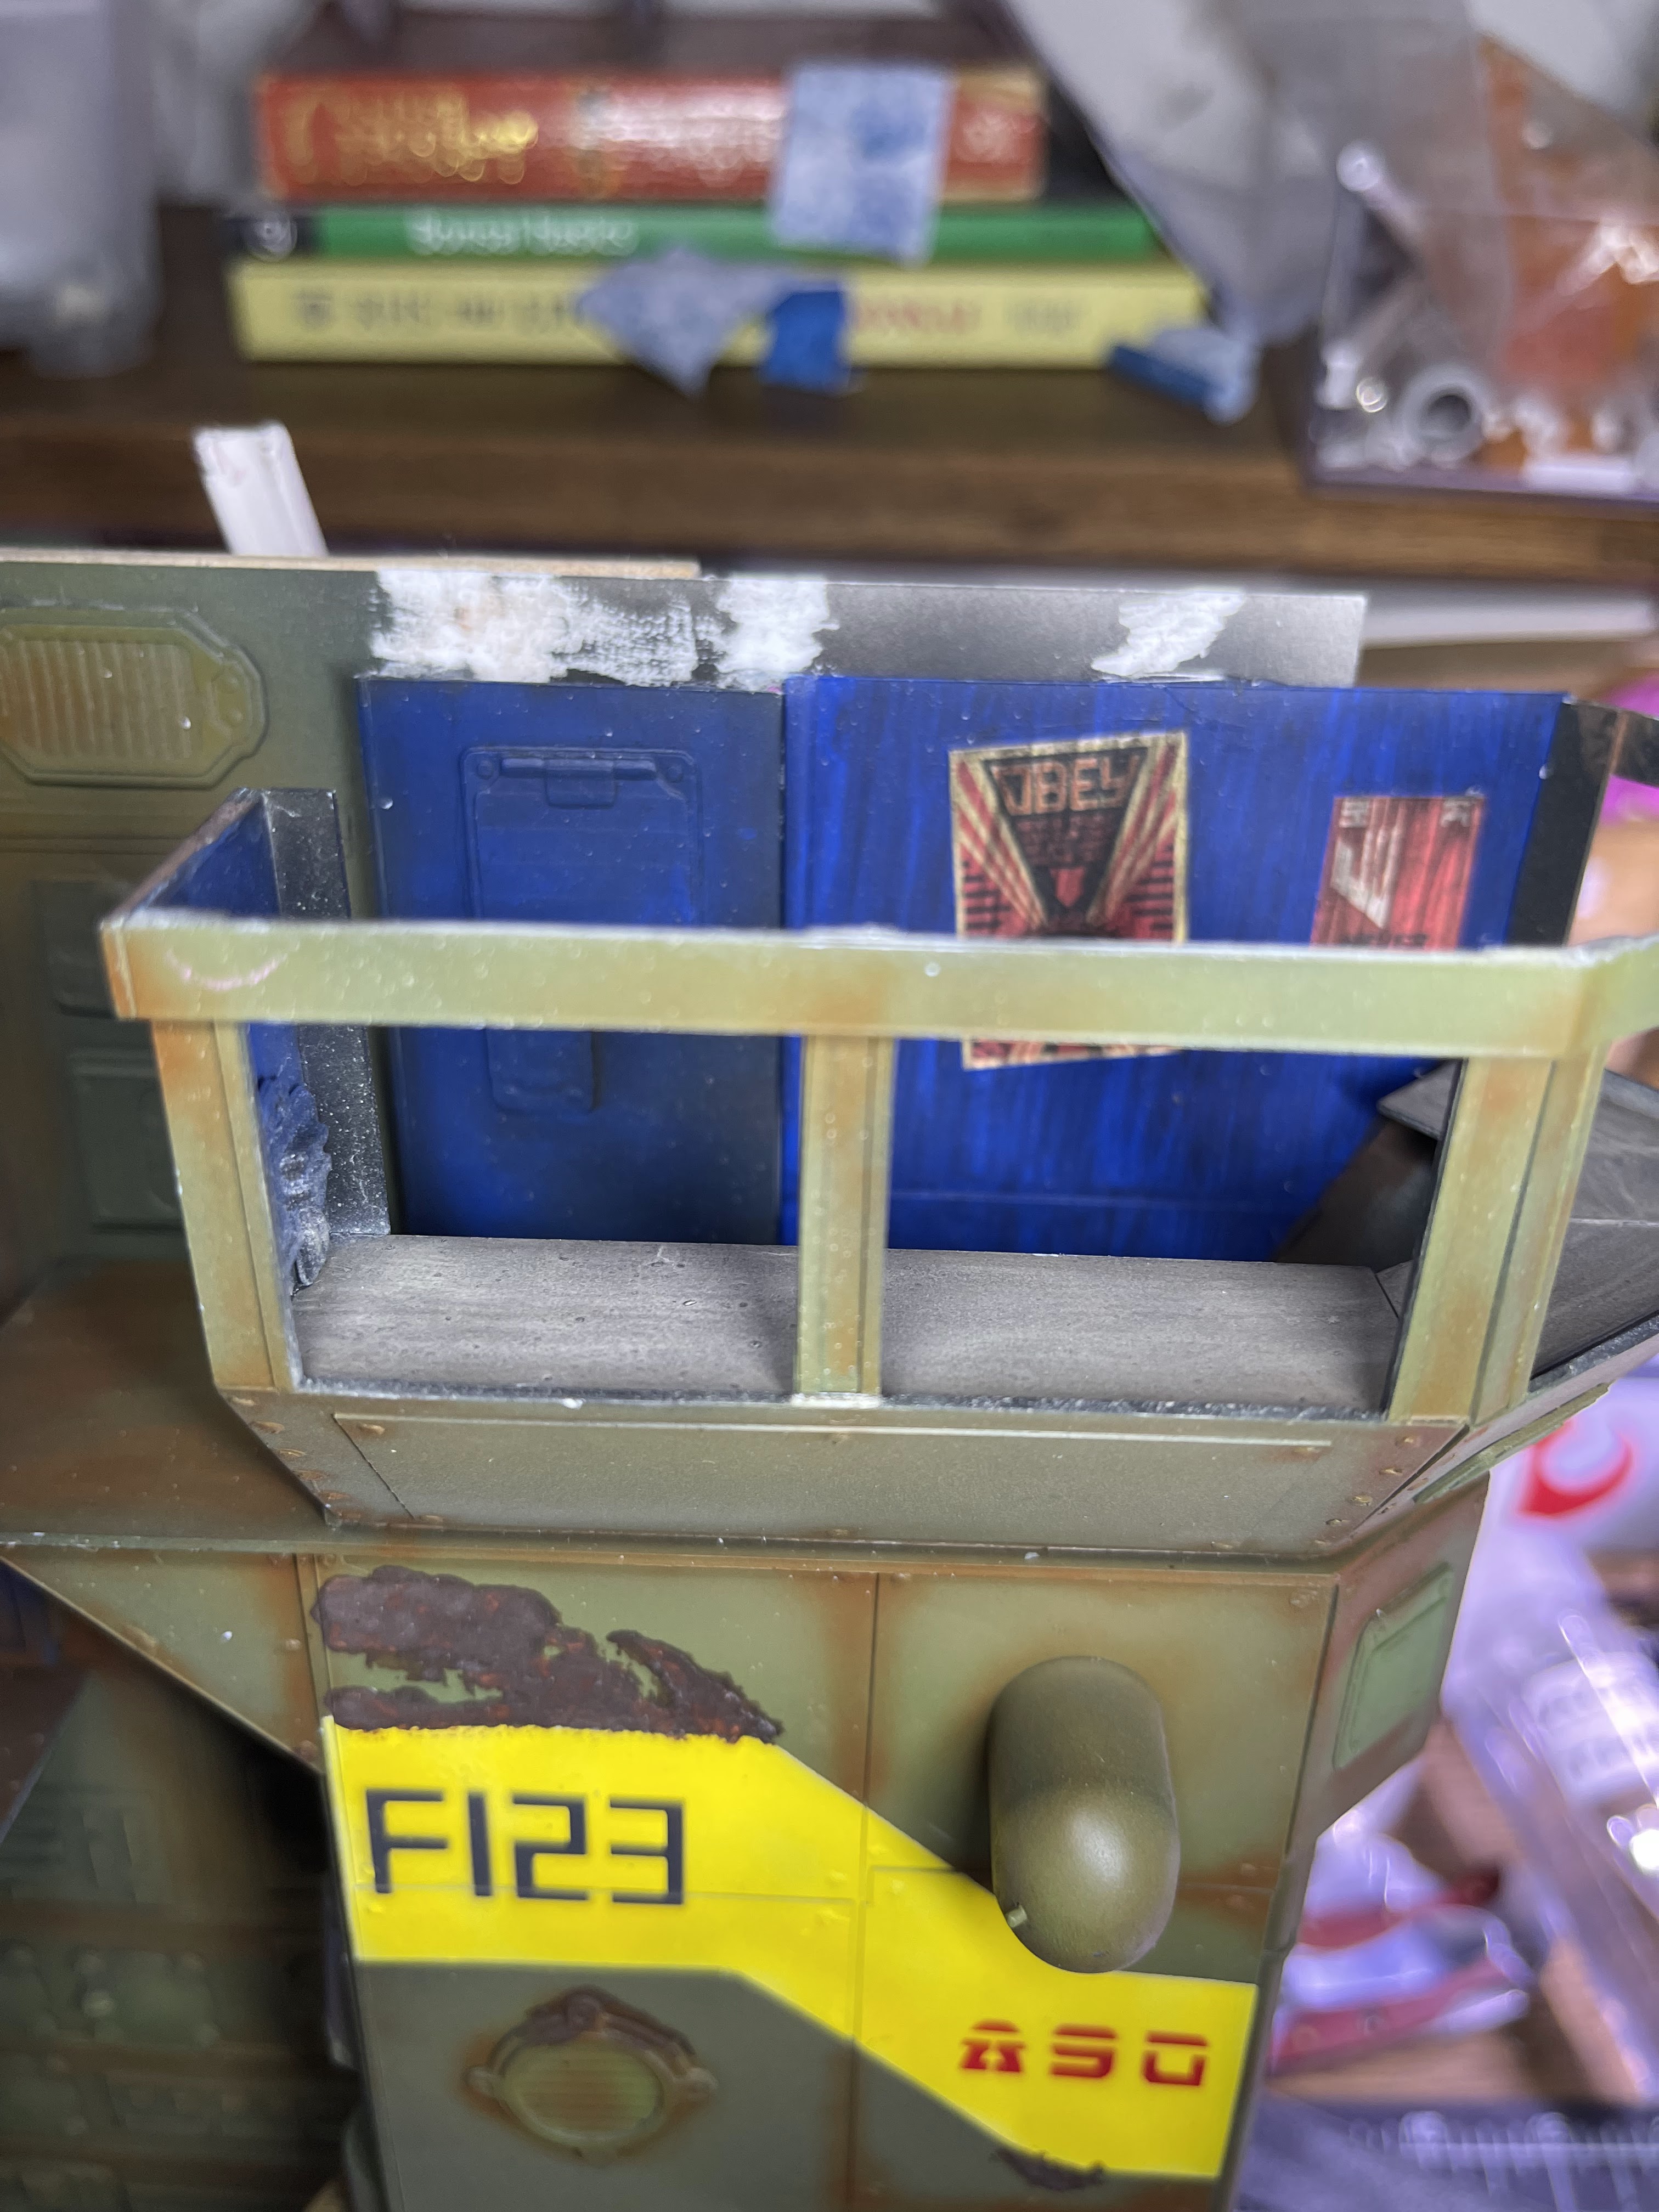
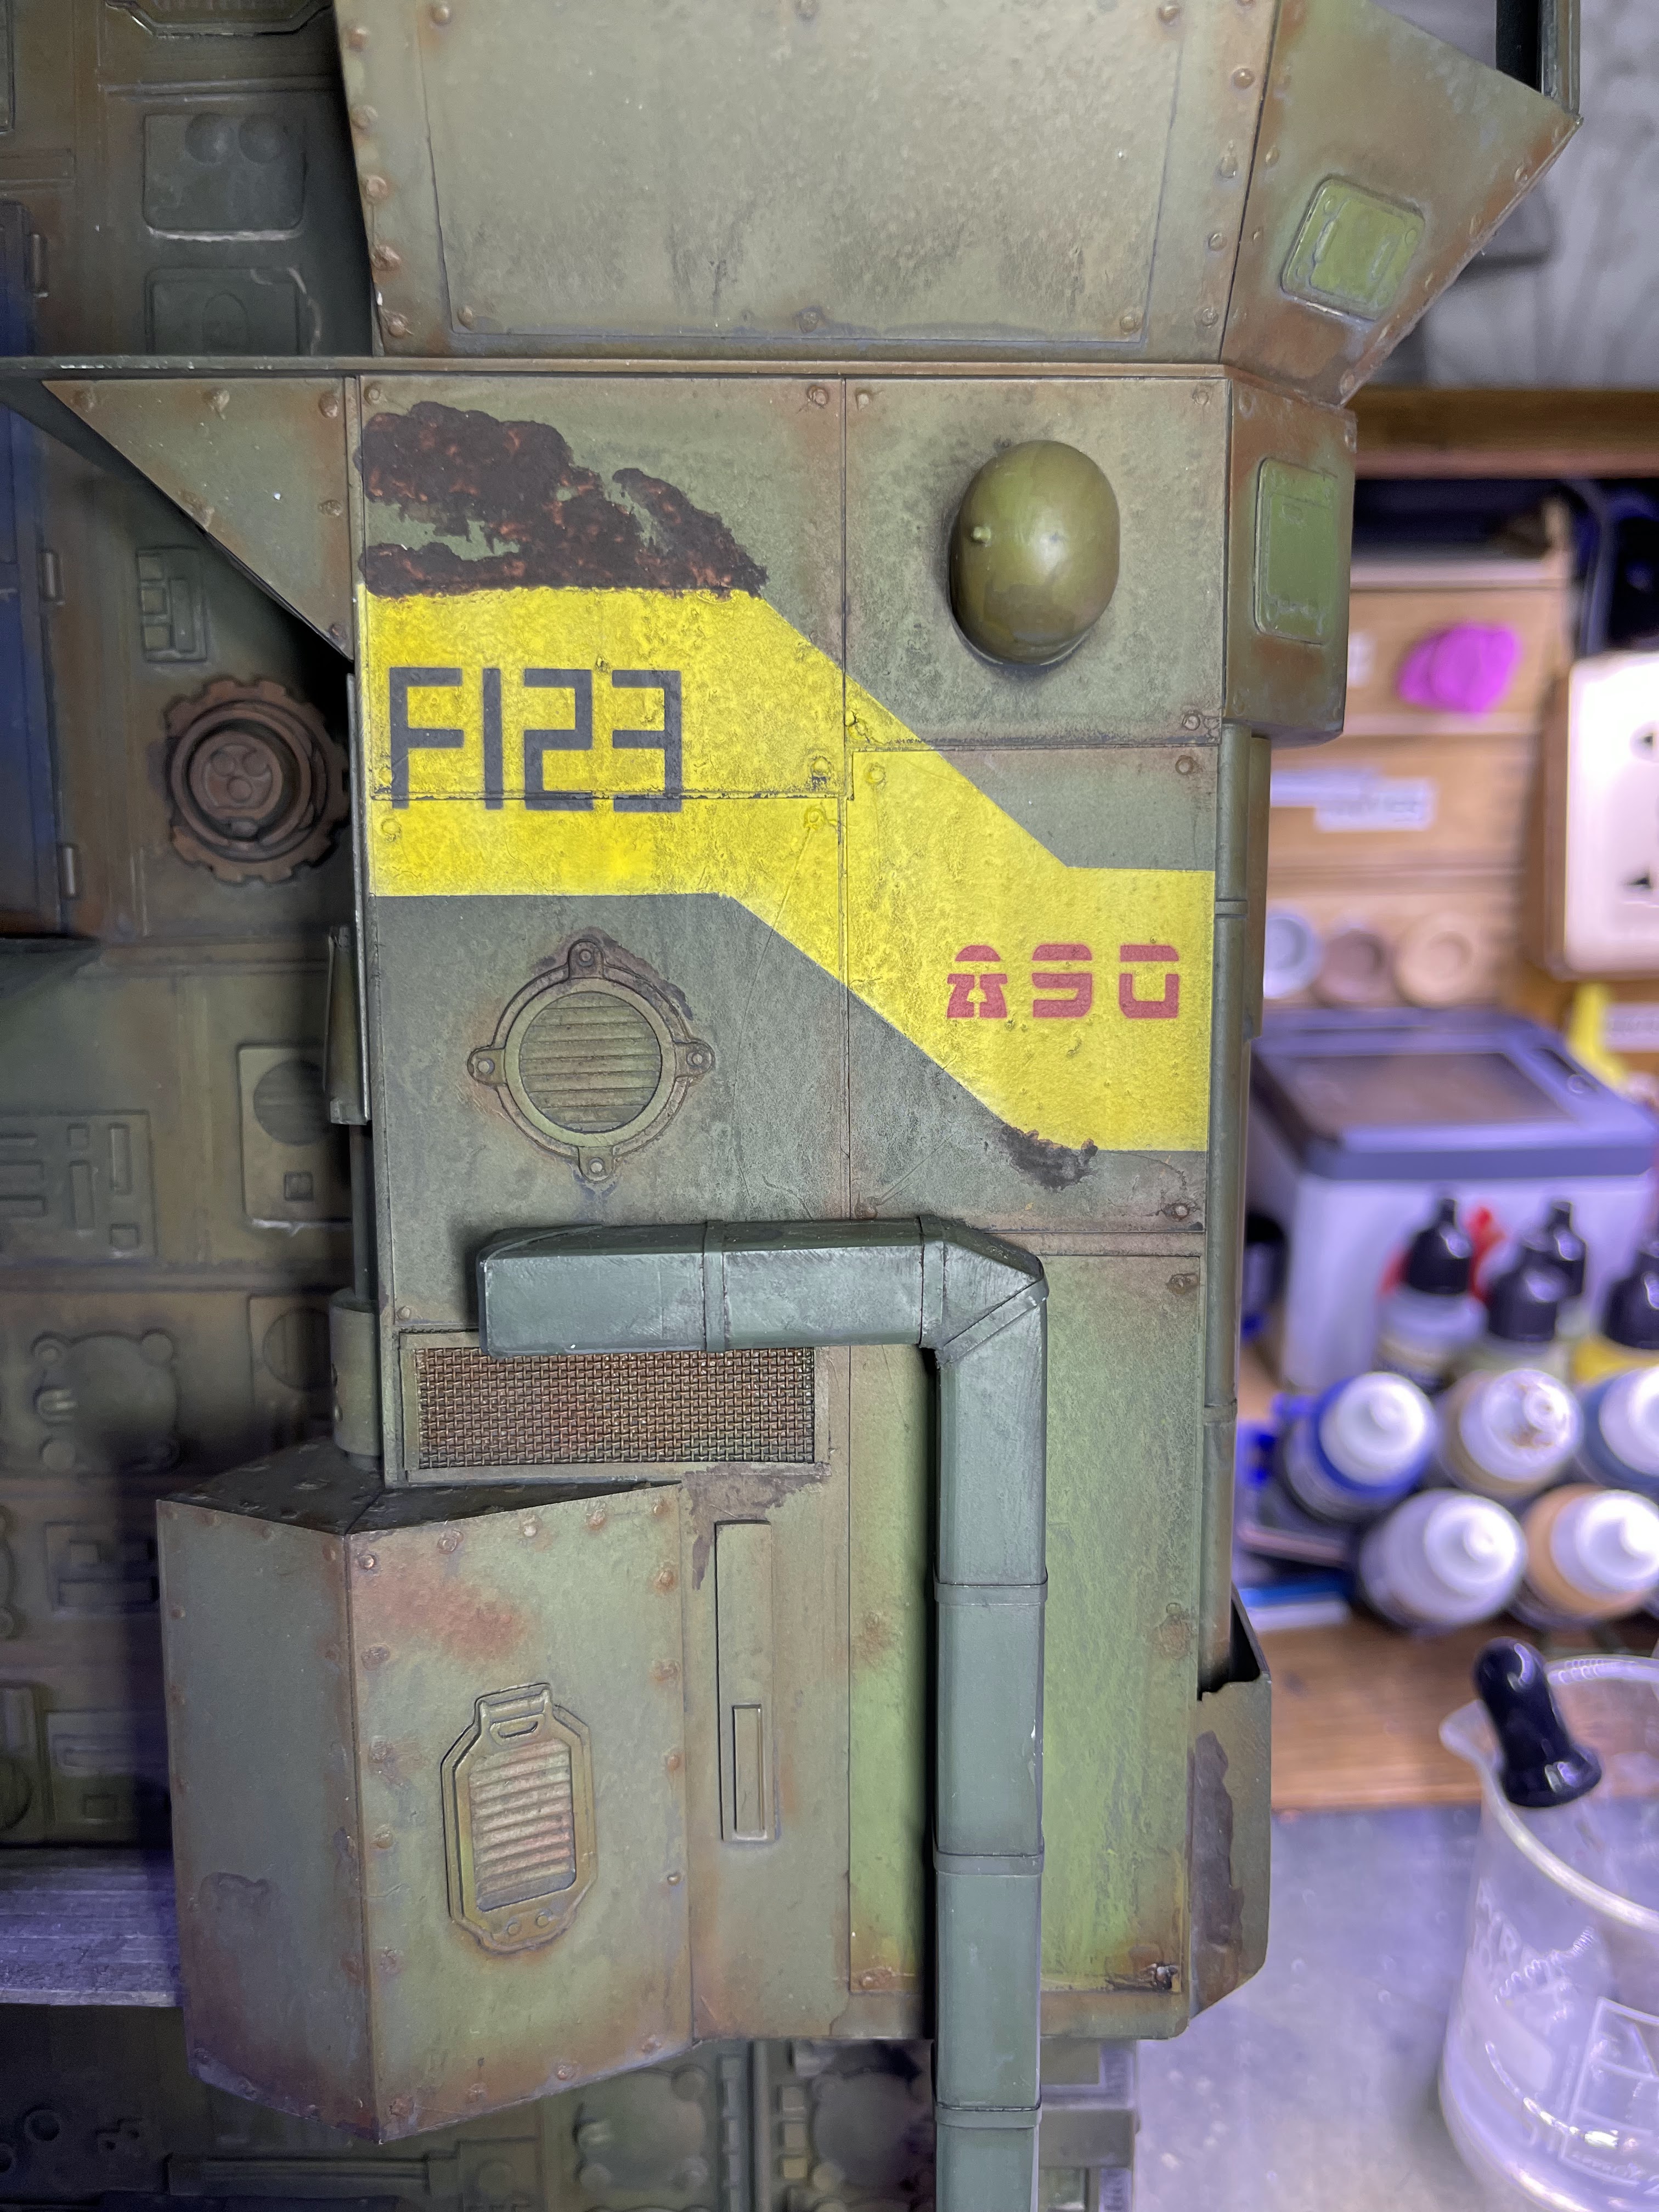
to add interest and also start to sell the worn out and falling apart look I airbrushed Meng models rust tracks in various places over the entire model followed by blue for the hangar door and interior of the control tower. I decided on a yellow banding for the stripe and dark grey for the platforms. Finally the girders holding the platforms were given a coat of rust tracks as well. Where any tear outs occurred from the top coat of paint I used Vallejo textured rust and stippled it onto those areas affected:


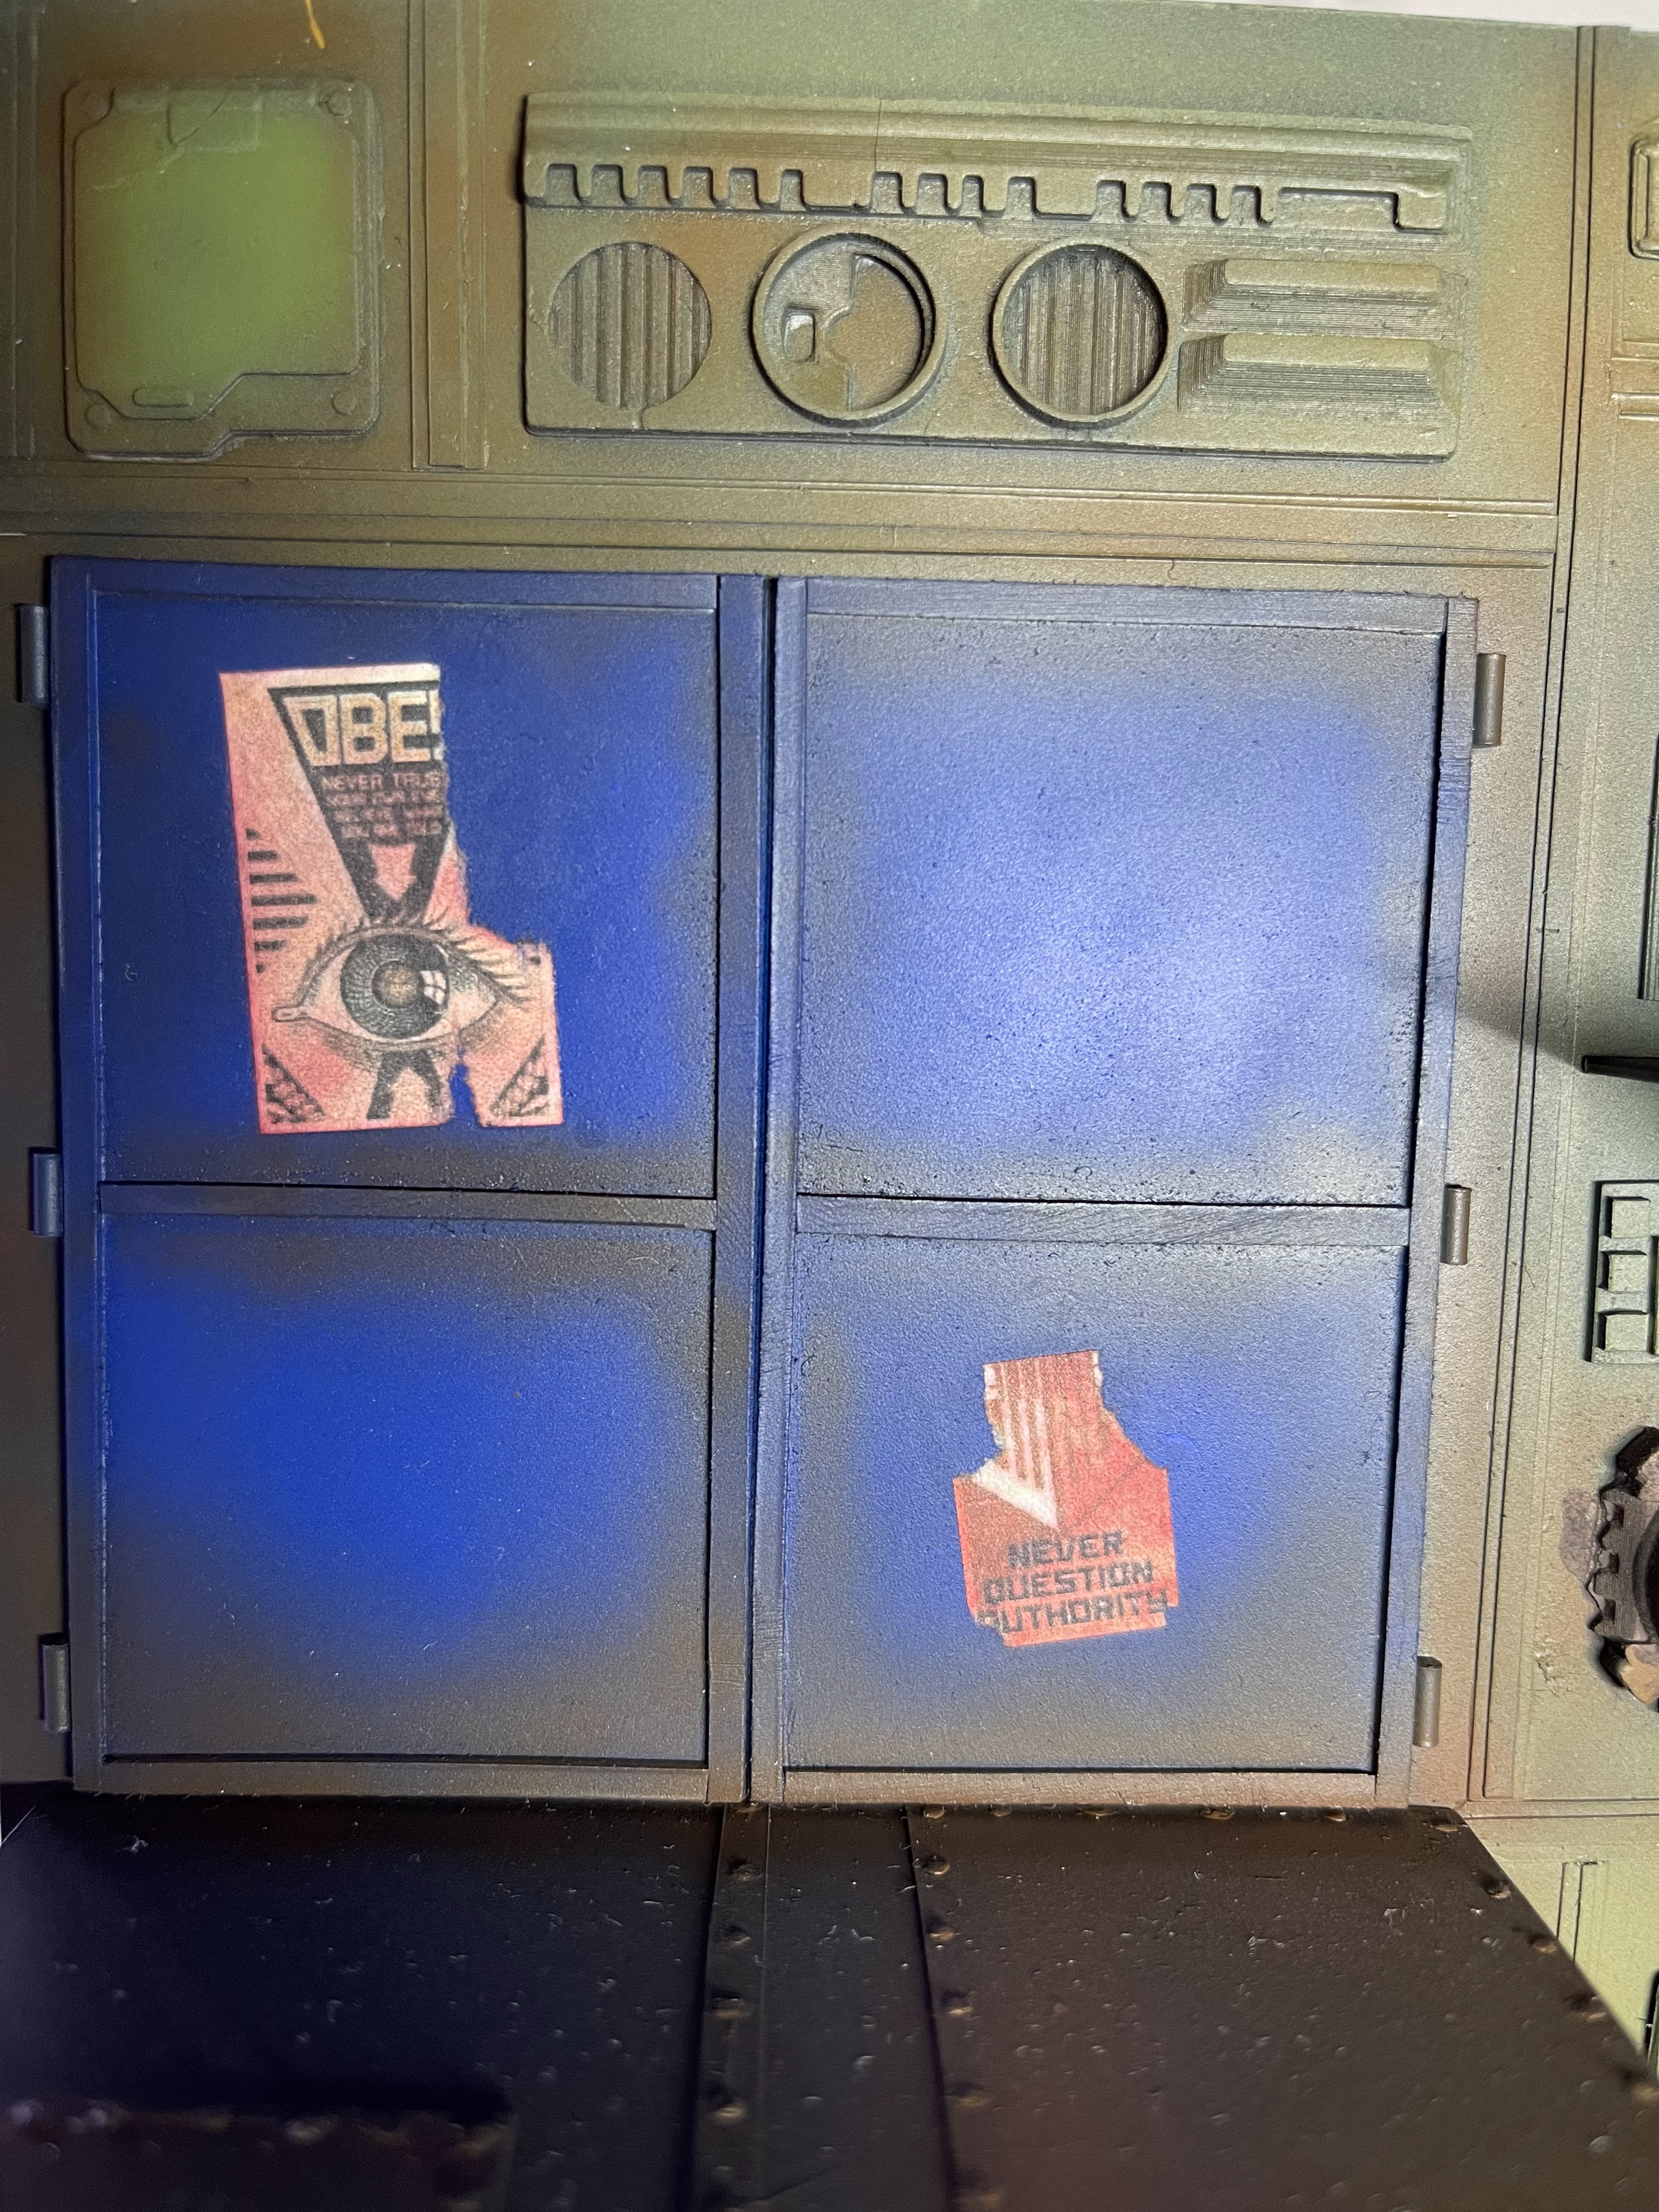
I also decided to add some numbers to the control tower using some spray masks from Alexan model along with some posters and blueprints printed from a quick internet search. These were glued in place and then liberally aged with some strategically placed tears and watered down black paint:


The accessories
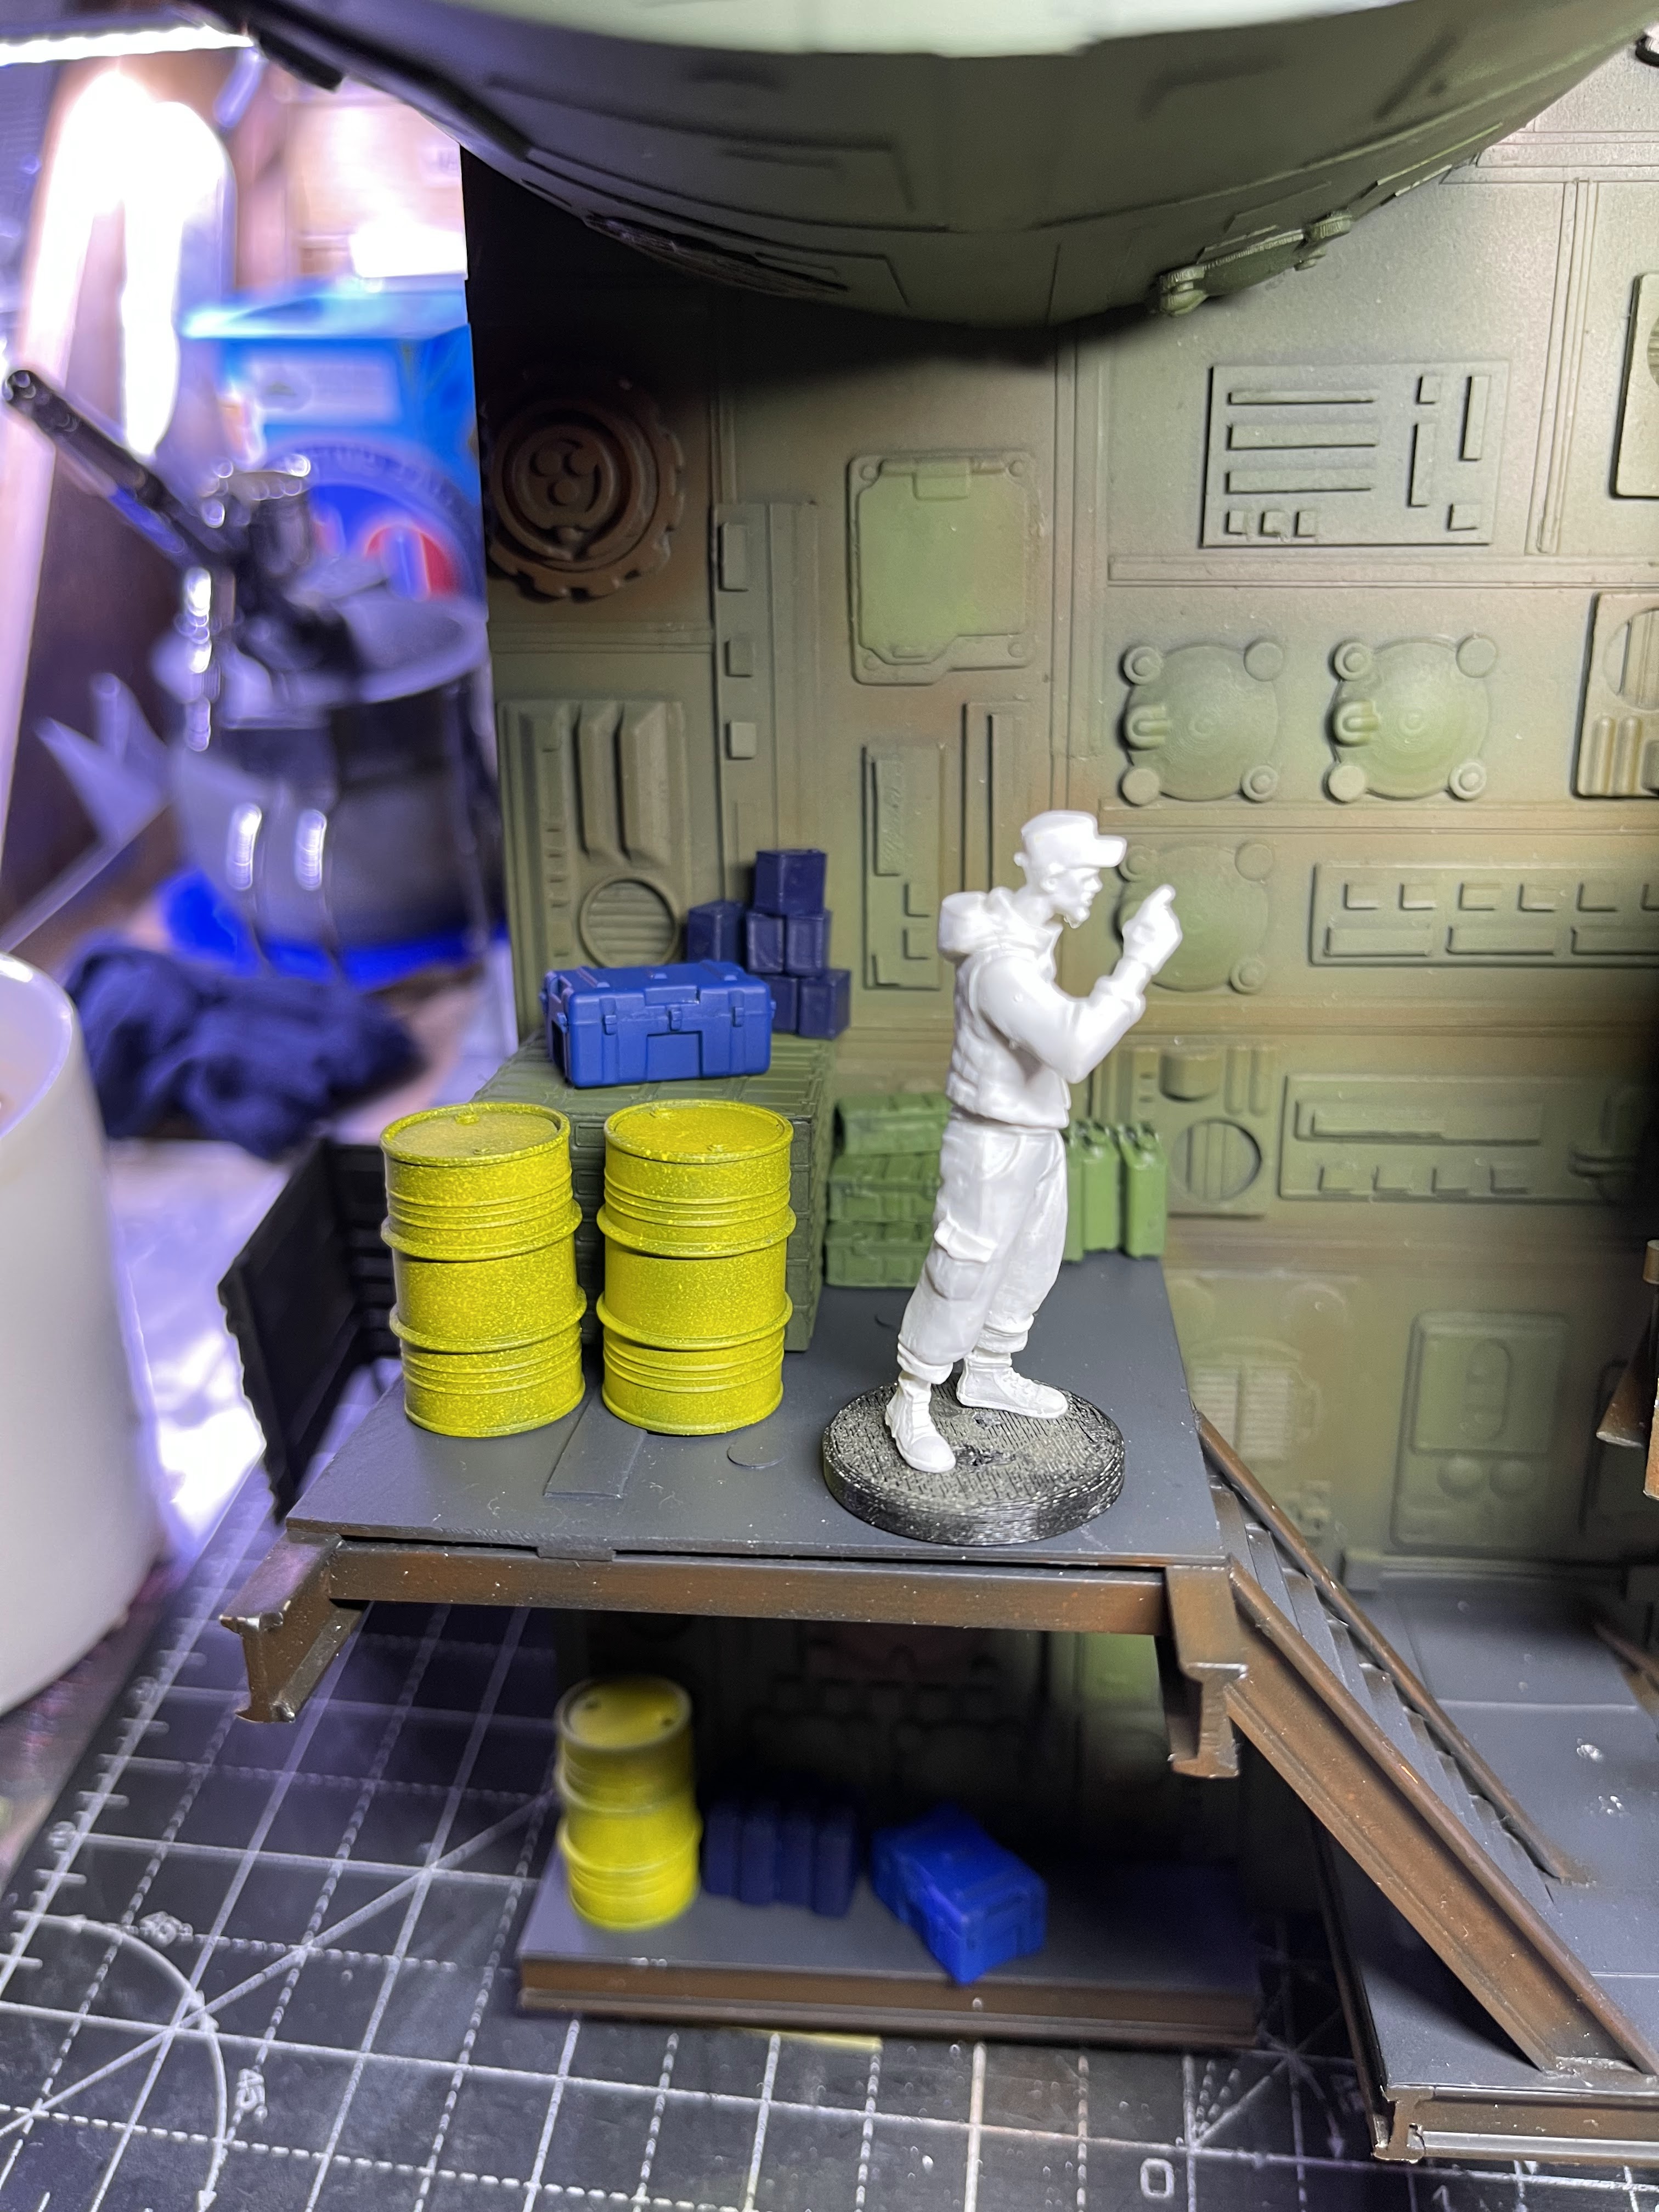
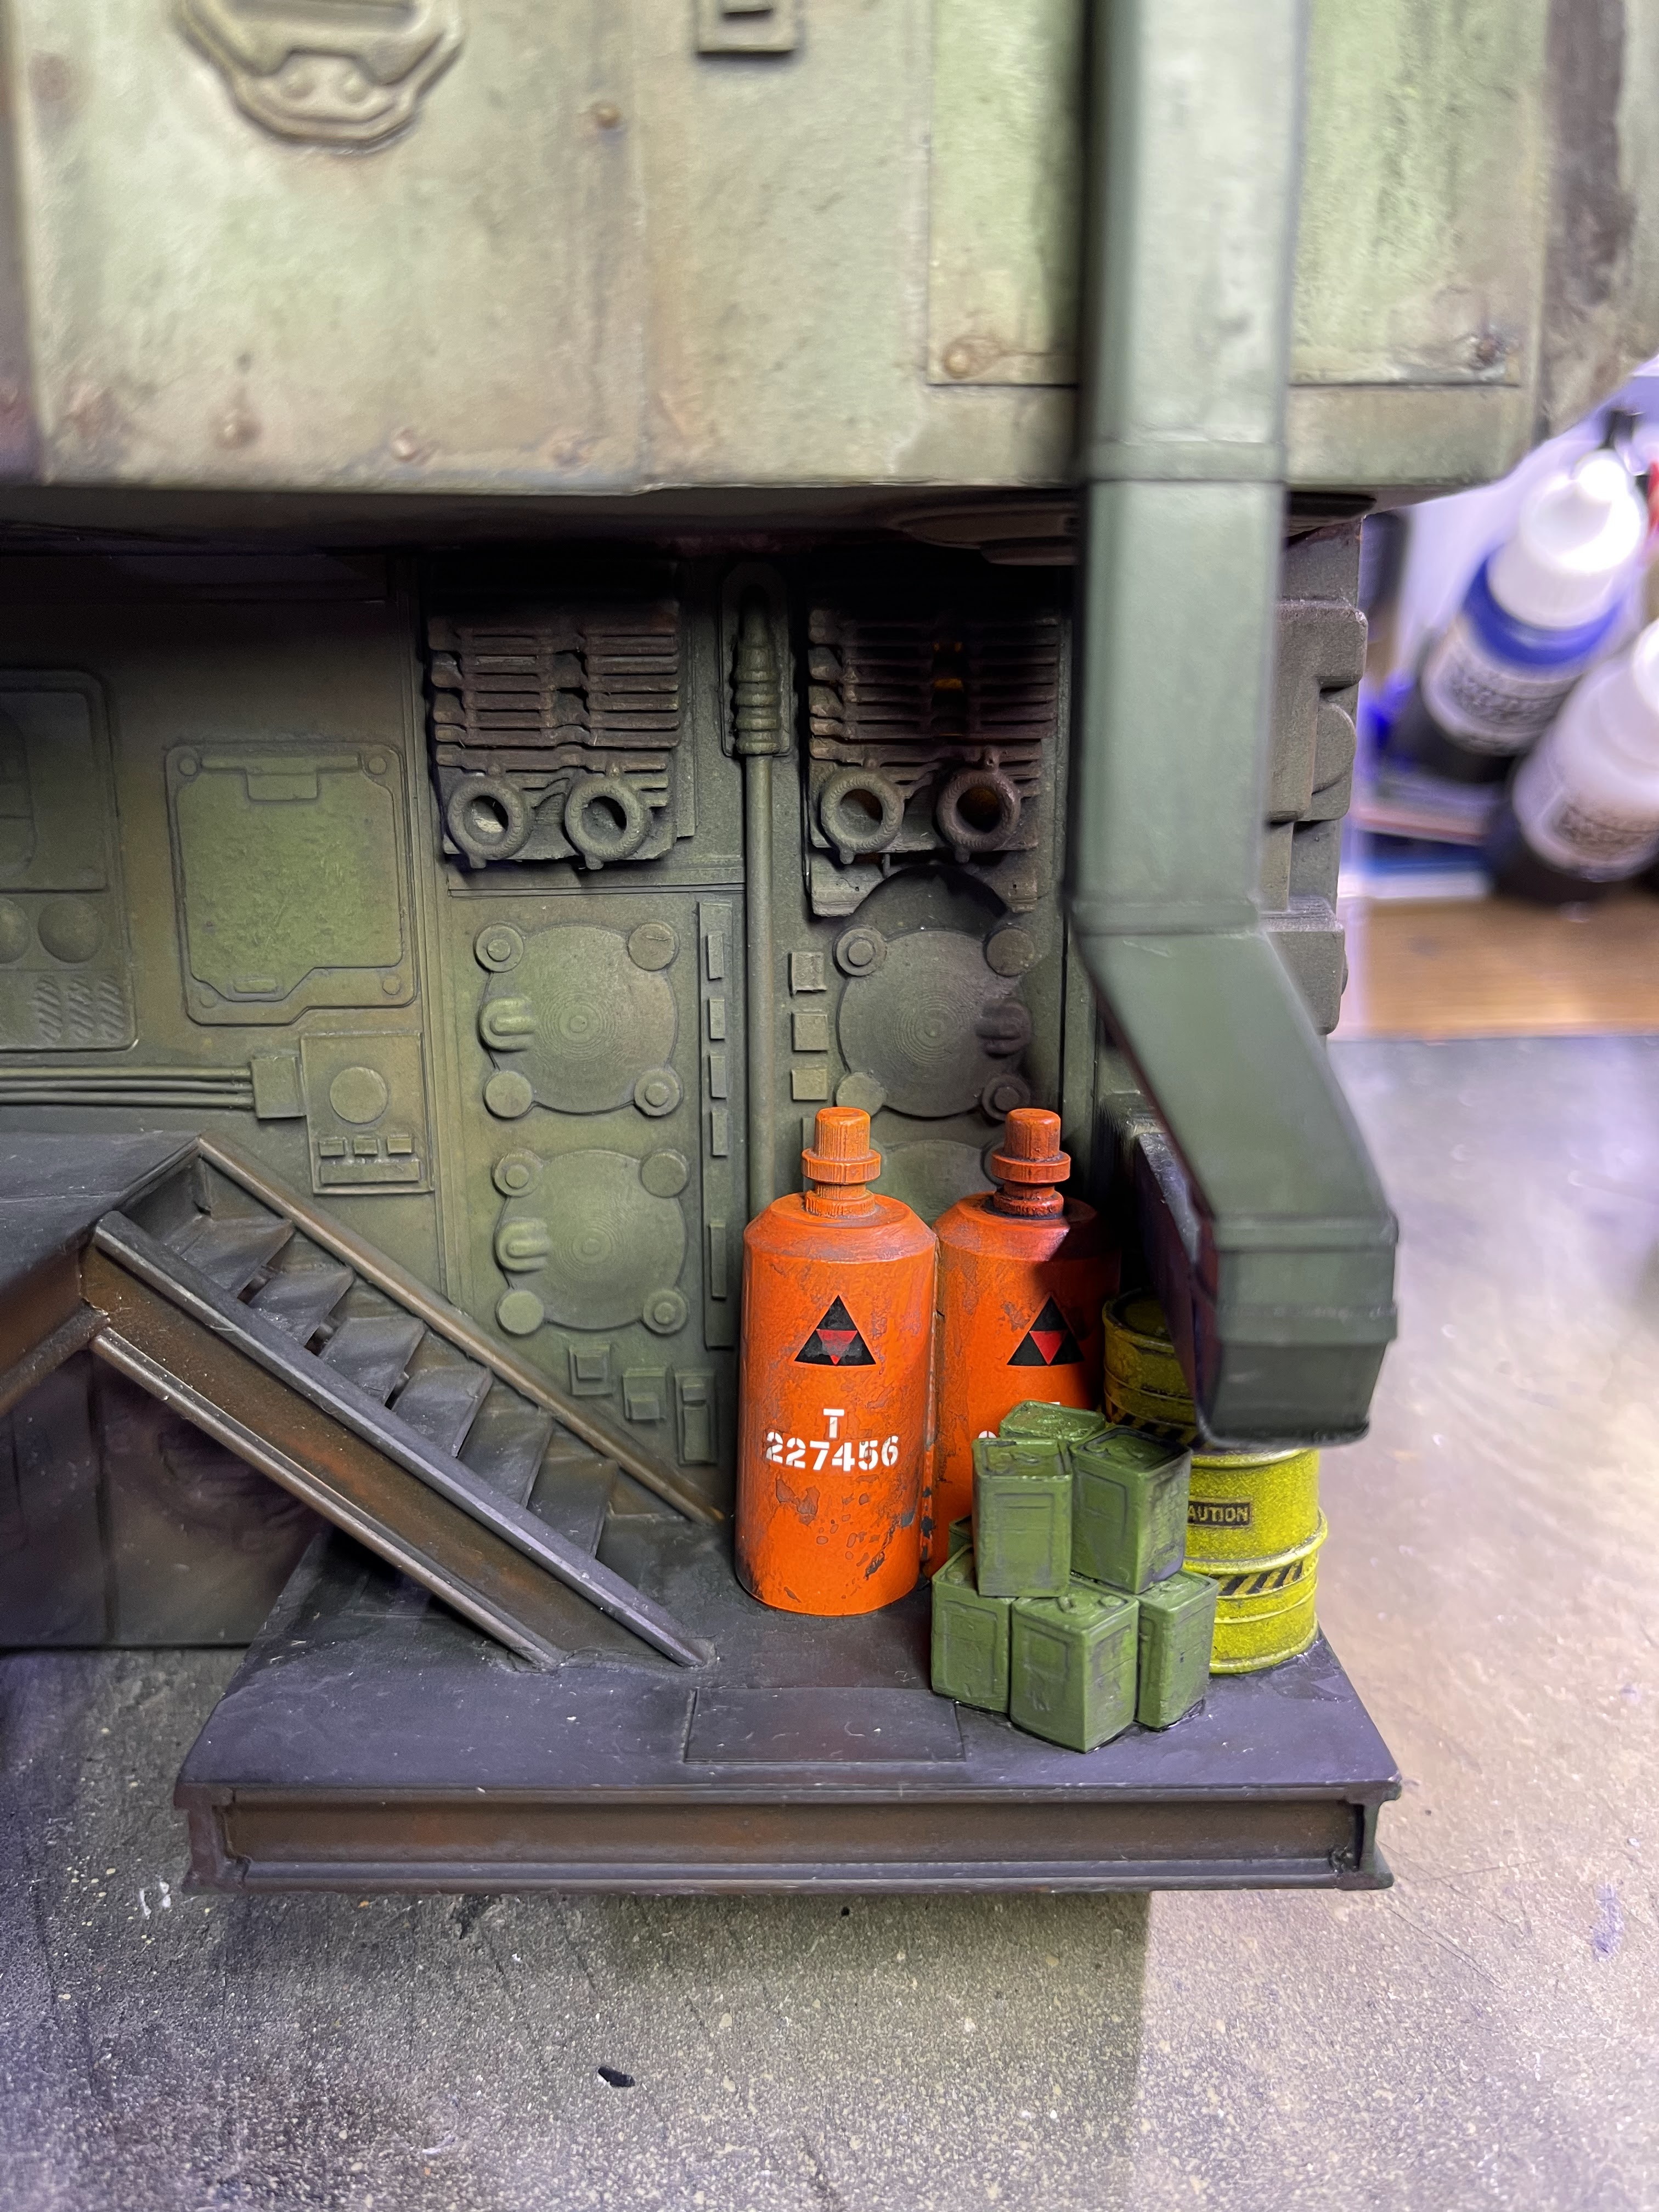
Any aircraft landing spot real or imagined will have a load of engineering materials dotted about the place. This model will be no different. To help things along I chose to use some kit parts that I have from the spares box in the form of fuel containers and oil drums. I also printed out some boxes of various descriptions and glued them all together in stacks for ease of painting and finishing. I also printed out two cylinder parts from what I believe was a cos-play glove as they looked interesting enough to use in the dio. After deciding on what accessories I wanted to use I placed them in various places around the model until happy with the layout; took some photos for later reference and then made a point of taking some reference photos because I have the short term memory of a goldfish:


The fighter
What can I say about this that doesn't put you off too much? The design of the kit is great (if you like sci-fi) and its relatively easy to assemble once the cast fixings are removed and I would recommend the kit to others with the warning that there will be lots of parts fit issues and filler involved. There's also a great potential for modifications and additions because after all, its a sci-fi kit so there's not many "rules" that need to be followed. Just don't expect Tamiya quality if you buy it. For the new colour I've decided to go with a green and rust finish this time around. I would like to get this thing looking like its one flight away from the scrap yard. (pretty much like the rest of the dio will hopefully look like). I'm not really going to modify the kit past how it was supplied as this won't be the main focus of the dio. I did however take some inspiration from some actual American WWII fighters and opted for a red tail and band on the nose. Here's some shots of the final spray job and some decals from the spares folder I keep from past models:


The figures.
As well as the original figures (shown in the introduction). I also decided to buy an additional figure from Ali Express (Sasha the welder girl) and also kitbash a figure from a Tamiya tank loading kit into a figure with his hands in his pockets (using a hornet resin head). Each of these were painted in Vallejo colours very similar to the box art for each of them. I also have to admit that while I was painting the figures I completely forgot to take progress photos so unfortunately I only have these few shots :


Finishing the piece
There are so many additions, modifications and weathering effects on the piece I actually lost myself in terms of what I did to it. In the most simple way to describe it; I pulled every shade of green, brown and black out of the paint draw and added it where I thought it would look good. The same can be said for the parts and accessories added. I rummaged through the spares box and placed things where I thought they would add some interest. I've included A LOT of progress shots below that hopefully demonstrate how this scratch built simply took on a whole mind of its own:


No comments:
Post a Comment