Introduction
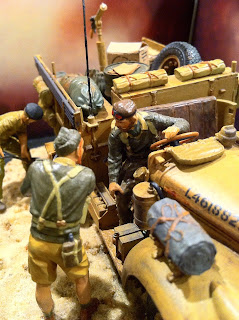
This is really a project that began two years ago. It started with a Tamiya LRDG Chevy truck commonly used by the British armed forces Long Range Desert group. following construction of the truck it was mounted onto a simple flat desert base and although I was very happy with it, visually it was not very appealing. A year later I revisited this model and decided to add another vehicle; a tamiya SAS jeep. This time I decided to add some of the superb figures from Masterbox kit details are: 3598 - WWII British Infantry LRDG in North Africa.
 |
| Figures added to the original dio |
 |
| Tamiya Jeep used |

 |
| The original vehicle used |
These kits were then mounted onto a larger base of flat sand. Although this was to me more visually pleasing with the combination of two vehicles and figures that seem to be interacting with one another, there was something about this diorama that still wasn't doing it for me.
So the subject of this page is simply the removal of the pieces from the diorama base and a re-design of the base to make it more visually appealing and interesting. The following photos are as it stands at the moment. At the moment I don't know which direction I will be going with this but I am going to think about the new layout while I complete the 8th Army Quad tractor diorama which is also a feature of this web site.


Since staring this page I have decided to put these vehicles in separate diorama for display. The vehicles themselves will not at this stage in my thought process be modified however this may change. The SAS jeep and two of the figures have now been re-based and can be viewed here I have also put the 8th Army quad tractor on hiatus as well due to a lack of ideas on how I will display the vehicle. the build for this vehicle to date can be viewed here. The LRDG truck will be mounted on a base the same size as the SAS jeep. It does have a small problem of being a little too small for the truck and figures to set a believable scene, however with a little florists foam a bit of luck, I'm sure that I can create an effective base with a small amount of effort.
The Base.
the vehicle will be mounted onto a plaster display base and as I have already stated, the base will have to be extended in some way to take the vehicle and the figures. To achieve this I will build the base a little bigger by using florists foam that will be glued, shaped and then coated with polyfiller. The following shots show how I marked the base and the progress of the build:


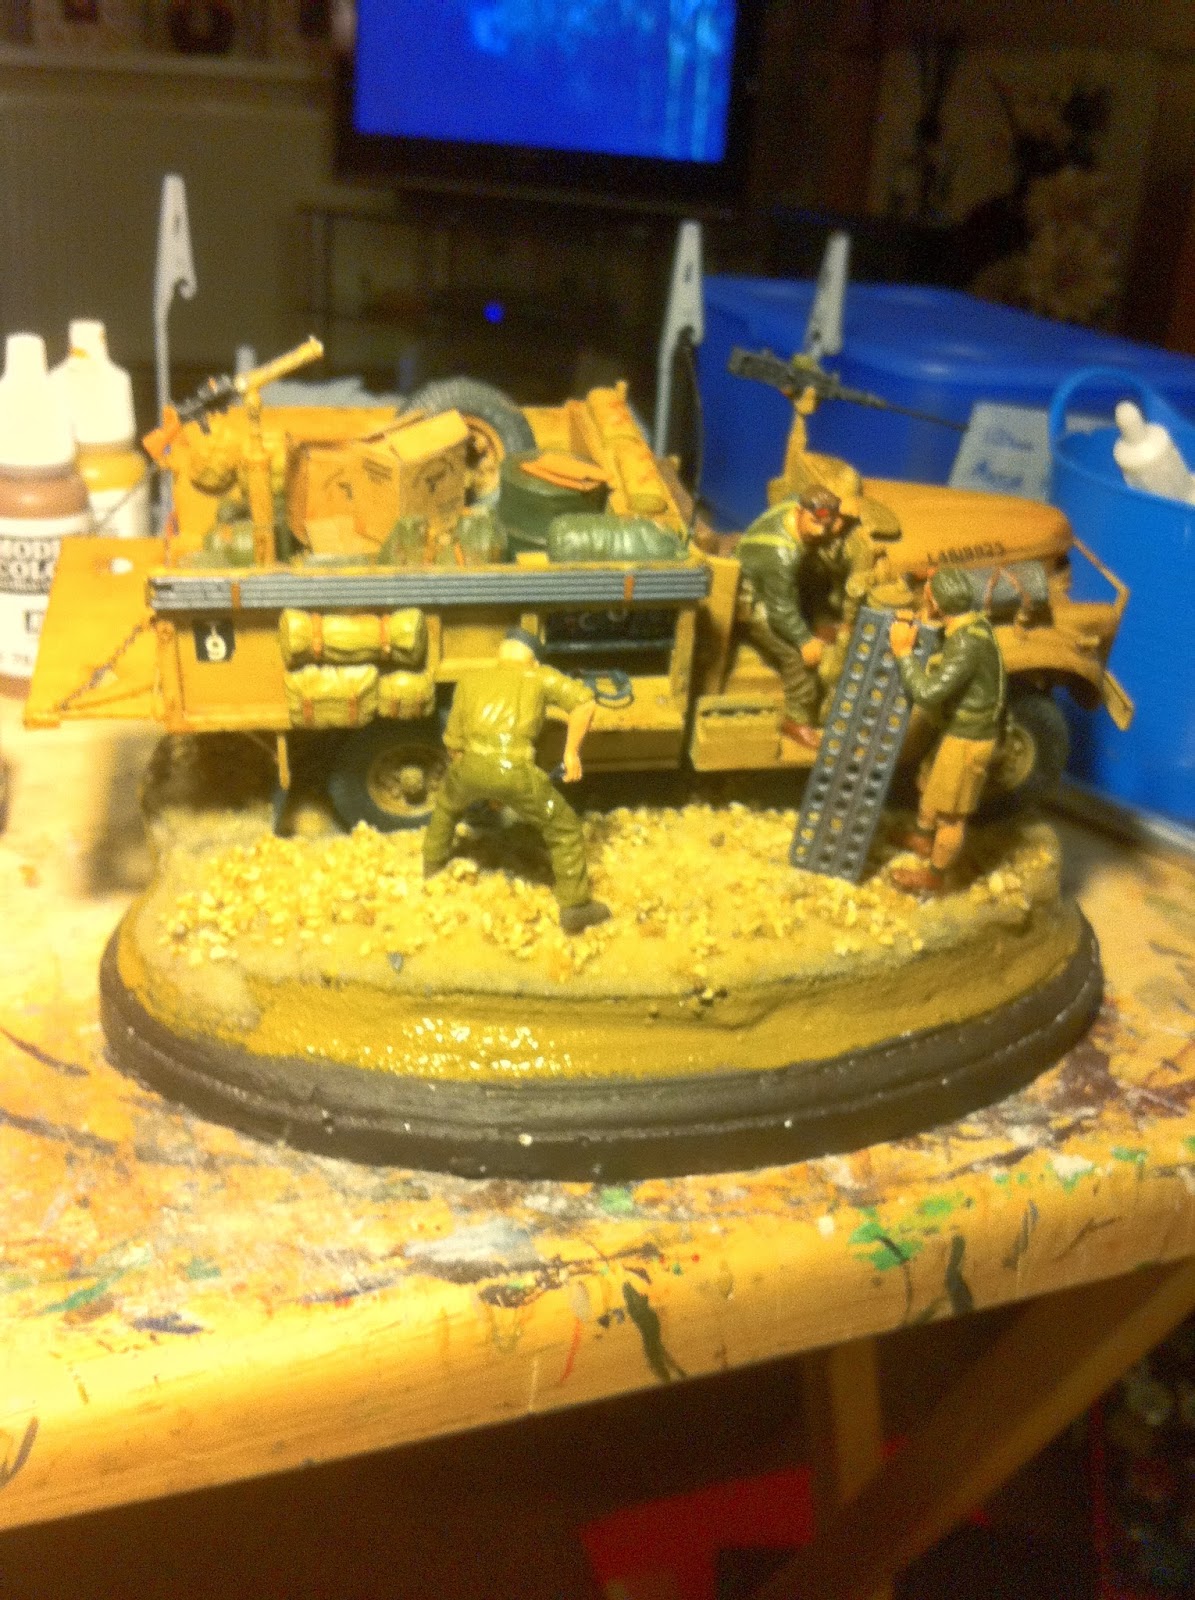
The next stage for this project once the plaster had dried was to paint the entire base in a medium acrylic brown and the coat the parts that I intend to be sand covered in PVA, While the glue was still wet I added some kiln dried sand and then repeated this another time. For the next time I used some Budgie grit to add a little texture to the base and then test fitted the truck to ensure that it "sat" squarly on the base. When I was happy with fit of the truck, I fastened it to the base with a generous dollop of PVA and allowed it to set into place:


The final stages for this build will be to fill in with sand around the tyres to give the impression of the vehicle bogged down in sand and to add the two figures to the front of the piece. I will also add a little smattering of fresh sand to the base and another coat of brown acrylic for the surround. The final touch will be a coat of Matt varnish to seal everything in place.
Everything is now finished with this re-work project and I'm really happy with the result. I have also decided to start adding information plaques to my models as this seems to be the "fashion" these days. I hope you like the finished piece of work and as always I welcome comments:


the vehicle will be mounted onto a plaster display base and as I have already stated, the base will have to be extended in some way to take the vehicle and the figures. To achieve this I will build the base a little bigger by using florists foam that will be glued, shaped and then coated with polyfiller. The following shots show how I marked the base and the progress of the build:


The next stage for this project once the plaster had dried was to paint the entire base in a medium acrylic brown and the coat the parts that I intend to be sand covered in PVA, While the glue was still wet I added some kiln dried sand and then repeated this another time. For the next time I used some Budgie grit to add a little texture to the base and then test fitted the truck to ensure that it "sat" squarly on the base. When I was happy with fit of the truck, I fastened it to the base with a generous dollop of PVA and allowed it to set into place:


The final stages for this build will be to fill in with sand around the tyres to give the impression of the vehicle bogged down in sand and to add the two figures to the front of the piece. I will also add a little smattering of fresh sand to the base and another coat of brown acrylic for the surround. The final touch will be a coat of Matt varnish to seal everything in place.
Everything is now finished with this re-work project and I'm really happy with the result. I have also decided to start adding information plaques to my models as this seems to be the "fashion" these days. I hope you like the finished piece of work and as always I welcome comments:


Thanks for the comments Robert. Its always great to have feedback. I'll be back at the workbench very soon.
ReplyDelete