Introduction

Here we go with yet another impulse buy from the stash! I bought this shortly after my V1 build after hearing that Takom had decided to release the missile on its own as well as being part of a larger kit with the transport trolley and towing vehicle. To the best of memory it cost me £20 which in hindsight is incredible value for the shear size of this model. I started this build with absolutely no idea of a diorama setting and hoped that it would come to me in a wave of inspiration! so I'll start with the build:
The launch pad assembly
The instructions for both the missile and the launch pad are very simplistic because there are very little components to piece together. I will however say that what they don't have in quantity they make up for in quality. I built this over a period of two nights to allow for the main frame to stabilise before adding the final pieces. There's not really much to say aside from there was minimal flash removal and its really well cast. here's the pictures of the assembly below:


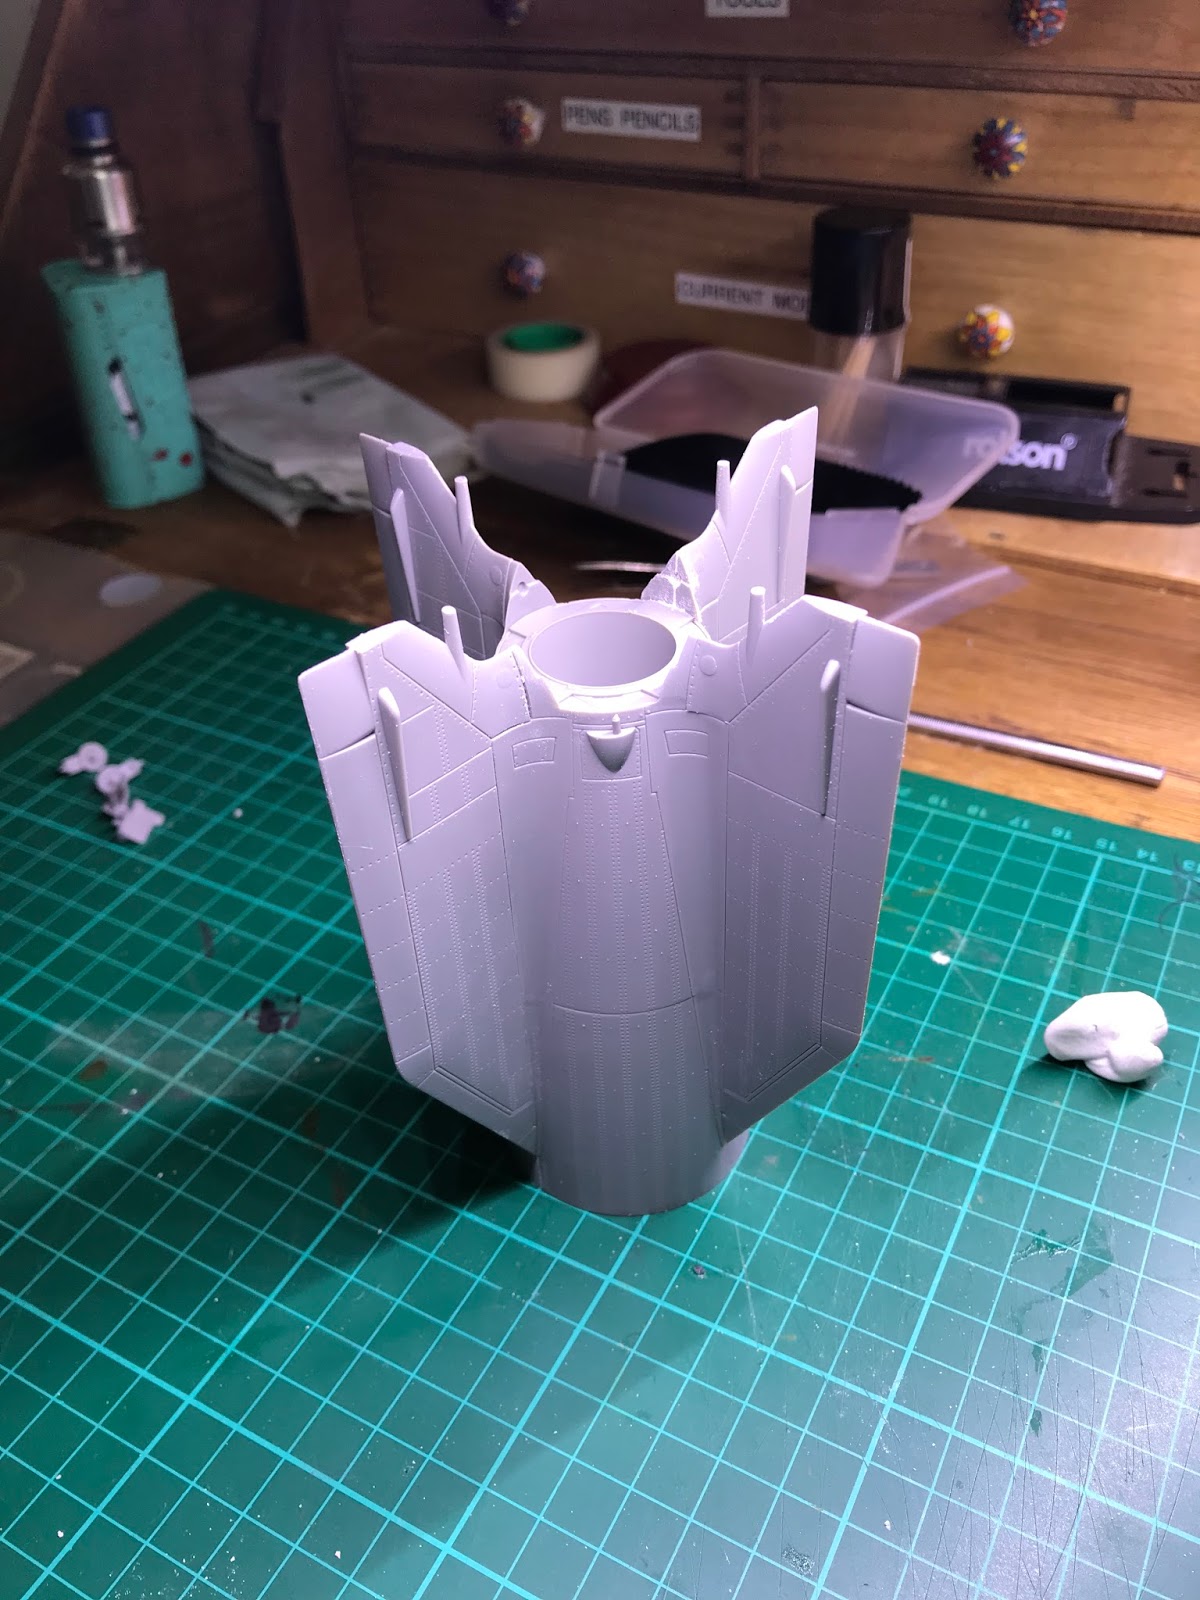
The missile assembly
The missile is assembled in two sections fist. The upper section comprises of the two main cylinder halves, the cap and a final small finishing cap (the pointy bit). The lower assembly consists of the two cylinder halves, the four fins, an internal "cone" and four guide vanes. Putting it all together was simplistic enough however there are a few small seam lines that need to be filled carefully so as not to lose the detail on the body of the missile. I have included photographs of the problem areas for easy reference below. I would also point out that this was assembled over two nights for stability of the build:


A sneaky scratch building/diorama bonus!
As I explained in the introduction; this is a second release from a much larger original kit. What it means for me is that there are a lot of "extra" pieces left over on the sprue that are intended for the larger kit. When quickly glued together it yields some hydraulic cylinders, gas cylinders, two wheel hubs, brackets and gas cylinders which will go straight in to the spares box!
Painting the launch pad
After a search around the web I came to the conclusion that these pads were constructed quickly and made to be re-usable. They were mainly painted in whatever green or grey paint they could find and that's about it! I chose green to be the colour for my launch pad and after a quick dusting with some grey primer; opted to paint with a brush rather than airbrush. I made this choice as the brush would give an uneven finish and look more hand painted and abused as the original would. Weathering was first carried out using some more humbrol and revel enamel paints in various stages of dilution with white spirit.
The Paint Scheme
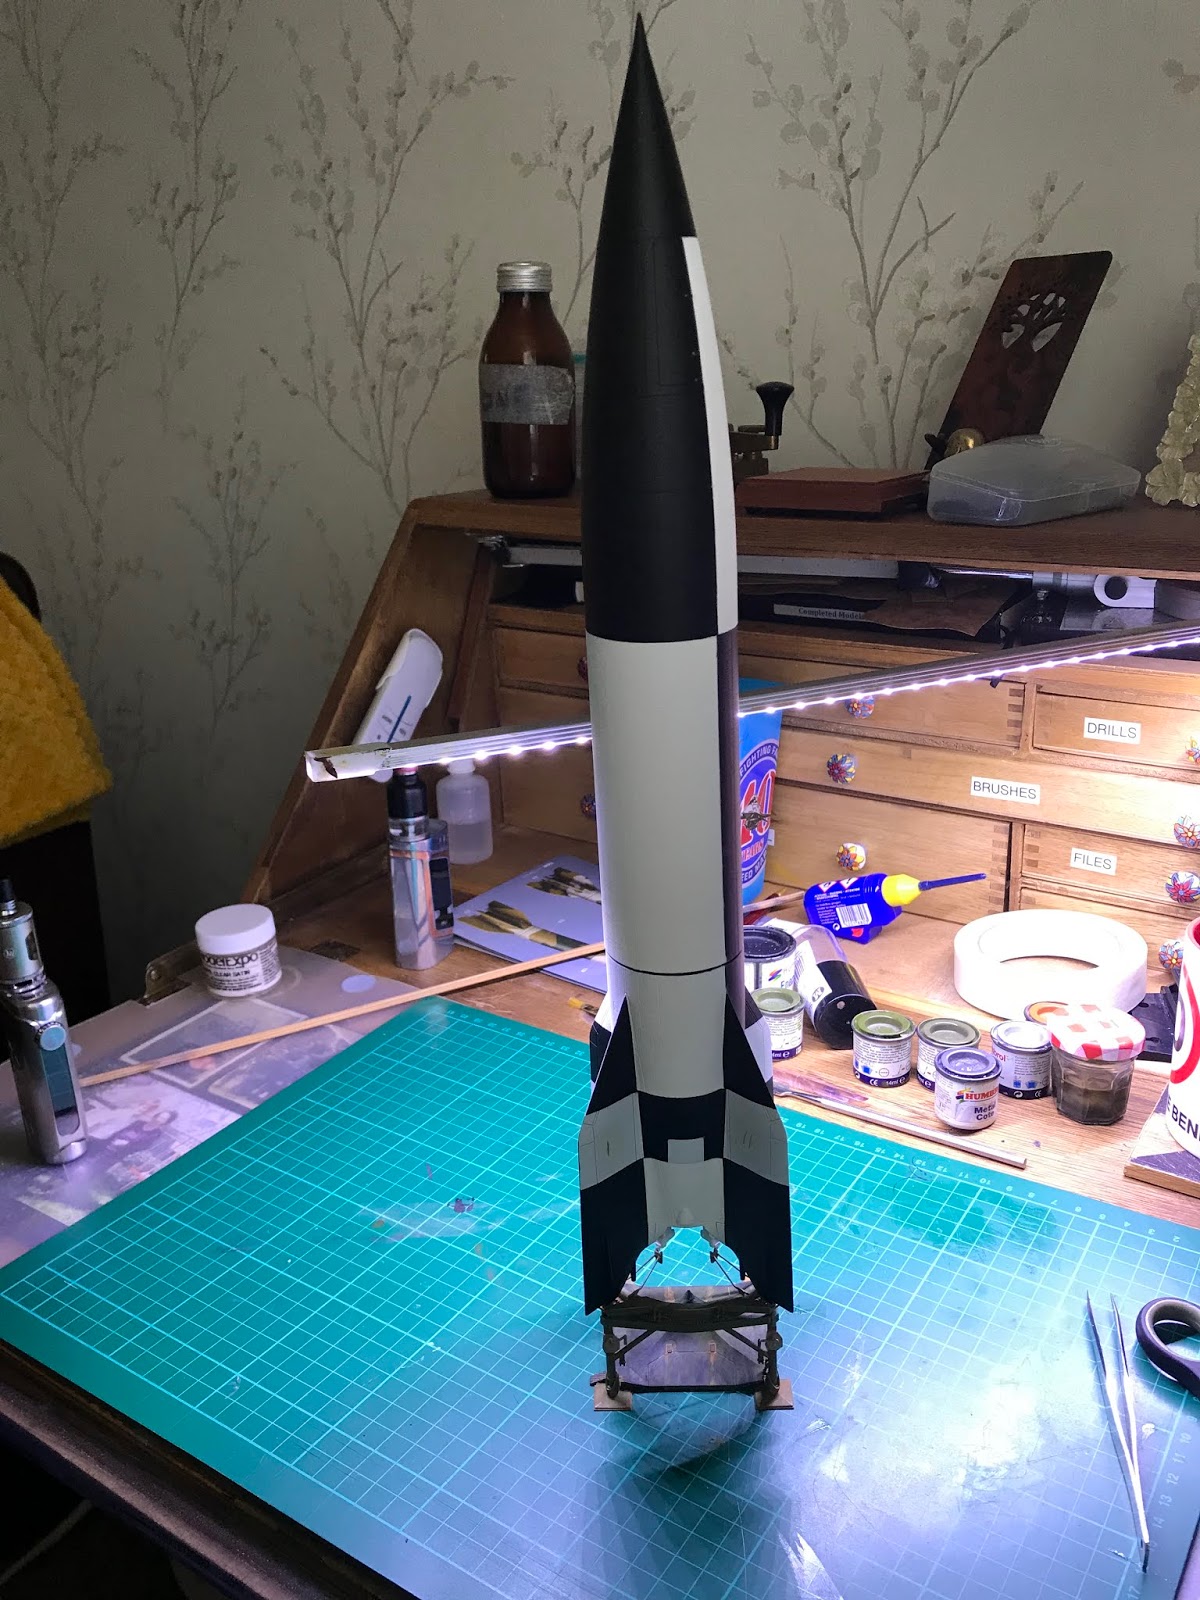
Aikom provide a good choice of paint schemes as well as the location and time frame that these paint schemes were used. From a diorama point of view this is fantastic as it can inform the builder which direction they may wish to go. For me there's only one scheme I wanted; the original test rocket scheme in black and white. I was fortunate to find an image that shows this scheme in great detail and originally saved t to my phone. Unfortunately I didn't take note of the source to credit the image and would greatly appreciate information on this if you happen to come across the original so that I can amend this post . The copy that I made is below :

Masking up this beast is very similar to the Saturn rocket I made a few years back (both designed by the same man). on the face of it things see very easy but if you want accurate, crisp and clean lines it will take time and patience to get them right. I also found out that each test rocket had a painted "lady of the moon" motif on them; the design varying with each design change. I added an additional white square on the rocket to accommodate this in the finishing stages of the build.


For the paint selection I decided upon a satin finish. This is purely because I simply could not find an accurate source that mentions if it had a Matt or Gloss finish on the actual rocket so satin is the perfect compromise! I have used many white sprays over the years and in all honesty the best pure white that I have used is white primer. The colour is devoid of cream, grey, blue tones and can be easily layered on top of an exiting base colour. As previously stated, these were experimental rockets so very little weathering would be present but I wanted some tonality to the finish. To achieve this I primed the whole missile in grey; masked off the black areas and then added layers of white onto the grey to give an almost even coat that allowed some of the grey tones through. This was then top coated in satin varnish to prevent the white surface from becoming marked. Once dry the white areas were masked and the coated in black matt. With all of the masking tape removed, the whole surface was then re-coated in satin varnish.


Paint finishing
The missile main body is basically complete so my attention was turned to the guide vanes and "tail pipe" or " rocket motor". I had already decided to display this model vertically on its launch stand so I admit that I painted the internal section of the rocket motor in matt black and added no further detailing or paint effects as this will essentially never really be seen unless a mirror is used. I also added some orange detailing to the fins following a reference photo of the V2 test missile housed in the Smithsonian Museum in America. along with red/black colours to the control vanes of the rocket motor.The Base.
Due to the height of this thing I decided upon leaving the display base very small. I found a great seller on Ebay that supplies real wood bases for a very reasonable £4.99 delivered! I opted for an unfinished teak base. The sides were finished in satin varnish and the top section was coated in Mr Surfacer to give a mottled finish that I hope resembles smooth concrete (which the Nazi's were very fond of using). Once the surface was dry I marked it out with a pencil and then lightly cut into the wood with a razor saw. The surface was then painted in mid-stone followed by Vallejo black/grey to fill in the tarmac expansion joints and then various washes of white, black and green were applied to give the surface some character.


Giving "Life" and Scale to the piece.
This is one large scale model but its difficult to envisage the scale of it without a human figure to add proportion. I remembered reading that during its development stage, each missile was decorated in a painting. With this in mind I decided to depict the rocket on the platform; ready for launch with one last job being performed; the painting of the figure. A quick root around the spares box revealed a wooden ladder set; a masterbox figure and a hornet resin head. The results of my efforts may be seen below:


Finishing
Mounting the stand on the wooden base without some additional support would be foolish at best so I drilled small holes into the feet of the launch pad and inserted some stiff wire supports. Corresponding holes were then drilled into the wood base and the whole thing was glued in place. Its at this stage I applied my wax seal, name, signature (covered) and the date. This is something that I have always done to my models so that in the many years after I'm gone people can still look at these and know when they were made (I hope!).


Final Photos and Thoughts
I'm really happy with how this model has turned out. I have seen some fantastic interpretations of this model in various dioramas on the internet; these have ranged from an out of the box build with the tractor to the missile in sections being loaded onto a allied truck but I wanted to make something that was visually dramatic but also not so big as it dominated my model display area in my office. I had already wall mounted one rocket (in the background of the photos below) so it was difficult to come up with a theme. My saving was reading about the various art work placed on the missiles during its testing phase. I must also add that although it is a testament to mankind's engineering ingenuity; I would be remiss to not remember the horrors that the prisoners at Peenemunde had to endure to complete this unbelievable weapon. I have included the final photos below and as always welcome your comments:
PS: I made a number of the "lady of the moon" decals when I made this missile and still have them. If you would like one of the decals you are welcome to have one free of charge but will of course have to pay for the postage. just get in touch via my e-mail for details, alternatively if you would like me to send you the file; you could make your own.


No comments:
Post a Comment