Introduction
This is another one of those model builds that I never thought that I would do! A colleague of mine approached me with a "challenge". He had bought a wooden viking ship model many years ago and made a start on it. A few house moves later and having lost some of the parts he placed what he had left of the model back into the box and left it there. He asked if I would have a go at building it. I said yes without even looking at the kit and brought it home. I had a few other models to complete and a busy schedule so a year later I am finally getting around to building it. Fortunately I had been given a limitless timescale to complete this as he knows that model building is a hobby for me and that on occasion I have to stop completely while work/life gets in the way.

The Kit

The Skeleton of the boat
I'm sure that the correct terminology is not the skeleton however not being a nautical builder I will describe things the best way that I can. The first thing that I was faced with when studying the plans was that the parts that were missing were the bow, stern and keel beam. Probably the most important parts required for an accurate model !!!! A great many swear words and several cups of coffee later I had formulated a plan. I had some lite ply left over from a previous project that when an additional layer of balsa wood was laminated to it would be an accurate thickness for the bow and stern parts. I also has some bass wood strips left over from another project that I could laminate and then cut down to form the keel beam. I then used some of the wife's grease proof paper to trace from the drawing for the stern and bow parts and proceeded to manufacture them. The initial build of the skeleton is shown in the photos below:-


Satisfied with how the parts fitted together I then started to measure out the positions for the hull bulkheads along the length of the keel beam. To ensure that they were as square as possible an engineers square and mini level were used at all times. Again Some problems were encountered with some warping on some of the beams. I decided that these could be alleviated as I progressed with the build when attaching other parts that could pull the affected beams back into alignment.
Some additional deck beams were then glued into place and the skeleton was essentially complete. I am happy so far with how this is coming together however I think I am about to lose the will to live with the next stage: the hull planking!


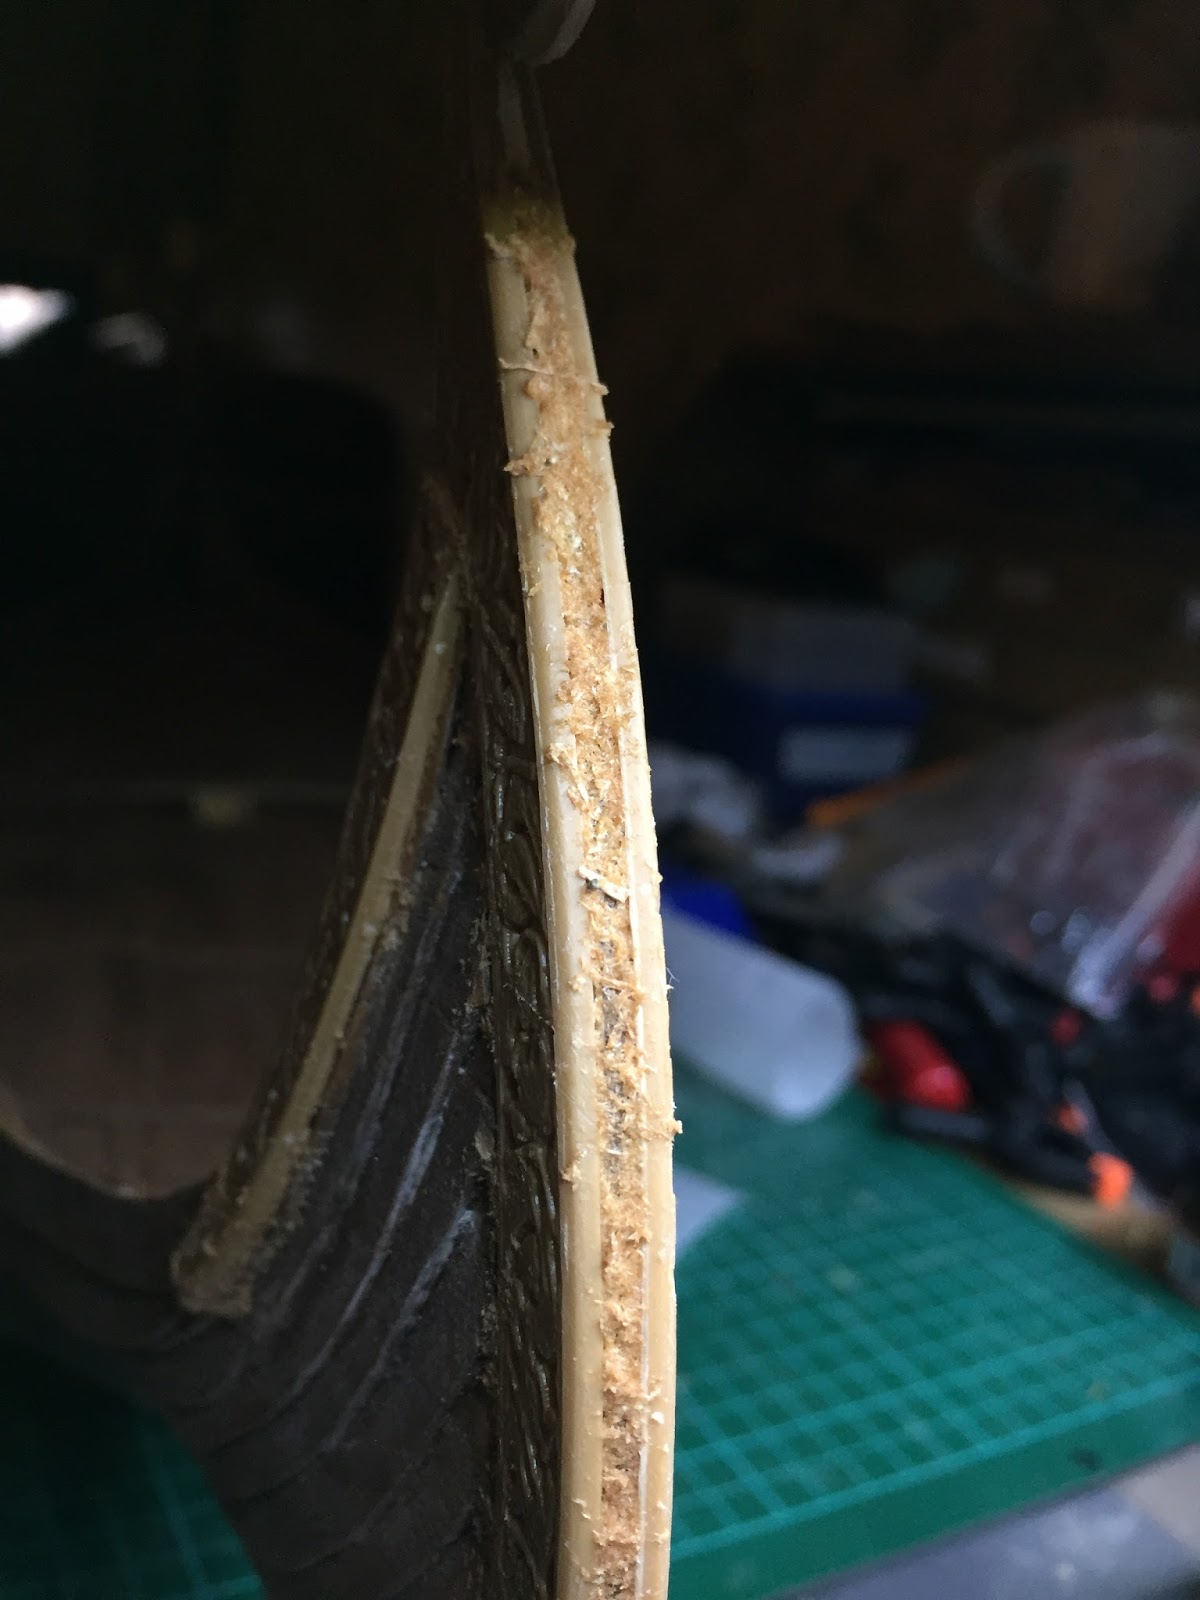
Planking the hull
The wood pieces which have to be individually cut are bloody awful. The wood has dried to the point that they are unbelievably brittle and snap at the slightest pressure across the grain. To make matters worse they cannot be sawn using my scroll saw as this has proved to be too vicious and splinters the wood almost immediately. This essentially means that each piece must be cut by hand using a hobby knife! Many, many, many hours later with several repairs to the planks I was left with a bundle of numbered strips to start attaching to the hull beams.


The hull of the boat is now complete (thank god). There were no real issues her save for the time it took to set and layer each plank to the next one. If you do decide to take on a model like this I would advise you invest in a lot of clamps! I would also like to take this opportunity to apologise for the poor quality photos. This is purely because the model is larger than my model desk as shown in the photo below. This makes it extremely difficult to photograph the build progress in the night time when most of the work is being done.

I've decided to sand, fill and stain the hull before moving on to cutting and planking the deck of the boat. I took this decision as while the deck is off I will have access to both sides of the hull and it will hopefully make my life a little easier. I also have enough wood off cuts to laminate the keel beam with the same wood as the rest of the hull. This should then disguise the fact that it was home-made as it is currently a lot lighter in colour than the rest of the wood. The first job for finishing the hull is ensuring that the bow and stern decorative plates fit as snugly as possible. Unfortunately Billings supplied these parts in plastic and I am at the moment scratching my head trying to figure out the best way to incorporate these onto the model. The main problem is that any plastic part painted to look like wood will always look terrible when held against real wood. Being as this part is supposed to be glued to the wood structure; leaves a big problem in making it look authentic. (more on this later). I am pleased with the initial fitment of the decorative plates against the hull. I am confident that with a small amount of fettling they will provide a seamless fit to the structure:

Happy with the fitment I then took on the task of sanding, cleaning, filling and generally cleaning the entire hull. I think the most accurate way of describing this process is "beautification". Its not really a word you would normally associate with Vikings however this boat will be used as a display piece once completed and although I have ensured that there are no true straight lines on the hull; it still needs to look pleasing to the eye. I used a combination of watch makers files, a small dental bur, a Dremmel with a sanding wheel and hand sanding to get the hull prepared for staining and finishing:


The kit also provides a rather nice stand. I decided that this would be an appropriate time to build and finish the stand as it would prove very useful in supporting the hull once stained and finished. The stand is simplistic in its design and construction and I will let the pictures below detail the build process:


To finish the stand I opted to leave it in a natural colour and applied some Dutch Oil to seal, nourish and protect the wood. The completed stand looks really nice and once dried I am sure will look even better. In addition it holds the hull really well and should provide a stable build platform for when I begin to plank the hull.
Finishing the hull
There was fortunately enough waste material to laminate the new keel beam in the same wood as the hull. This was done in sections and held firmly in place with a liberal amount of clamps to dry. I decided that I would finish the hull before continuing on with the build as this would make it easier to complete in the long run. To get the desired colour I used some burnt umber acrylic paint in a 25:75 ratio with water. This light mix allowed the colour to soak into the wood and I could also control the depth of colour by the application of several coats. Each coat was allowed to fully dry before the next was applied as I didn't want the water to warp or twist the hull. I then lightly sanded the hull once more and applied a coat of Danish Oil to finish. I expect to give the hull at least one more coat of the Danish Oil before moving on to constructing the rest of the boat.


I would like to discuss at this point a decision that I took at the beginning of this build to ensure that there would be no truly straight edges to hull planks. The kit provides some very well printed plank shapes that have very clearly defined straight edges along their length. I was about to hand cut the first strip with my knife and steel rule when I happened to glance at the box art. It depicts the ship under construction. It was then that I realised the craftsmen of that time period did not have access to complex machines that would provide perfectly straight wooden planks. Why should the model of the same ship be any different? I took the decision to continue to hand cut the planks with my knife, but without the aid of a straight edge. This took a lot of concentration and careful cutting however I was left with small undulations in the edges of each plank. When each one was placed on top of one another the effect is still very pleasing to the eye but gives a much more authentic feel to it. I personally think that if each plank were cut perfectly straight it would not have the same effect. I do hope that you agree.
While the hull dried I began the laborious construction of the oars; all 30 of them!I will continue to piece together and build them in between the other jobs that I have on the boat build. This will hopefully break up the monotony of making them.


The Deck
The deck boards are deceiving in the fact they at first glance look an easy thing to do. When you consult the instructions they are not clear at all in how they should be attached to the structure. Fortunately after "consulting" the internet I found that for each run of deck boards; they require additional support beams to be fixed to the bulkheads of the boat. These are just strips of wood but they have to be fixed at just the right depth to ensure that when the deck boards are fitted, they are flush with the top edge of the bulk heads. To achieve this I simply cut a small section of deck board and glued a scrap piece of wooden stock to it. This allowed me to gauge the correct depth that the support beams had to clamped and then glued. This entire process was repeated for the entire deck:


I'm glad that I chose to start in the centre of the deck and get all the straight cuts out of the way first. As I got ever closer to the bow and stern, the cuts became ever more difficult in the way that they had to be matched to the angle of the boat's hull. What I will say at this point is that I am glad I have experience in laying wooden floors as the principles are almost identical! In a contradiction to how I built the hull I chose to leave the deck board edges in the machined finish that the wooden parts were supplied in. I could have used my knife to carefully shave the edges to give the effect of roughly sawn timber; however when I viewed to the cut pieces on the deck I found the preciseness of the fits to be quite satisfying to look at. I asked family members and friends what they thought and they all agreed. I know that some of you reading this will think that this decision is slightly odd given that I went to great lengths on the hull to ensure a certain authenticity about the build; however this will be viewed as a display piece when completed and a certain amount of artistic licence must be applied if it is to stand up as a finished piece to be admired.


With the deck finally complete I decided to move on the mast base inside of the ship. As expected the instructions were non-existent and once again I was left with consulting the web in search of answers. There wasn't a great deal of information but I did find some information that alluded to the support provided with the model was insufficient to cope with the mast and sail. I immediately set about strengthening the mast mount prior to permanently fixing the final deck boards in place.


Some bass wood blocks took care of the longitudinal support inside the hull and the support at the deck level should be sufficient to hold the mast firmly in place once everything has been assembled. Yet again the instructions are nonexistent with regards to the mounting of the mast in the hull. I can see two options:
1. Drill the mounts to the same diameter as the mast.
2. Shape the mast base to the contour of the mount in the hull.
I chose option 1 and 2 after a little deliberation. The internal hull mount remained square and the mast was cut and shaped accordingly. I chose to do this as once fixed the mast would not be able to rotate in the hole should the glue fail at any point. If the mast rotated once the sail and rigging were complete it would ruin far more of the model. I however choose to drill and file the upper mount to the diameter of the mast for aesthetic reasons.


I also chose not to complete the mount at this stage as I want the ability to freely stain the upper deck without the worry of hitting the mast with my elbows during the process. The final preparations for the deck involved sanding excess glue from the joints, sanding the black ink part numbers and fixing some rather nice edging strip pieces that cover up the top of the bulkheads on the deck. This makes a world of difference to the look of the piece as it removes the sight of the lamination's of plywood.


With the final preparations complete the entire deck was stained in brown acrylic and then once dry given a coat of Danish oil to seal the stain in place.
Mid Build review
I don't normally provide a mid build review in my builds however this is somewhat of a long project in comparison to my normal models. I also want to discuss my frustrations with the kit. In fairness to Billings boats the kit is very old and the wood has been allowed to dry for an extended period of time so my comments on the brittle nature of the stock supplied could be a direct result of this and a new kit version of this may not suffer the same problems. I will stand firm on my opinion of the supplied instructions and drawing especially with their lack of clarity and non existent explanations. I have found the up to date instructions in PDF format and little has been changed from the originals that I have. This in my opinion is unforgivable for such an established company. Many aspects of this build are extremely monotonous and repetitious. If you have a poor attention threshold or are impatient by nature; this is definitely a model to avoid! Fortunately for me, I enjoy working with wood in models and did not find this to be a problem once I had started the phases of the build that displayed these qualities. Many of the problems that I faced were borne from the lack of instructions and my inexperience in model ship building and I am sure that some of the solutions that I used are not "standard practice" in the model ship building community. Please don't take this write up of my build as a concise tutorial on how to build this ship.Completion of the hull and deck
With the deck ready to be stained and oiled I turned my attention to completing both sections before moving on to the mast and rigging. The oar mounts had to be carefully marked out, The shield strips added, the tiller or rudder added and the bow and stern plates fixed and painted. The first job I decided to tackle was the rudder/tiller. For reasons that I will never understand, Billings decided that the tiller would not be a printed item and would have to be manufactured from wood stock. That isnt a problem in itself however, the overall measurements for the tiller are placed in the bill of materials only and the shape from the scale drawing. Neither of which give a detailed drawing for things like the length of the shaft, handle or spade section that slots into the rudder!! After yet more head scratching I came up with a shape that very closely resembles the illustration and I kept it very "battered" being as this would be one of the most "man handled" items on the ship.


The pivot point for the rudder is again something else that was quite difficult to get right. The drawing shows the dowel portion having an overall length that had to have an angle cut from it. Again the drawing did not give any specific angle! What I had to do was temporarily clamp the rudder in place to the hull and measure the distance from the hull plank to the uppermost portion of the rudder where the plate would be mounted. This measurement was then transferred onto the dowel which gave me the minimum measurement for overall length and therefore produced the cutting angle. ( if you think that was confusing; try doing it !!!).
Just before the deck was stained I also decided to fit the bow and keel plates that are supplied as plastic items. In preparation of fitting the plates, the keel and stern planks were carved and sanded to a sharper edge as per the instructions provided. The edges were then coated in glue and the plates fitted and clamped and allowed to dry. I had previously cut the hull planks as closely as possible to match the edge of these plates but there are still some quite obvious gaps. I had kept quite a bit of sawdust while making this ship and I now mixed some of this with PVA glue to give me a very good wood filler that matched the colour of the hull perfectly. This was applied into the gaps to provide an extremely close fit to the hull plate.

Once everything had fully dried, I began staining the deck with the same mix of acrylic paint to water as the hull. After the first coat it became apparent that I had dripped a little more glue than I had realised onto the deck. This resulted in my stain not soaking into the deck boards evenly. I waited for the stain to fully dry and then simply sanded these areas to allow the stain to soak in and applied a second coat. I am really happy with how the stain soaked into the grain of the wood. It has given a wonderful aged look to the wood. I can assure you all that this was completely unintentional but it looks fantastic. Normally an unintentional paint result is a painful one for me as they almost always look terrible. Its nice to have a "win" sometimes!


The interior of the hull which is visible in the deck area needed a little more work to remove the ink lines, numbers and glue over-spill. I used a small dental bur on my mini grinder to clean things up before the application of stain to match the rest of the ship. On the subject of cleaning things up I would also mention just how good the £1 novelty USB keyboard hoovers are for model making! They are great and the next time your in a pound shop, pick one up; you won't regret it.


After I had stained the remainder of the deck I noticed that there were a few areas that had some unacceptable gaps and marks. I was already planning on filling the bow and keel beam joints between the wood and plastic so this was an ideal time to fill everything in one go:


While the filler dried I turned my attention back to the oars, mast mount and rudder for the stain and finishing. This had to be completed in two batches as I simply didn't have enough clamps to support all of the pieces at one time!


After the filler had dried I used a combination of hand filing and a small grinding tip to shape the filler back into the contours of the ship. The plastic stern and keel components were then painted in a light brown matt Humbrol enamel paint as a base coat. I opted for the mat enamel as it adheres to un-primed plastic extremely well and once dry has a porosity that will hopefully accept the water/acrylic stain mix that I had used for the rest of the hull.


While the enamel paint dried on the hull and stern, I turned my attention to the shields supplied with the kit. Unfortunately they are plastic items as well. Ordinarily I would take the option of throwing these away and making new ones from wood, however when one considers that the bow and stern plates are made from the same plastic it makes sense to keep the shields and finish them in the same way as the plates to provide some continuity to the finished model. When I inspected the shields I was impressed with the quality of the molding on the front face, unfortunately there is no molding at all on the rear face of the shield. This wouldn't be a problem to me if the entire back face of the shield would be covered in the final assembly but at least half of the rear of the shield sits proud of the hull. I used a razor saw to cut lines into the back of the shield to replicate the front effect. I had to slightly off set the rear lines to the front or I risked cutting through the shields. I also have some thin black leather in my "stash" that I cut away from an old wallet of mine. I plan on cutting this leather into thin strips and attaching them to the rear of the finished shields to replicate the straps that the crew would hold onto when they use them in battle.


Whilst I continued to prepare the shields I was asked by Colin (the friend I'm building this for) if I could paint one of the shields in the colours that he used when he takes part in battle re-enactments. Happy to oblige I painted one of them as requested:


As already mentioned, I cut some of the leather from my old wallet into strips and made sure that they were the right length and width for the back of the shields. I then coated the shields in some matt lacquer and glued the leather straps in place. The only thing left for the shields is to paint the centre boss in silver. I will do this at the very last moment before I hand the ship over to Colin.


Moving back to the hull and stern; I painted over the matt enamel with the same acrylic wood stain as I used for the rest of the hull. I am really happy with the result and I honestly don't think I could have achieved a better wood effect than what I have. Hopefully you will agree.


Now that the deck and hull are rubbed down completely and stained I turned my attention to all of the smaller "add-on" pieces for the hull and deck before sealing everything with Dutch oil and moving on to the mast and rigging. Some of the pieces in the keel and stern areas are plastic and others wood, fortunately they fitted without too much fettling and I was quickly able to move onto marking the oar positions for drilling on the hull and then marking the hull for the hundreds of drill holes to accept the nails. In addition I started to add things like the oar stowage mounts onto the side of the deck


The next step is one that I have been dreading since the start of the build; the hull nails! These nails are tiny! They measure 1 mm diameter by 4 mm long. I decided to pre-drill the hull with a 1 mm drill bit and fasten the nails with superglue. The main hull was easy as the back of the nails are hidden by the deck boards. As you get closer to the bow and stern however; the tail of the nails pokes through the hull boards and is quite visible on the other side. This means that I had to take an already small length and cut it even smaller to ensure that it penetrated the hull boards without coming through to the other side.


Disaster! Only a small one but a disaster none the less. When I first opened the box, the nails were loose. After finishing the starboard side of the hull I quickly realised that a large portion of the tiny nails had "escaped" over the many years that this kit had been in storage leaving me with not enough nails to complete the hull. I sent a text to Colin to explain this and he spent the weekend like a bloodhound scouring the model shops of South Wales to find enough of these nails to complete the ships hull. He managed to find enough of the nails from Lendons model shop in Cardiff. They are a great little family owned business and I'd recommend them to anyone visiting the capital. Here's a link to their site lendonsmodelshop.co.uk
I have now began the final steps to complete the hull and deck prior to a final varnish coat. One of the things that I had to do was to get rid of a white deposit that is all over the deck and some of the other pieces. It turns out that where I had applied the Dutch oil and not removed the excess with a rag, the wax content had crystalised and risen to the surface. After a little reading, the solution was to apply a little more oil to the affected areas and buff off with a rag:

I then turned my attention to the rigging mounts supplied with the kit. Again some of them were wood and others plastic. The plastic portions needed to be filled and I opted to use some squadron putty for this to maintain the same surface. Each part was cut, sanded and finished in the same way as described in the sections above. I also cut and attached the mounts and strip along the sides of the hull that would provide for the shield mounts once the model was complete and ready to display:


Before I moved on to preparing the hull for varnish and then on to final assembly I thought that I would take the opportunity to add a little note inside the hull of the ship. I don't normally get to do something like this as the size of the models that I normally make would not permit it. I decided to write the note in the style of a scroll, complete with a wax stamp and ribbon. This was added to the inside of the hull before the remaining planks were glued into place. Its my hope that this scroll will never be found but in case it is, I have requested that the model is repaired and returned to its former glory


Final preparations before varnishing the hull include inspecting in detail all of the areas to ensure that the finish is OK, that all of the nails are in place, there are no loose deck boards, etc. There is nothing worse than applying the finishing coat to a model only to discover a mark, blemish or missing piece! I then cut and attached the shield mounting rail nails on both sides of the hull and stained it the same colour as the rest of the wood. I also took advantage of some extremely nice weather and placed the hull in the sun to fully dry. I was also very fortunate that my local Lidl store had spray lacquer on offer. I bought £20 worth of lacquer which should be enough to coat the boat twice and give a good hard wearing surface. When added to the industrial grade super glue and paint I have spent a total of £30 on this model which I am sure you will agree is fantastic on a model of this size!

I'm really happy with the results so far. The hull with the lacquer finish looks fantastic. As always I improvised with what I had around me, so my wife's laundry basket has a good over-spray coat of Matt lacquer and the family toaster has doubled for a hull stand while the lacquer coats harden! The cooker also made an excellent stand for the curing of the deck after that had been coated.


Not one to sit around idle I decided to wash the sail by hand before doing anything with it. Over the years that it had remained in storage it had soaked the adhesive from the tape that had originally held it and it had taken on the damp musty smell that cloth takes on when stored in an old wood draw for a long while. It surprised me just how well the sail came up after a wash and once dried and ironed, will be ready to rig onto the mast. I had considered a number of options for the sail. The instructions called for the sail to be painted in red and white stripes. I have a problem with this as an enamel or acrylic will harden and not look correct at all. If I use a water based paint or dye, it will bleed across the lines of the sail and look bloody awful as well! I had also thought about buying some more material and dying it red. I could then cut the material into strips and sew the sail together. This would probably be the best solution to give the red/white stripe effect but I have decided to go another way. I have read a lot regarding these ships and there were loads of different sails used on them. A very common sail was of a plain white. Opting to go with the easiest and best achieved version that I was capable of; I decided upon the white sail. I used some brown thread and sewed over the printed lines on the sail. I also added some thin gauge wire under the folds on the edge of the sail so that it would retain its shape over time:


I am now at the most annoying part of any model build for me. The finishing steps! This is basically the stage where all of the little jobs that I have been putting off are completed such as painting/finishing the small parts left over, mounting the mast and rigging the sail. It is also the time when I start to have things go wrong for me. The first of these was the rudder. I mounted the rudder onto the hull, fixed it in place with wire and then over-layed with some leather and allowed to dry. It was then that I realised that during the assembly, the boat and stand sit on my cutting mat which is approximately 8 mm thick. When the boat was placed on a flat surface the rudder hit the surface! it was then that I realised it was approximately 8 mm too long. A cup of coffee and a vape (I've quit smoking) later I cut the additional 8 mm off the bottom of the rudder and re-shaped it. The oars were coated in lacquer and then the additional rigging parts.


Rigging the ship
I will be honest here and say that I have very limited experience in ship rigging and even less experience on rigging a Viking ship. This I am sure will be a lot of fun!


The rigging wasn't actually as hard as I thought it was going to be. I don'y know whether it really was easy or whether when compared to the rigging work on the Sopwith Camel that I made a while ago, it was easier? In either case it took me an evening to complete. AND THAT'S IT! She is complete at last!!!! It was a lot of fun to build this in the end. I had a few moments when I wanted to take it out to my garden and burn it but now at the end of the project I can honestly say that I leaned a lot in terms of my own model making abilities and that's always a very good thing. I was very fortunate in that I didn't have to pay for the model itself as these now retail for £160+. I would say that Colin (the guy I built it for) had bought a bargain when he picked it up for £20.When you couple that with the £30 I spent to complete it, this is one hell of a model for the money! I'll end this post with some finished photo's of the ship and its new owner in one the aircraft hangars that we both work in. As always any constructive comments are always welcome.


It is with a very heavy heart that I find myself updating this page. My friend and colleague Mr Colin Edwards-Jones passed away peacefully in his sleep. It was a complete shock to all of us. He leaves a son and daughter, his sister and his mother. It is my understanding that the ship is being passed on to one of children and I hope that it gives them as much pleasure as it did to Colin. He truly was one of the nicest most genuine people you could ever hope to meet. He is missed every day by the staff and students alike at the University. The smile on his face when he is holding the boat in the image above is one of my cherished memories of Colin.
I hope that he is at peace.
Hello, I have finally begun my Oseberg after having bought it 15 years ago or so. Happy that all the bits seem to be in the box, and the wood hasn't suffered over time. On the other hand, I could do with clearer instructions; but that's wooden-ship modeling all too often.
ReplyDeleteHi. I hope you enjoy building it as much as I did. I agree that the instructions could be a lot better. Once your finished you have to send me a link to the photos or maybe e-mail me a few photos and I’d be happy to add them to this page if you don’t have a website.
DeleteThis comment has been removed by the author.
DeleteI'll post pix to my blog & let you know
DeleteOutstanding! I’ll put the link to your blog on this page if you don’t mind.
Delete