Introduction
I've created this "how to" as there is not a lot of direct and too the point instructions on how to actually create your own decals. I have to say that I have not had to create my own decals very often as the majority of my projects either don't require them or the decals are required. However I have had a few instances where I have found the need to produce some of my own. I have come to that point again so I thought that this would be an ideal opportunity to share with you how I produce my own decals:
Materials:
- A suitable word processing or photo editing program
- Printable Decal Sheet (laser or inkjet)
- Suitable Printer
- Acrylic Matt Spray Varnish
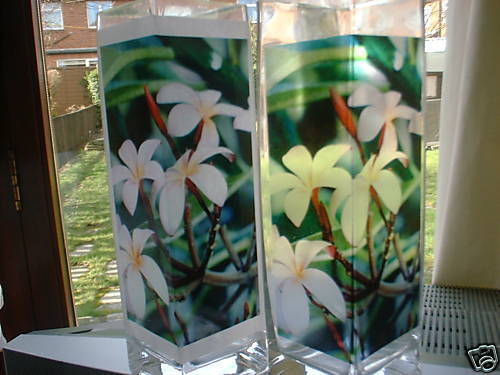 |
| photo taken from E bay |
The printable decal sheets can usually be bought quite cheaply from Ebay. You have to read the description closely as the sheets will either be suitable for a laser printer or an inkjet printer so make sure that you buy the correct sheet for your printer.

The second thing that you need to think of is the sheets are either transparent or white in the background. If you have an intricate shape that would be very difficult to cut around precisely then you will probably want to opt for the transparent background. I would point out as well that the depth of colour is much better when you print onto a white decal sheet. The photo right illustrates the difference in colour transparency between a white and clear background. The main draw back of making your own decals is also the lack of the colour white. If for example you want to print out a white american WWII star or want to use white writing for a vehicle like the vehicles shown left, then unless it has a black outline you will be unable to print out your own decal as a printer does not have white ink.
Process:
 |
| Hasagawa 1/48 Jeep |
I will be using my current project to illustrate how I produce decals. Briefly I intend to turn a standard 1/35 Italeri Willy's jeep into a "follow me" airfield jeep as used in World War II. The vehicles were brightly painted in checkers to stand out for the pilots to notice them. You can buy one of these jeeps in 1/48 scale as shown in the photograph on the left, but not in 1/35. The two options that I have are to either mask and spray or take the easier route and spray the whole jeep white and use red square decals to complete the look.
To produce the decals, I first took my rule out of my tool kit and using the vehicle as a guide, worked out the size of the red squares that I will need. In this instance 0.5mm. to create the decal I used microsoft power point as I can easily insert an "object" and re-size it. Once this was done I altered the colour of the square to bright red, removed the border and then copied and pasted the square many times over until the desired amount of them was produced. For the serial number on the bonnet, I used the Calibri font at size 8 and emboldened it. Once happy with what I had produced I printed the sheet onto PLAIN paper FIRST to ensure that I have everything in the correct proportions with no errors. once printed, I cut out some of the squares and writing and placed them on the model to check that everything was how I wanted it. With everything looking fine, you can then print out onto the decal sheet and allow the sheet to dry for a few hours.
 |
| test fit of the decals |
 |
| screen shot of the decals I produced |
 |
| decals following a coat of varnish |
Once dry, the sheet then needs to be sealed with an acrylic matt varnish,
WARNING If you don't take this step you will find that as soon as the decal is immersed in water, the ink will separate from the decal and it will be ruined. I typically spray two thin coats of varnish onto the whole sheet and allow it to dry overnight. Once the sheet is dry, cut out the decals individually and apply to your model. I have also used microsol (a decal softening product) on home made decals with no adverse effects.

Before I finished writing this tutorial I actually found a scanned image of the 1/48 scale decals used for the Hasagawa Jeep shown in the photo above. While I would normally go through the process that I have described above. I will not overlook a gift such a this. If you find a scanned image of the decals you want to make, then the process is exactly as I have described above. If you are lucky enough to find an image that is 100% the actual size as it was scanned then to find the scale that you need, its just a case of some simple maths. I printed out the decal sheet onto plain paper. measured the total size of the sheet, multiplied the size by 48 to give the "true scale size", then divided that by 35 to give me the 1/35 scale image that I needed. (hope that makes sense). I would point out that unless you are a wizard with photo editing software, the blue background of the decal sheet will also be printed so some of the smaller white decals shown on the sheet left will not be able to be used as it will be nigh on impossible to cut around. For me this is not a problem as I will be portraying the vehicle I'm making these decals for as an RAF version so I won't need the white decals shown.
Below is two quick shots of the decals being applied to my "follow me" jeep.

I hope that you have found this tutorial useful and that you start making your own decals from reading this. If you have a go then let me know how it went.


 Before I finished writing this tutorial I actually found a scanned image of the 1/48 scale decals used for the Hasagawa Jeep shown in the photo above. While I would normally go through the process that I have described above. I will not overlook a gift such a this. If you find a scanned image of the decals you want to make, then the process is exactly as I have described above. If you are lucky enough to find an image that is 100% the actual size as it was scanned then to find the scale that you need, its just a case of some simple maths. I printed out the decal sheet onto plain paper. measured the total size of the sheet, multiplied the size by 48 to give the "true scale size", then divided that by 35 to give me the 1/35 scale image that I needed. (hope that makes sense). I would point out that unless you are a wizard with photo editing software, the blue background of the decal sheet will also be printed so some of the smaller white decals shown on the sheet left will not be able to be used as it will be nigh on impossible to cut around. For me this is not a problem as I will be portraying the vehicle I'm making these decals for as an RAF version so I won't need the white decals shown.

No comments:
Post a Comment