 |
| Armature ready |
 |
| My selection of sculpting tools |
This time around I also opted to use my home made armature stand which is made up from half a small brass hinge, some threaded rod, wing nuts, a small aluminium bracket and an old Fletcher trolley base (I teach physics) My contraption can be seen in the next photo which shows the initial "bulking out" of my sculpt. I would also like to point out at this stage, that while my wife would call me tight with money and I would call myself "cost efficient", I went to the trouble of making this stand rather than buying one as I have trawled the Internet over and over and cannot find an armature stand that is small enough for 120 mm or 1/16 figure sculpting so I had no other option than to make one. It was just a bonus that after buying and scrounging the parts to make this it ended up costing under £5 or $7.50 !
 |
| bulking figure out on my home made stand |


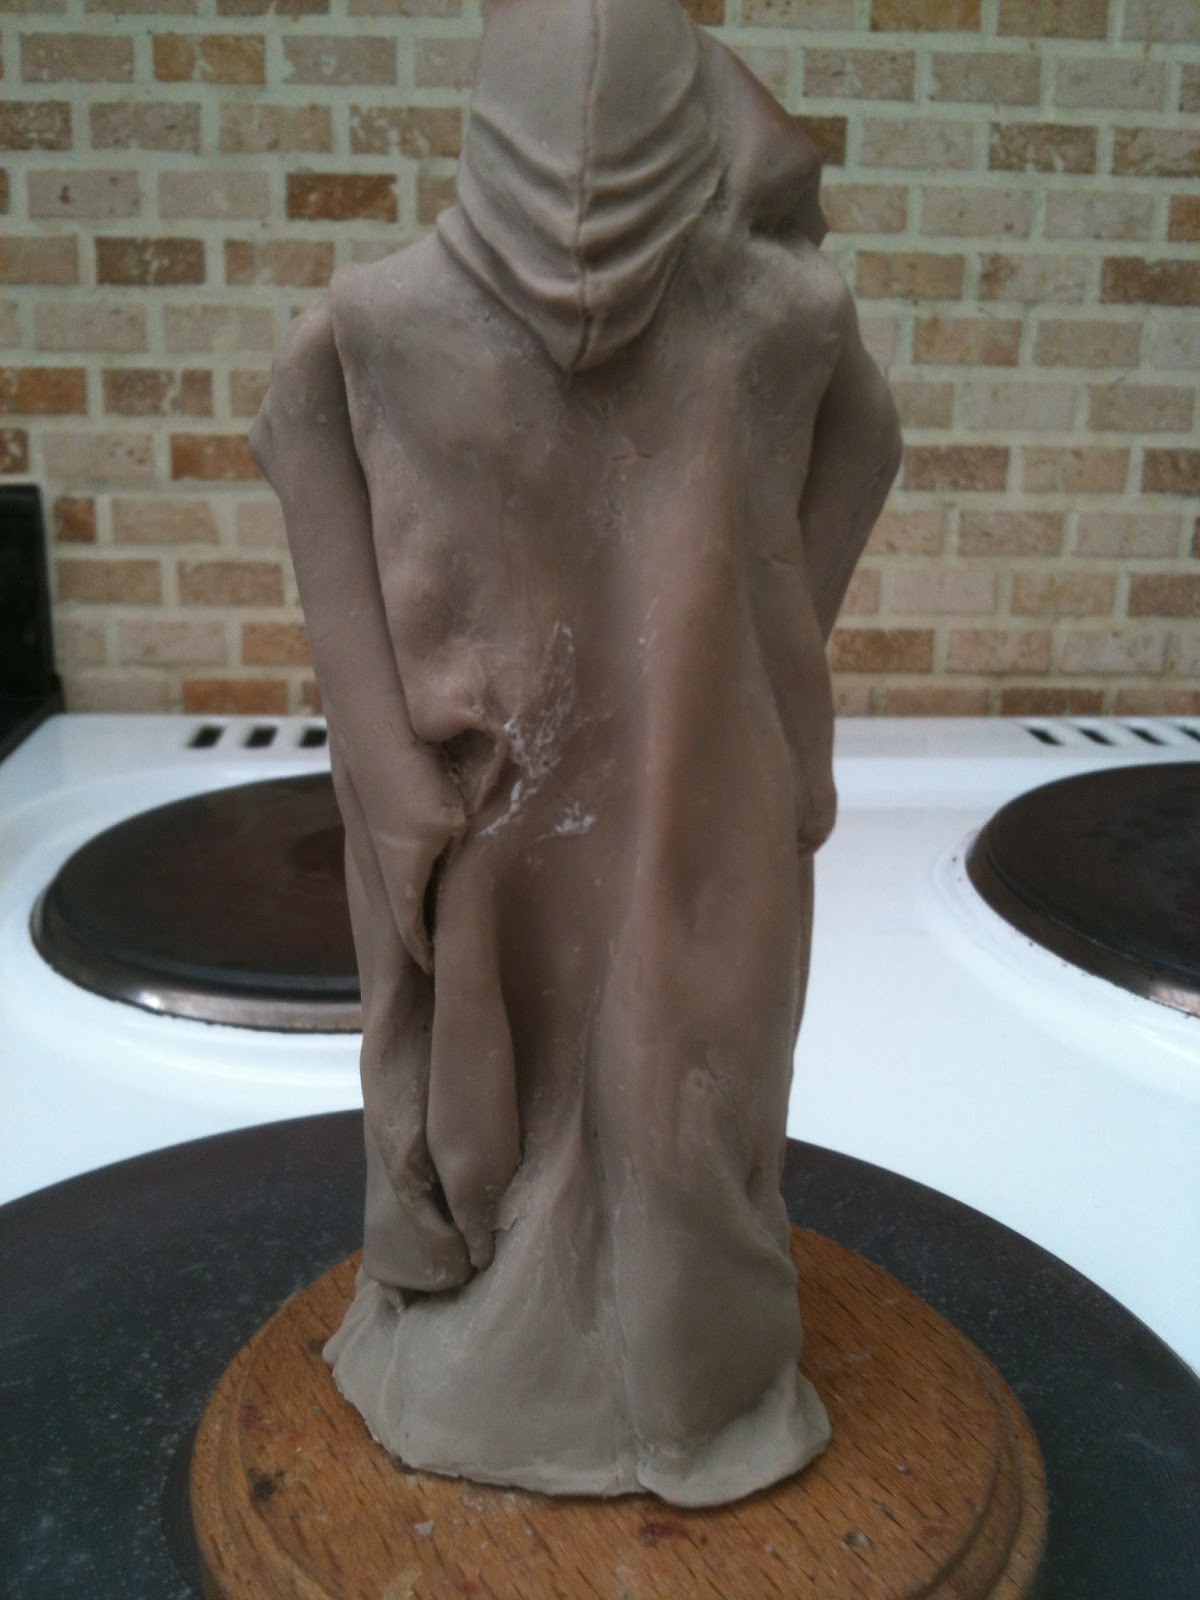
The next stage that I decided upon for the figure was the base of the cloak which I intend to have flowing slightly onto the floor. The difficulty for me is to ensure that the folds look correct as the robe comes off the body and onto the floor. I did this in a number of stages, slowly working around the base of the figure and baking as each stage was completed. The following photos show the base of the cloak in various stages of completion and baking:


 One of the drawbacks from baking and re-baking is that sometimes various parts of the figure can scorch in the oven as illustrated in the next photo. Its not something that I get overly worried about as I ensure that any subsequent baking of the figure that I do, the scorched element is covered in aluminium baking foil which deflects the heat off that portion, preventing further scorching or burning while allowing the other parts of the sculpt to cure with the heat.
The end of the sculpting phase is drawing closer for me with just the left hand which I will depict holding a set of rosary beads tightly in a clenched fist, and the sleeve itself. Once these are complete it will be a case of coating the figure with primer, sanding and filling any imperfections from the sculpting process and then a final paint and setting on the base which as yet I have not decided on how I will be portraying?
As with all of my sculpts/projects I thought that I had reached the end and then decided that it just didn't look right to me. The problems that I had identified were:
The Sleeves seemed too long.
The back section of the figure was too bare.
The back of the figure seemed to be too wide.
So now the added stage for me is to get the carving tools out and start cutting away the offending areas so that I can re-sculpt to my satisfaction.


I am a little happier now from shortening the sleeves of the figure and adding a panel onto the upper portion of the back that is really a continuation of the small part of the front panel that can be seen on the upper left front part of the shoulder of the figure. I also carved a small amount out of the figures waist just to give a little definition to highlight the figures proportions. I also began to add some more smaller layers to the material to give it some realistic folds and shape, plus it will hopefully serve to add more interest in the painting phase where highlights and shading can be added.


Over the next few days I will be carrying out the following stages:

The back section of the figure was too bare.
The back of the figure seemed to be too wide.


I am a little happier now from shortening the sleeves of the figure and adding a panel onto the upper portion of the back that is really a continuation of the small part of the front panel that can be seen on the upper left front part of the shoulder of the figure. I also carved a small amount out of the figures waist just to give a little definition to highlight the figures proportions. I also began to add some more smaller layers to the material to give it some realistic folds and shape, plus it will hopefully serve to add more interest in the painting phase where highlights and shading can be added.
The next four images show the completed sculpt just after its final bake. The only additions from the last set of images are the hand and some infills and blending to ensure that the whole figures sections blend into one another. I am really happy with the figure at this stage and am looking forward to painting it.


Over the next few days I will be carrying out the following stages:
- Prime the figure to identify sculpt marks
- Fill and sand any imperfections with squadron green putty
- Re-prime the entire figure
- Re-work if necessary
- Apply base colour (humbrol enamel)
- Use Oils for highlights and shading
- Apply Matt varnish coat
- Mount to simplistic figure base
- Sit back and admire my work!
Priming and filling
Following a quick spray with the grey car primer, I was pleased to see that for once my finger prints had not been transferred to the figure. In addition there was no real need to get the squadron putty out to fill any minor defects. A very happy man, I was a the point of applying the first coat of colour. The problem that I had at this point was the choice of colour for the figure. The way that I saw it was that I was essentially limited to two main choices:
Brown
Grey/Black
This may not seem like a big problem, but after living with this figure from its inception, the choice of colour can be a very important one. I thought about the grey/black finish to begin with because I thought that this would give a very macabre feel to the figure and provide stark comparison against my other figures in my collection. After alot more thought which involved at least three cups of coffee, ten cigarettes and a lot of procrastination, I decided to take the common sense route and ask my wife!
The colour choice was made; Brown with heavy comparison of light and shade to provide as much depth as possible. I picked up a medium colour Humbrol enamel brown (I forget the number) and coated the entire figure as a base coat and allowed to dry for a few hours in my model oven (Yes I have a model oven that is a DIY project I will provide a how to guide on the blog soon). The following photo shows the figure in its current state:

For the high and low lights, I will be using oil paints as usual. The base colour for the oil will be burnt sienna and then I can build on the high and low lights with variations of burnt sienna mixed with white, black, yellow, etc to provide depth of colour. The oil painting went very well, with little or no errors to speak of. I started off with a light coat of burnt sienna over the complete figure and then used yellow ochre for the highlights with a mix of burnt sienna and lamp black for the creases to give depth and variation of colour. Finally I used white for the very tops of the folds to give the figure definition. I have to say that I am very happy with the results:


For the base I use something that I made quite a while ago. You will notice that for the final stages of my sculpt, I switched from my home made stand to a wooden figure base. This is actually a wooden light switch patress that can be bought from e-bay for a couple of pounds. Rather than spend a couple of pounds for each figure base, I decided to buy some liquid latex and take a mold of the base, which I then placed fibre glass over for strength. I have done this for a number of different shape and size patress's which now allow me to cast as many figure bases as I like in white plaster or poly-filler as its commonly known as in the UK. It works out to roughly 20 pence a base which leaves me with more free cash to buy other model stuff. (yes I am that tight!). Any way the process is pictured below:


With the base cast, it's now a case of finishing touches for the figure, I have virtually finished it to my satisfaction with just the hand and the Rosary beads left to add. Once these have been added it will be a case of placing the figure into my model oven to dry off and then applying a liberal coat or two of matt varnish to ensure that the colour stays fixed.

I have also decided that my weeping figure should have something to weep over, so I made a quick sculpt of a head stone similar to the one shown below left, with my headstone from sculpey shown on the right, although at this stage it is not assembled:


For the rest of the base I decided to keep it simple and uncluttered. It was first painted in burnt umber acrylic paint, then given a quick coat of PVA followed by Javis green scatter to simulate grass. The headstone (now painted in Humbrol light stone) was then assembled and fixed into place onto the base. I also filled in around the base of the headstone with some course modelling paste and pushed some natural fibre floor brush bristles into the still wet paste to simulate some long grass. This was then left to dry for an hour or so. After some time drying it was a case of getting out the oils and applying various washed to the stone and the grass until a more realistic effect was obtained. I also elected to make a small single rose from some lead foil wrapped around a small gauge copper wire stem. For instructions on how to make this I used Google to search for how to make sugar flowers on cake decorating websites which I found to be very informative! See pictures below:
With everything completed I added the figure to the base and started with the finishing touches which included the rosary beads which I ended up making individually out of sculpey as I could not find beads of a small enough diameter. These beads were then individually glued together and onto the figure before paining and adding the crucifix (also from sculpey). For the base, the only additions were to add some extra vegitation in the form of Spangum moss which I am fortunate to have an endless supply of on the mountain near my home. The whole figure and base was then sprayed in humbrol acrylic Matt varnish and allowed to dry. The finished photos are below. The figure does look a little shiny under the lights but I can assure you that it is a dull matt finish.


For the base I use something that I made quite a while ago. You will notice that for the final stages of my sculpt, I switched from my home made stand to a wooden figure base. This is actually a wooden light switch patress that can be bought from e-bay for a couple of pounds. Rather than spend a couple of pounds for each figure base, I decided to buy some liquid latex and take a mold of the base, which I then placed fibre glass over for strength. I have done this for a number of different shape and size patress's which now allow me to cast as many figure bases as I like in white plaster or poly-filler as its commonly known as in the UK. It works out to roughly 20 pence a base which leaves me with more free cash to buy other model stuff. (yes I am that tight!). Any way the process is pictured below:


With the base cast, it's now a case of finishing touches for the figure, I have virtually finished it to my satisfaction with just the hand and the Rosary beads left to add. Once these have been added it will be a case of placing the figure into my model oven to dry off and then applying a liberal coat or two of matt varnish to ensure that the colour stays fixed.

I have also decided that my weeping figure should have something to weep over, so I made a quick sculpt of a head stone similar to the one shown below left, with my headstone from sculpey shown on the right, although at this stage it is not assembled:


For the rest of the base I decided to keep it simple and uncluttered. It was first painted in burnt umber acrylic paint, then given a quick coat of PVA followed by Javis green scatter to simulate grass. The headstone (now painted in Humbrol light stone) was then assembled and fixed into place onto the base. I also filled in around the base of the headstone with some course modelling paste and pushed some natural fibre floor brush bristles into the still wet paste to simulate some long grass. This was then left to dry for an hour or so. After some time drying it was a case of getting out the oils and applying various washed to the stone and the grass until a more realistic effect was obtained. I also elected to make a small single rose from some lead foil wrapped around a small gauge copper wire stem. For instructions on how to make this I used Google to search for how to make sugar flowers on cake decorating websites which I found to be very informative! See pictures below:


With everything completed I added the figure to the base and started with the finishing touches which included the rosary beads which I ended up making individually out of sculpey as I could not find beads of a small enough diameter. These beads were then individually glued together and onto the figure before paining and adding the crucifix (also from sculpey). For the base, the only additions were to add some extra vegitation in the form of Spangum moss which I am fortunate to have an endless supply of on the mountain near my home. The whole figure and base was then sprayed in humbrol acrylic Matt varnish and allowed to dry. The finished photos are below. The figure does look a little shiny under the lights but I can assure you that it is a dull matt finish.


Just added some extra photos in a non shiny finish


No comments:
Post a Comment