
Introduction
This is kit bought for me by my wonderful daughter for fathers day. In all honesty I had not previously seen this kit and would have probably overlooked it due to the manufacturers name (model snobbery I know!!). Anyway after opening the box I was pleasantly surprised at the level of detail on the figures, chute and the other ancillary parts provided. I will probably do an out of the box build for this kit as I reckon that it will build up into an impressive little dio without any additional parts, figures, etc.The build
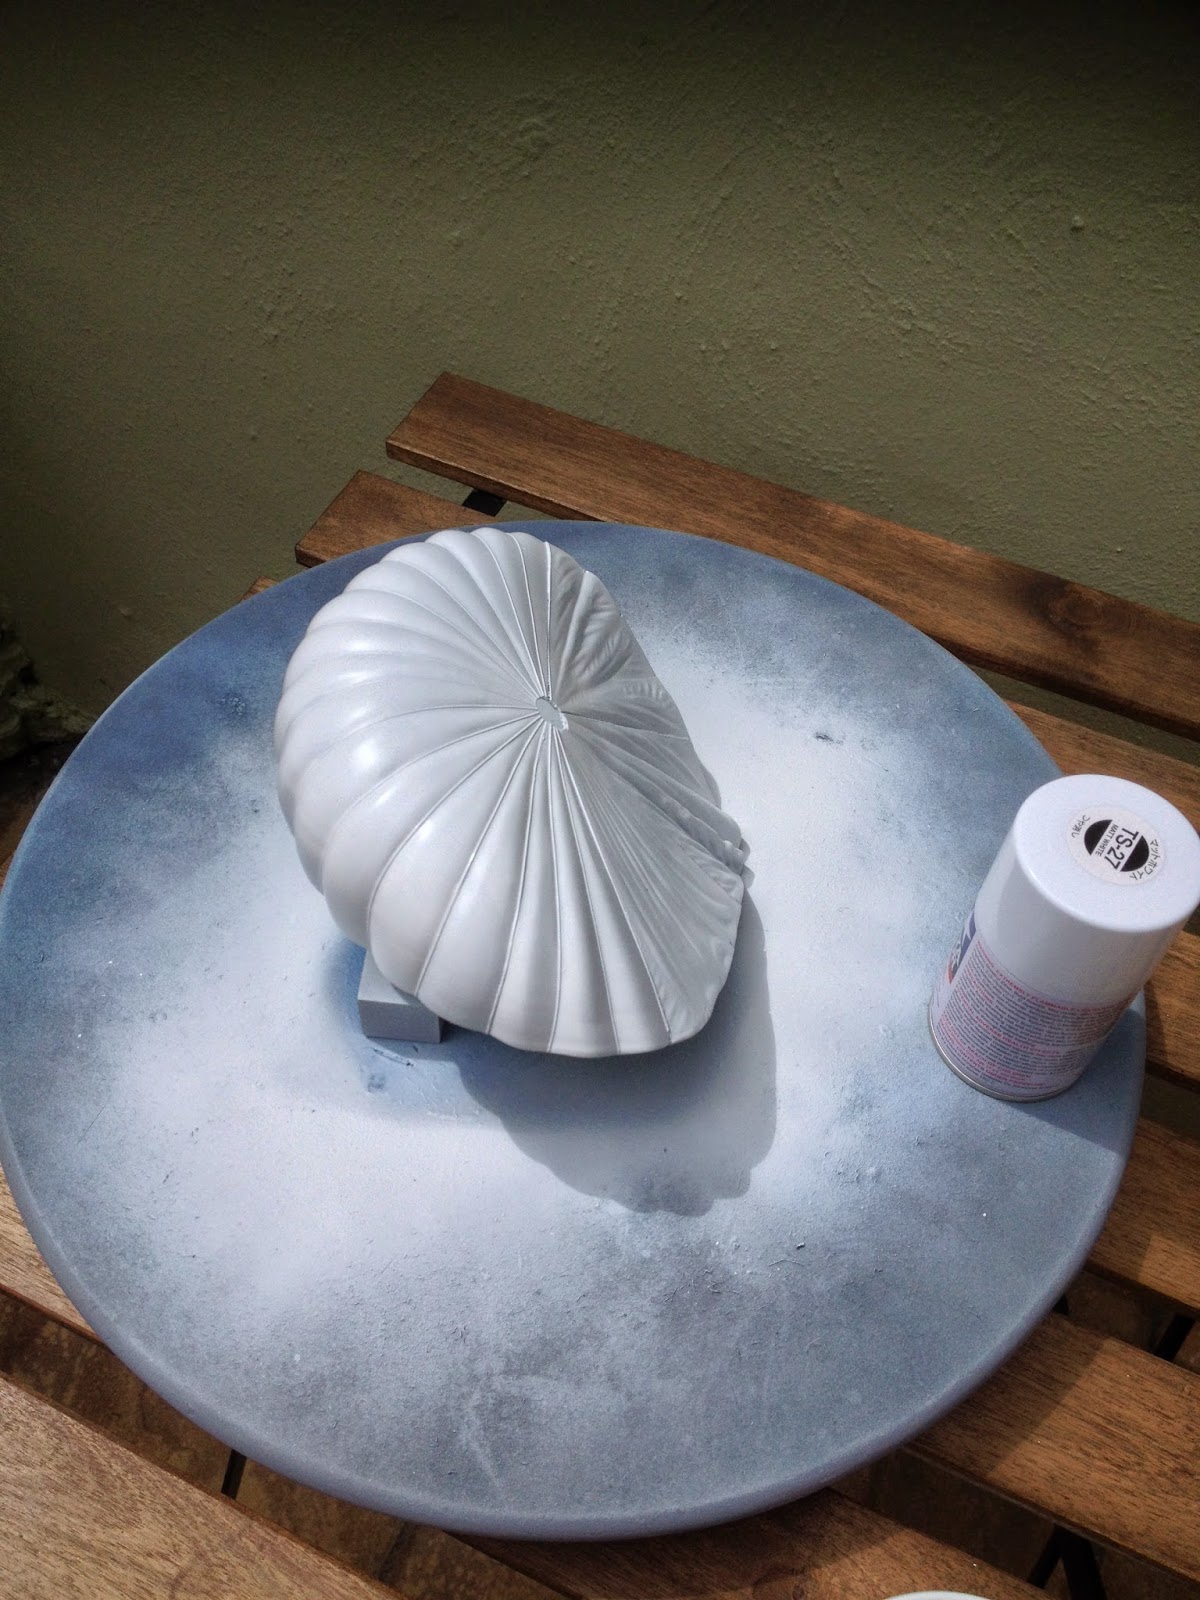
The first order of business was the construction of the parachute canopy which is provided in six parts. There was hardly any flash on the chute and thankfully no pin or mould marks in sight. There are some seams which needed filling but I'm hoping that this will be minimal.


for filling the seams on the canopy I decided to use squadron white putty and after an initial rubbing down I sprayed a light coat of grey primer onto it to reveal any seam marks that required any further "fettling"


I am really happy with the current finish of the canopy and the next stages for it will be a topcoat of tamiya flat white followed by a dust coat of matt varnish to seal it. The good thing about this canopy is that it would be new and therefore very clean so I will not be adding any weathering to it. I may or may not apply shading to enhance certain areas. I plan on waiting to see if the finished piece requires it.
As usual I have been plagued with the dreaded paint reactions yet again!!!! After a short period of bad language and resisting the urge to throw the canopy across my living room, I rubbed down the affected areas and re-sprayed them. Fortunately the paint reaction did not occur for the second time and there were only a few gaps apparent with the finished colour. To save a little time I decided to fill the seams with some thick superglue and once dry applied a little more of the topcoat to the canopy. Progress shots of the canopy along with the paint reaction are below:


The decision on whether I am going to do any more work to the canopy has still not been made at this point and I think that I will leave it until the base itself has been made and then I'll look at what I will do to it once its sitting on the groundwork.
The figures
The figures are of reasonable quality and the poses are quite good. The redeeming qualities of these figures are the parts fitment and facial expressions on the figures. I would compare them to Tamiya in terms of quality and pose. When one considers the price of this kit; they are excellent value for money and I am really happy with it so far. I am not going to alter the poses of any of the figure as I think that they will provide enough movement and realism to the overall diorama that I intend to make out of them. The following shots show the figures with the humbrol base coats. I intend to use oils to add shade and highlights once it has all dried


The Base
The base will be made from a piece of MDF with a little florists foam to add some contours and detail. One the glue has dried on the foam I will coat the entire base in some white filler plaster and then give it a few coats of grey primer:


I have also decided to add a small dry stone wall to the scene which I will build from individual stones that I have. I am hoping that the long drawn out process of building the wall will pay off in the end.


With most of the simple components of the base in place, I gave it an overall coat of light brown before adding stones, rocks, grasses, flowers etc to it. Once the coat of paint was dry, the rocks were added, then some Javis "scenics" desert sand followed by some static grass clumps and a few yellow flowers to break up the base. I had also intended to add a tree that I decided to build from a small heather twig and some dried herbs to see if it would turn out OK. In all honesty it was bloody awful as you will probably see from the photos below. You will be happy to know that it is now in the bin and my trial method for tree making has been filed under my "didn't work" category!
Before the ballast and scenic sand was added I worked out the placement of the figures and parachute to make sure that the rocks and grass clumps would not interfere with the figure placement once the base was finished. Progress shots as always are below:


Last bits of work
Finishing touches for this included some oils for the soldiers, setting them into the base, weathering the base with chalk pastels and finally fitting the rigging for the chute, which I would like to add was a complete nightmare that I am glad I will not be repeating any time soon! The last of the progress shots are below with finished shots after that.


Finished Scene
On the whole this was an enjoyable build that I know has faults. I will probably re-visit this one day to sort out the ground work (not happy with it) and I will probably replace the parachute cords as I feel these are too large for the scale. I would also point out that the photos are taken whilst the figures are still "oil wet" and therefore a little shiny. These will all have a coat of matt varnish once they have completely dried. Other than that I hope you like the scene and if you fancy building something different then this kit is the one for you.


No comments:
Post a Comment